Gemini Enterprise
Connect Gemini Enterprise to Contentsquare to query your experience data directly in Gemini.
Gemini doesn't use one-click sign-in. First, a Customer Admin of your organization must create an application in Connected apps. Then paste its Client ID and Client secret into Gemini.
Create the application in Contentsquare
Section titled Create the application in ContentsquareAn application belongs to your Contentsquare account, not to an individual. You must be a Customer Admin, and you need somewhere safe to store the Client secret, such as a password manager. To rotate, rename, or delete the application later, see Manage applications.
- In Contentsquare, click your profile, then go to Account settings → Connected apps → Applications and click Create application.
- Enter a Name that helps you identify the application, such as
Gemini Enterprise – Marketing team, select Gemini Enterprise in Connect to, and click Save. - Copy the Client ID and Client secret from Your credentials, and click the eye icon to show the secret. The secret is shown only once. Click I copied my credentials to close the window.
Add the Contentsquare MCP server
Section titled Add the Contentsquare MCP serverThe connection values you need in the next steps:
| Setting | Value |
|---|---|
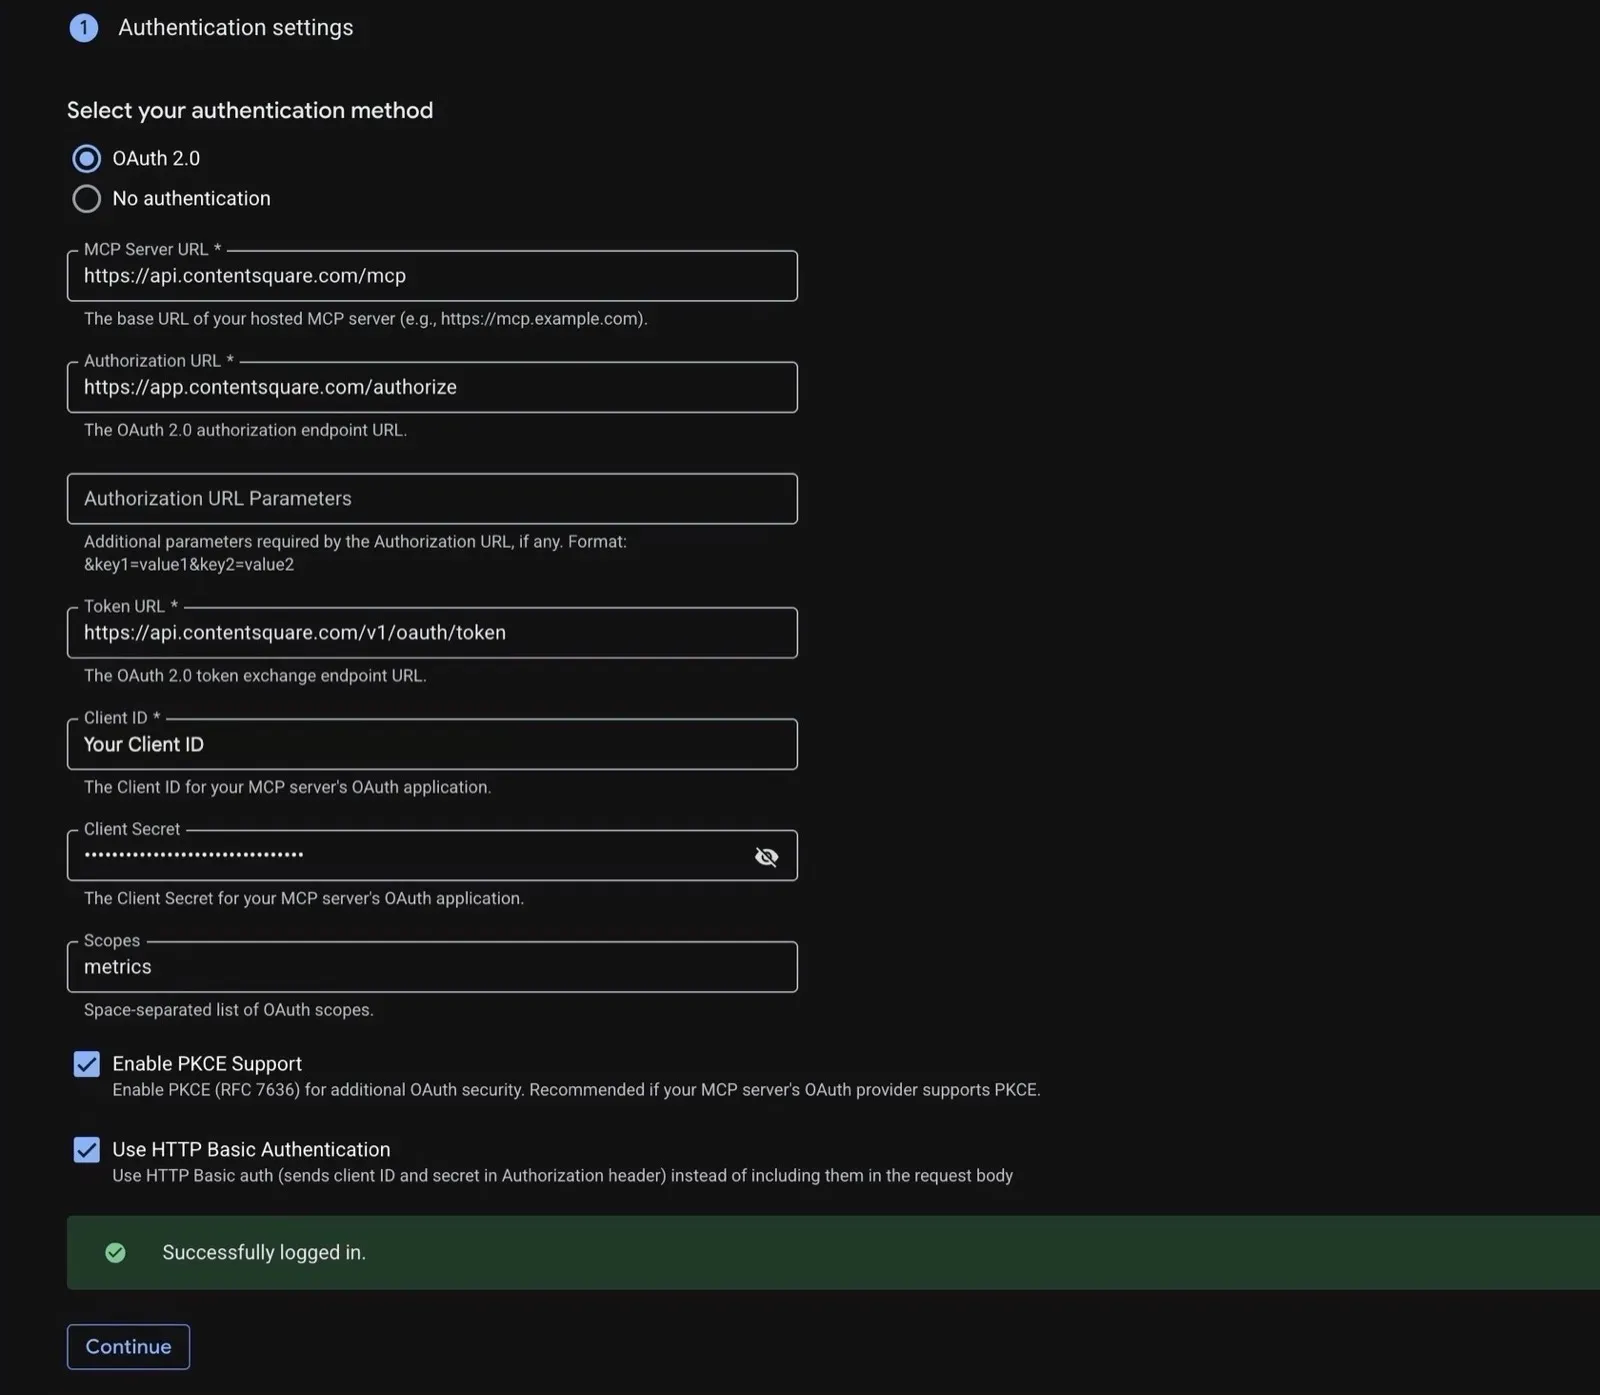
| MCP Server URL | https://api.contentsquare.com/mcp |
| Authorization URL | https://app.contentsquare.com/authorize |
| Token URL | https://api.contentsquare.com/v1/oauth/token |
| Scopes | metrics |
Once the tool is set up, each user connects it once. Whoever completes the first sign-in sets the access available to the connection. For a tool shared by a team, have a Customer Admin complete it. See Manage access.
Business Edition
Section titled Business EditionOnly Google Workspace or team administrators can add MCP servers in Gemini Enterprise.
-
Open your team settings and select Connected apps. You can also click Add MCP server on the New: custom MCP server connections banner of the home page.
-
Click Add MCP Server.
-
Paste the Server URL, enter
Contentsquareas the Name, and click Next.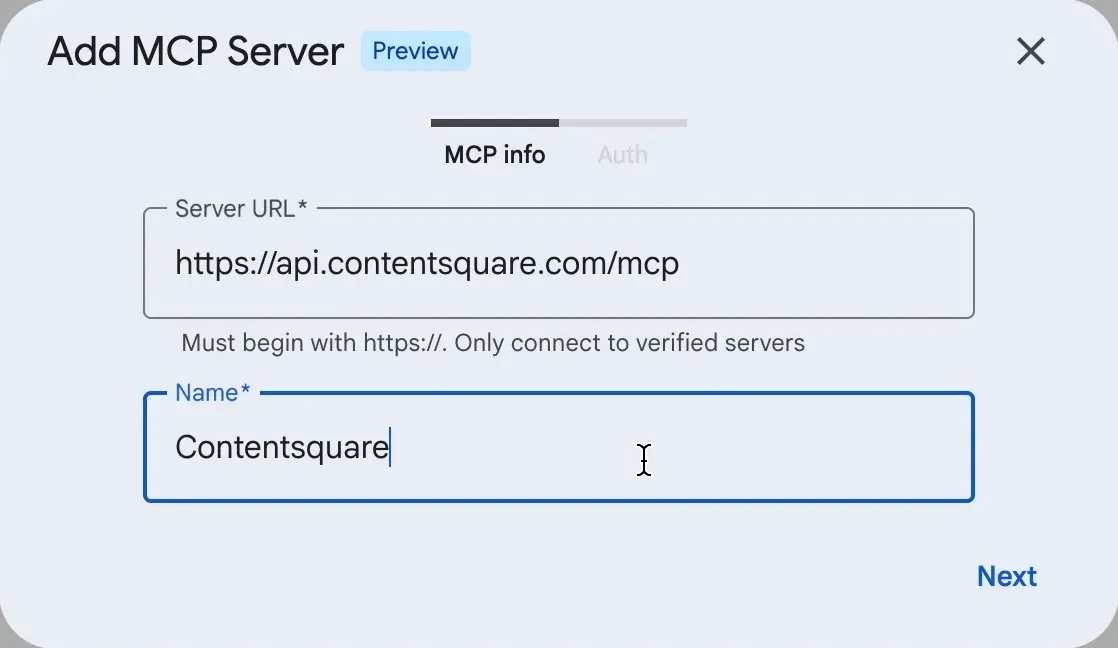
-
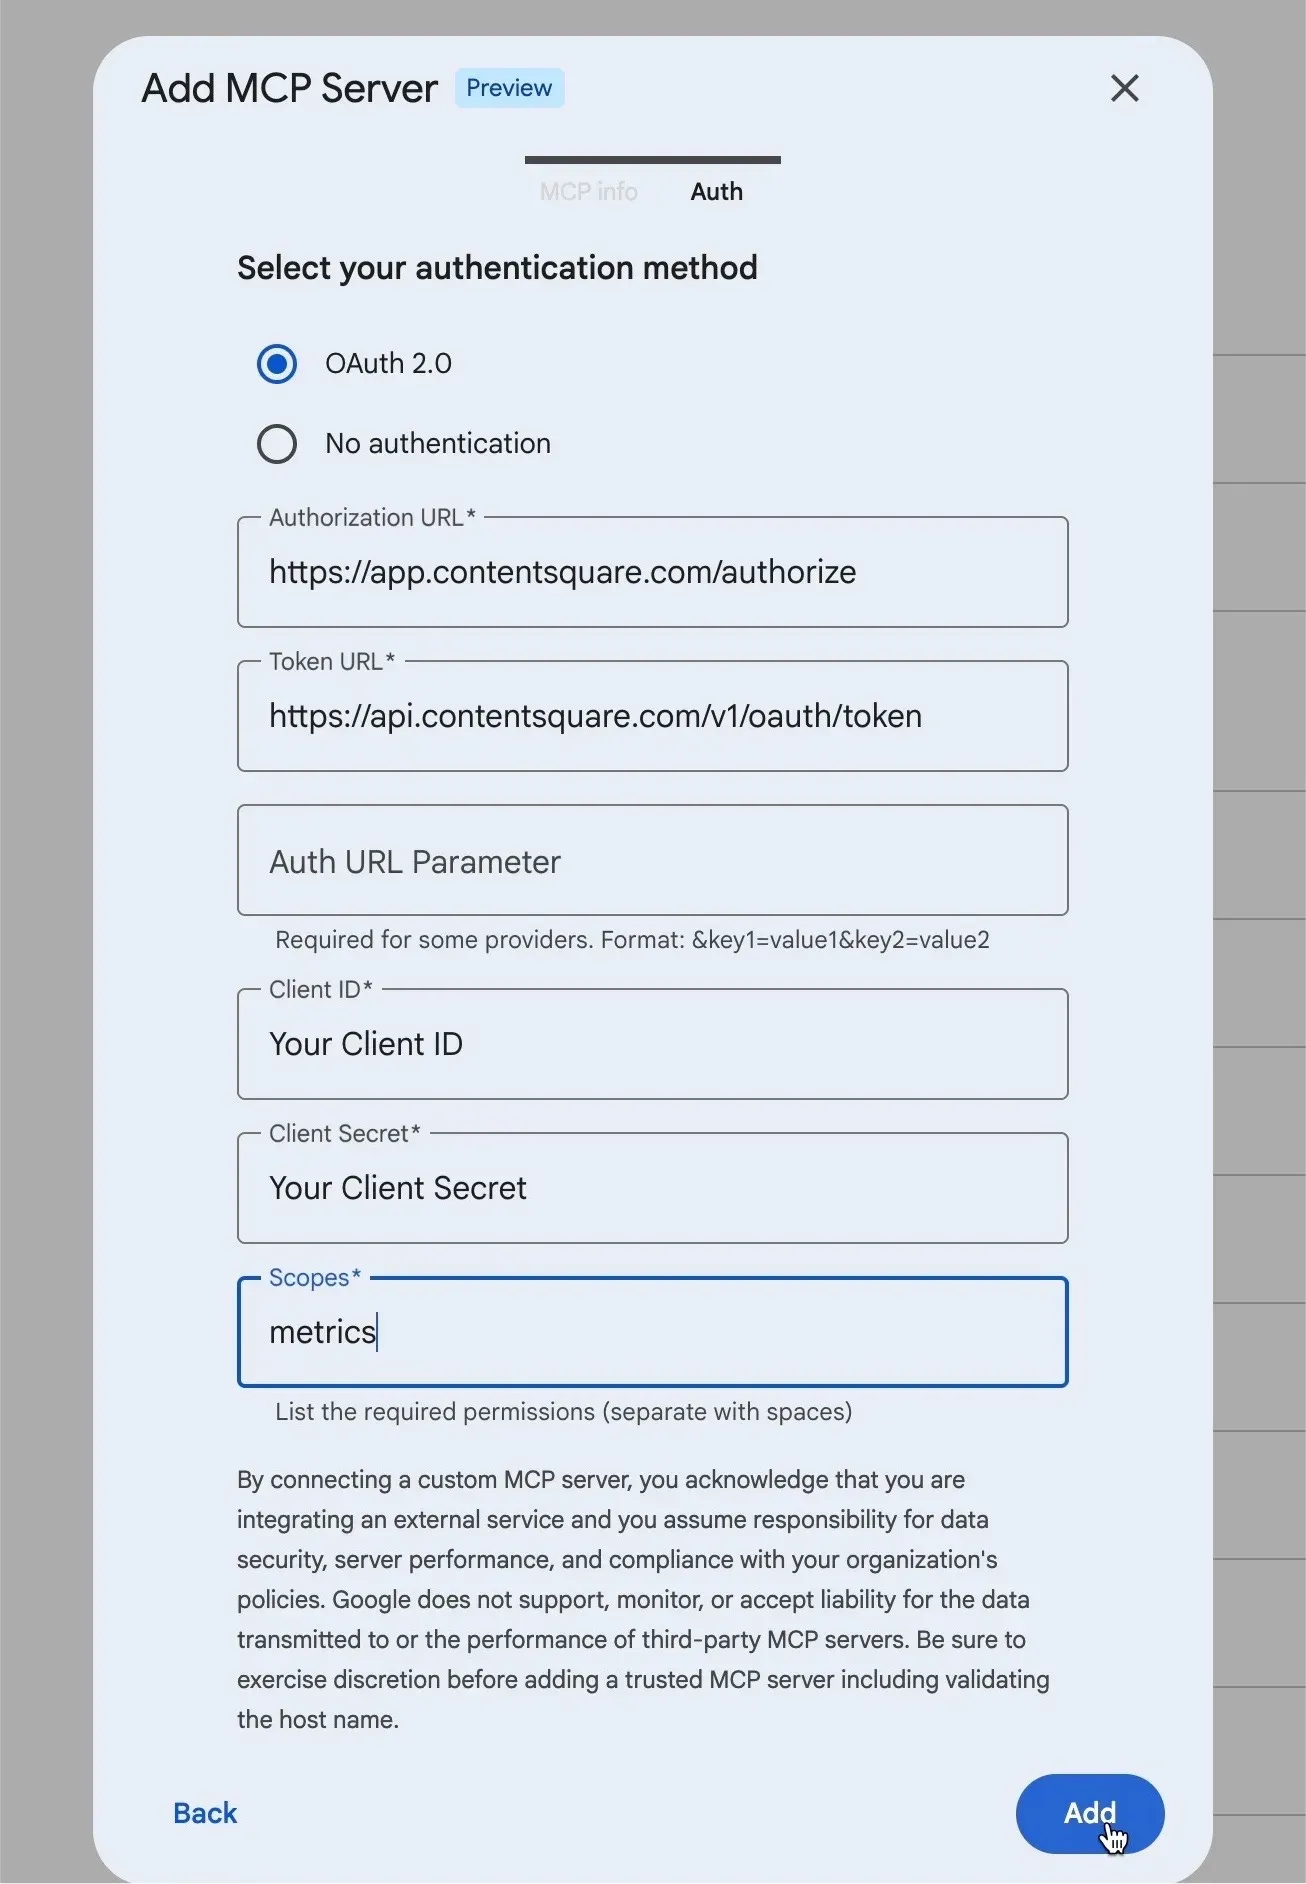
Select OAuth 2.0, paste the Authorization URL and Token URL, and paste the Client ID and Client Secret you copied from Contentsquare. Leave Auth URL Parameter empty.
-
Scroll down, enter the scope in Scopes, and click Add. Contentsquare now shows in the connectors list, enabled for your team.
Each user then connects their own account, once:
-
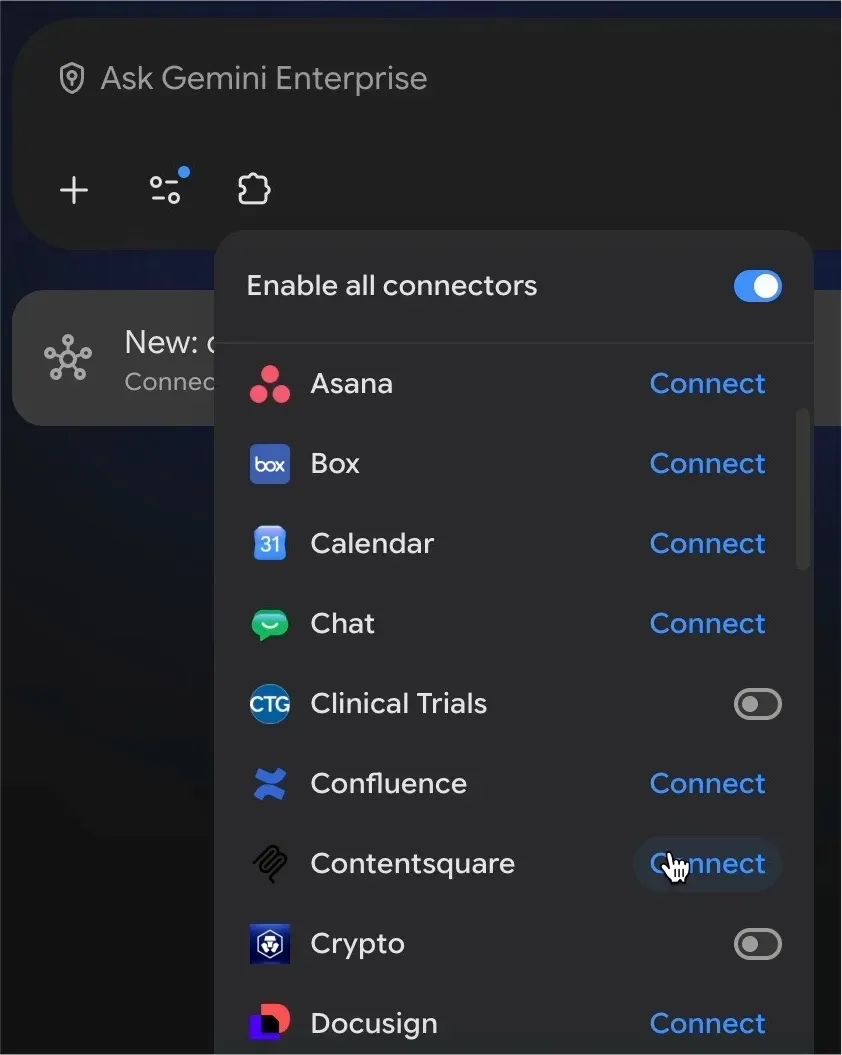
In a new chat, click the connectors icon in the prompt box, then click Connect next to Contentsquare.
-
Click Continue to Contentsquare.
-
In the popup, grant Gemini access to Contentsquare. Select the account you want to connect.
-
Choose to grant access to your entire account or select specific projects, then click Allow.
-
Type a prompt like
Which projects do you have access to?to check the connection.
Vertex Edition (GCP)
Section titled Vertex Edition (GCP)You need Google Cloud IAM permissions to create data stores and apps in Gemini Enterprise. Check with your IT or engineering team.
-
In the Google Cloud console, open Gemini Enterprise → Data stores and click Create data store.
-
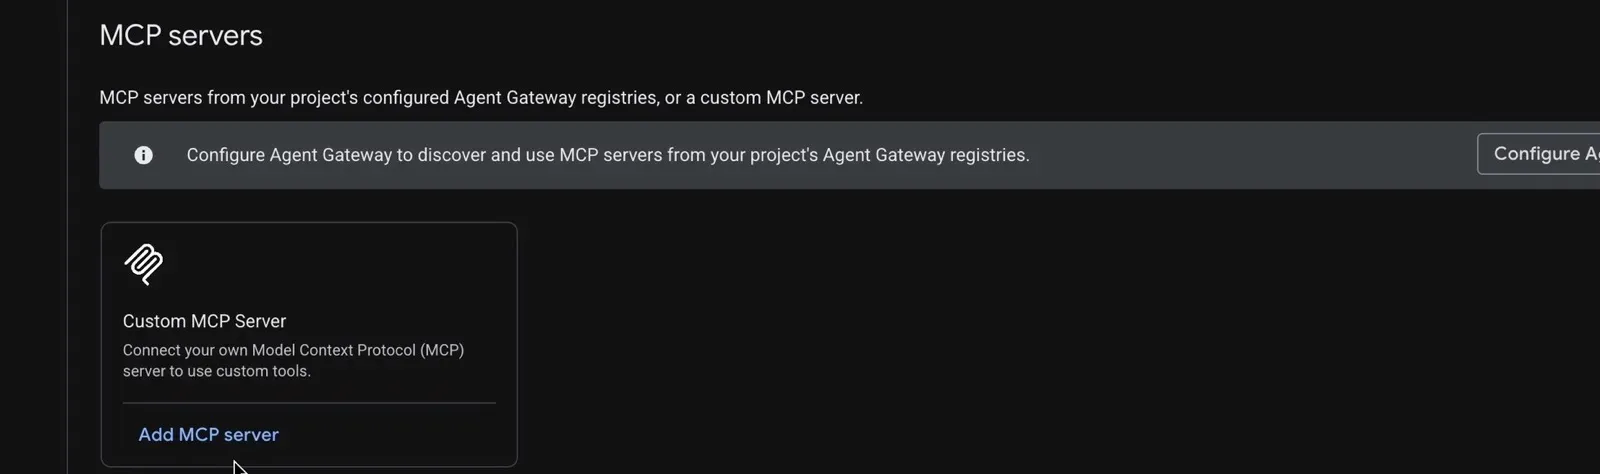
Under MCP servers, find Custom MCP Server and click Add MCP server.
-
Select OAuth 2.0 and paste the connection values. Paste the Client ID and Client Secret you copied from Contentsquare. Leave Authorization URL Parameters empty, tick Enable PKCE Support and leave the other options as they are.
-
Click Verify Auth. This step is required: Gemini signs in to Contentsquare once to check the settings, and you must complete it to continue. In the popup, sign in and click Allow. When Successfully logged in shows, click Continue.
-
In Advanced options, enter a description such as
Contentsquare MCP serverand click Continue. -
Enter a Data connector name and click Create. If your team uses more than one Contentsquare experience, use a name that says which experience it's for, for example
Contentsquare – Experience PlatformorContentsquare – Legacy. -
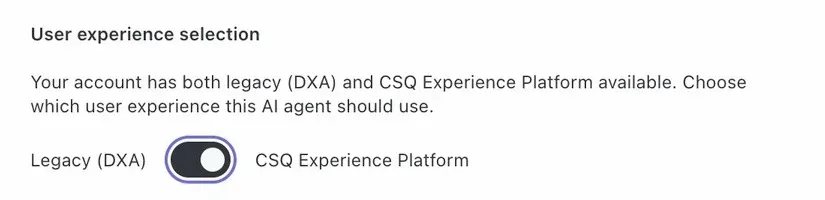
On the connector page, open the Actions tab and click Reload custom actions. In the popup, choose the experience this connector will use and click Allow. A connector works with one experience only. If your team uses both Legacy (DXA) and CSQ Experience Platform, repeat this procedure to create a second connector for the other one.
-
Select all actions and click Enable actions.
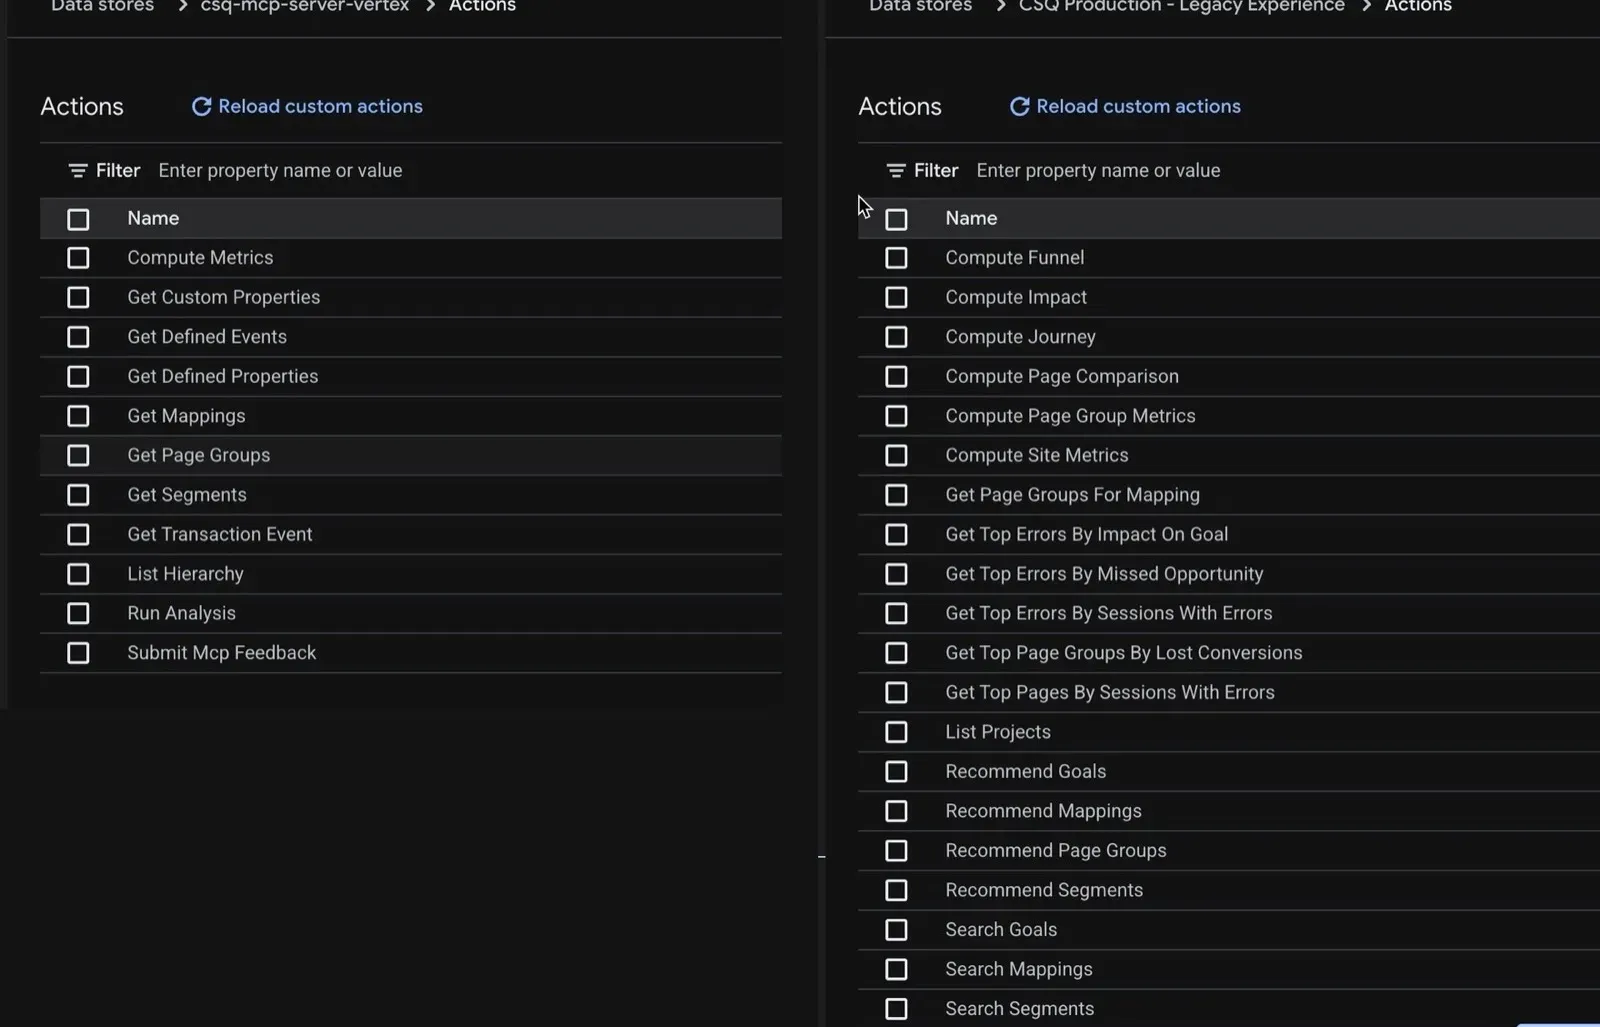
The actions depend on the experience you chose when you reloaded the custom actions. Users who authorize this connector with the other experience can't use it.
-
Go to Apps and open your Gemini Enterprise app. If you don't have one yet, click Create app, enter an App name, keep the global location, and click Create.
-
In the app, go to Connected data stores → Add existing data stores. Select the connector and click Connect. If you created one connector per experience, select both: one app can use both, and each user authorizes the one for their experience.
Each user then authorizes the connector, once:
-
Open your Gemini Enterprise web app. You can copy its URL from the app's Overview page in the console.
-
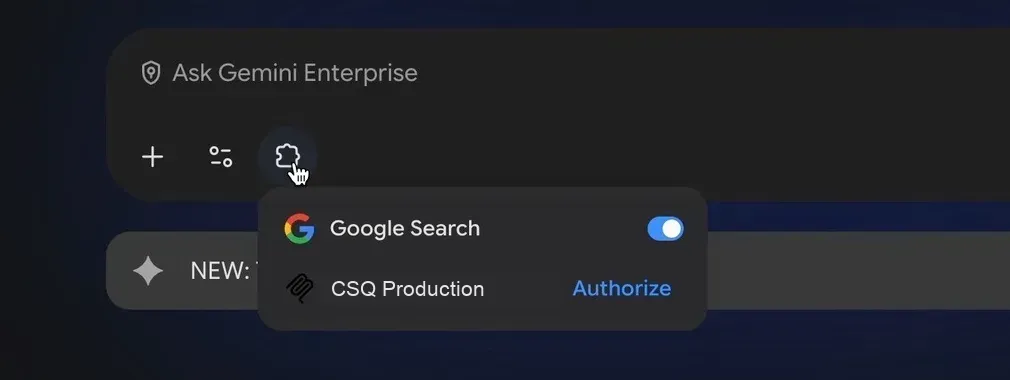
In the prompt box, click the connectors icon, then click Authorize next to the Contentsquare connector. If there are two, authorize the one for your experience. Each is authorized separately.
-
In the popup, grant Gemini access to Contentsquare: select the account, then choose your entire account or specific projects. If you're asked to choose an experience, pick the one this connector was set up for.
-
Click Allow.
-
Type a prompt like
Which projects do you have access to?to check the connection.