

Getting Started
Welcome to the SDK implementation guide!
This guide is designed to help you seamlessly integrate our SDK into your application. By following the outlined steps, you'll be able to collect and analyze data from your app, within just a few minutes.
Install the SDK
Section titled Install the SDKWith Flutter CLI:
flutter pub add contentsquareThis will add a line like this to your package's pubspec.yaml (and run an implicit flutter pub get):
dependencies: contentsquare: ^4.1.2See Compatibility for more information.
Start the SDK
Section titled Start the SDK-
Import the SDK
import 'package:contentsquare/contentsquare.dart'; -
Add a call to start the SDK as early as possible, ideally in the
main()function of your app.main.dart import 'package:contentsquare/contentsquare.dart';import 'package:flutter/material.dart';void main() async {await Contentsquare().start();runApp(const MyApp());}Alternatively you can start the SDK after user consent, for example on a button press:
class UserConsentScreen extends StatelessWidget {@overrideWidget build(BuildContext context) {return Scaffold(appBar: AppBar(title: Text('User Consent'),),body: Center(child: ElevatedButton(onPressed: () async {await Contentsquare().start();},child: Text('Agree with Terms and Conditions'),),),);}} -
After calling
start()you need to calloptIn()to start tracking.class UserConsentScreen extends StatelessWidget {@overrideWidget build(BuildContext context) {return Scaffold(appBar: AppBar(title: Text('User Consent'),),body: Center(child: ElevatedButton(onPressed: () async {await Contentsquare().start();await Contentsquare().optIn();},child: Text('Agree with Terms and Conditions'),),),);}}
Validate SDK integration
Section titled Validate SDK integrationStart your application, and check logs for this output:
┌───────────────────────────────────────────────────────────────────────────────│ 🔔 IMPORTANT 🔔 (CSLIB 4.1.2)├───────────────────────────────────────────────────────────────────────────────│ Contentsquare Flutter SDK 4.1.2 starting in app:│ com.example.testapp└───────────────────────────────────────────────────────────────────────────────Check the logs
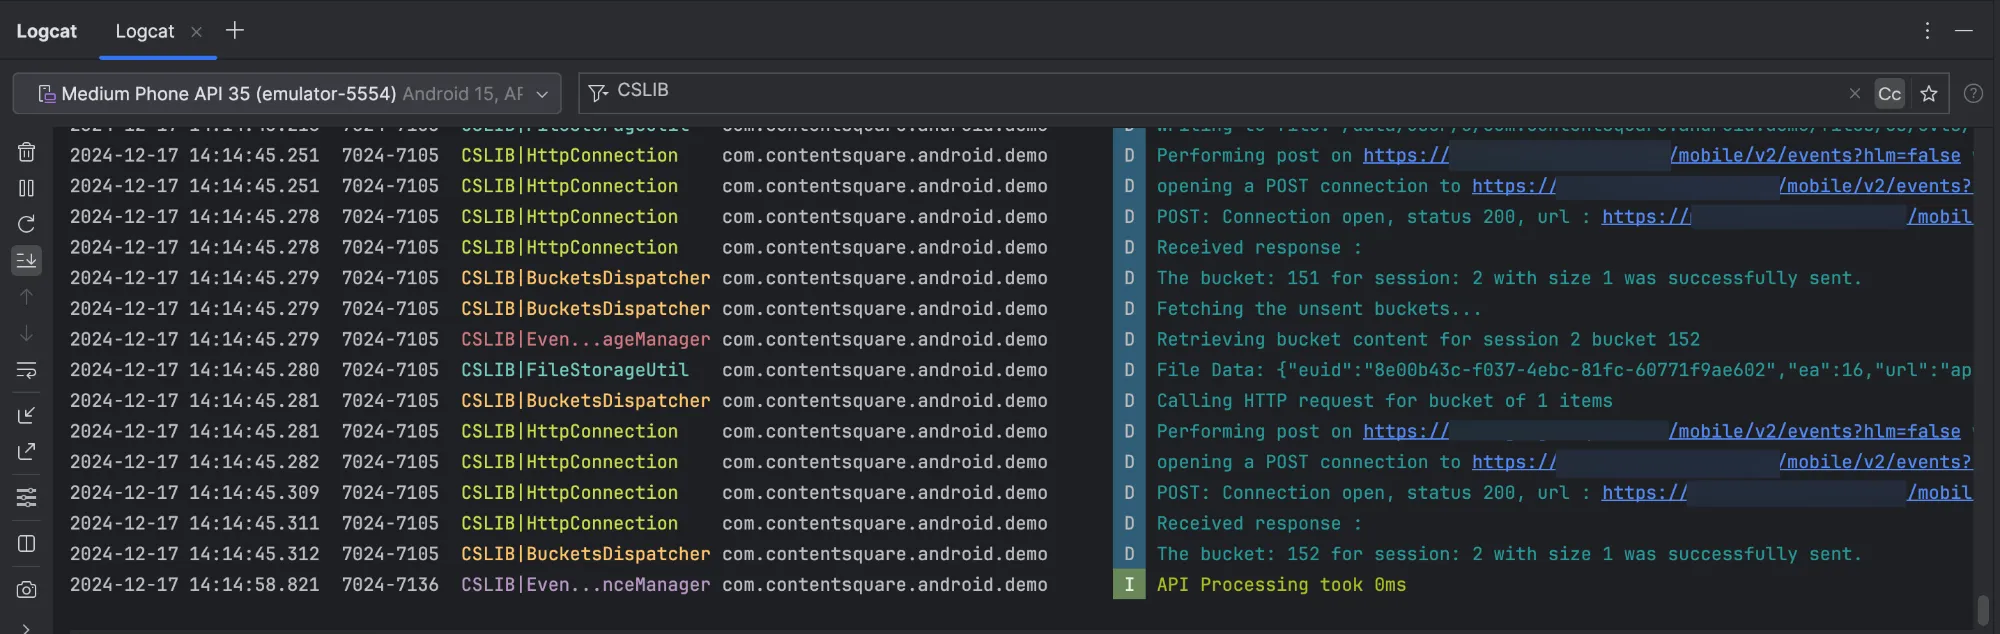
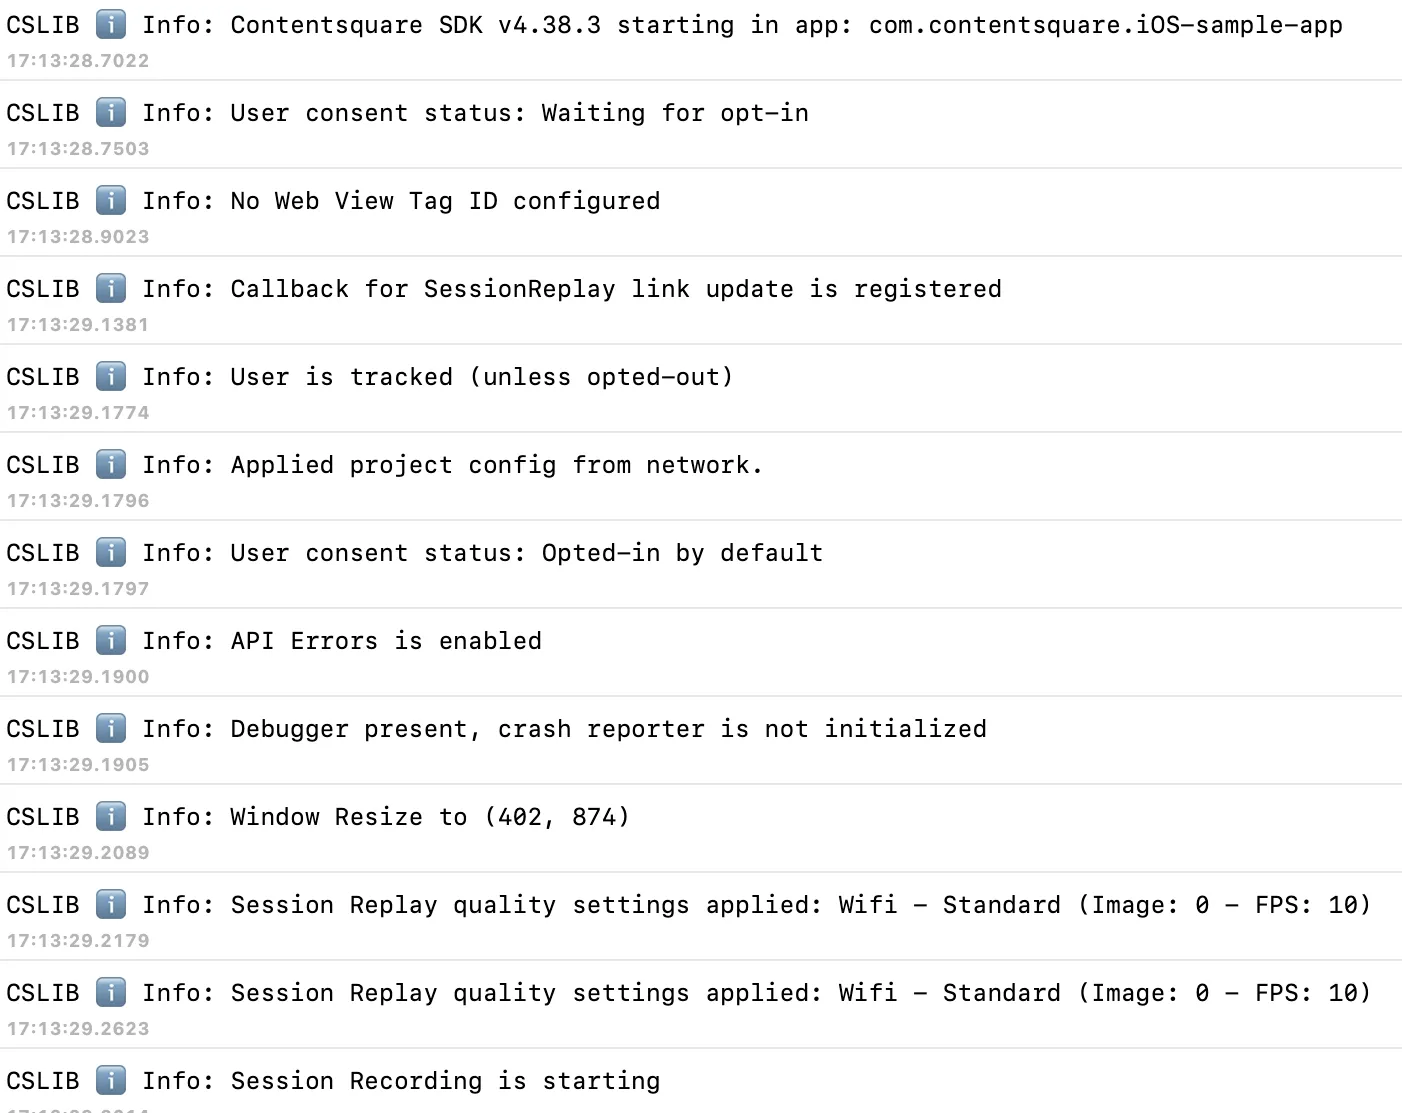
Section titled Check the logsContentsquare provides logging capabilities that allow you to inspect the raw event data logged by your app in Android Studio, Xcode, or on the Contentsquare platform.
To view all logs, you must enable in-app features: logging is linked to in-app features being enabled or disabled.
Viewing local logs in IDE
Section titled Viewing local logs in IDETo view SDK logs:
- Plug your Android phone into your computer (or use an emulator)
- Open Android Studio and start your app
- Open the
Logcatview and select your phone or emulator - Filter logs by
CSLIB
- Unless you are using a simulator, ensure the device you are using is connected to your Mac or is on the same Wi-Fi network.
- Open the macOS Console app or Xcode.
For the macOS Console app, make sure info messages are included at Choose Action > Include Info Messages ↗.
- Filter logs by
CSLIB.
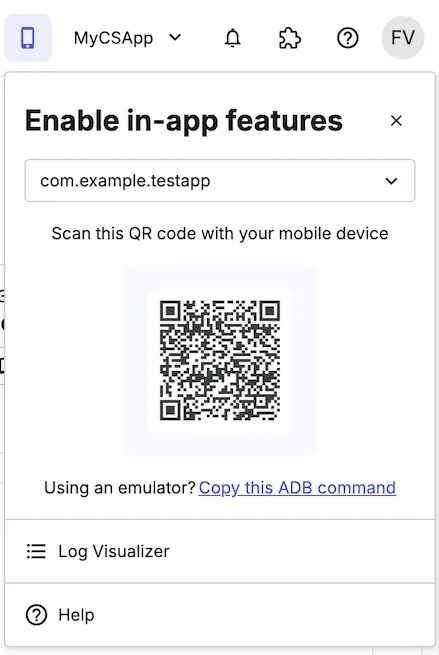
Enable In-app features
Section titled Enable In-app featuresIn-app features are essential for your implementation, as it includes key functionalities like screenshot creation and replay configuration.
To enable in-app features within your app, you have to first make sure your app is launched in the background. Then, follow the appropriate method described as follows.
On a device: scan the QR code
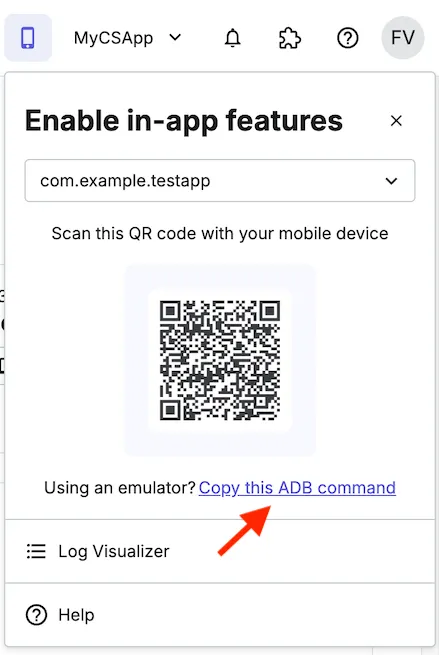
Section titled On a device: scan the QR codeIn Contentsquare, select the Mobile icon in the menu top bar and scan the QR code with your phone.
In Contentsquare, select the Mobile icon in the menu top bar and scan the QR code with your phone.
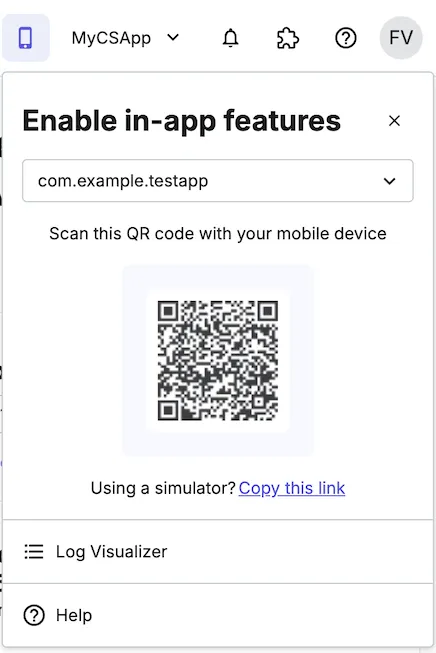
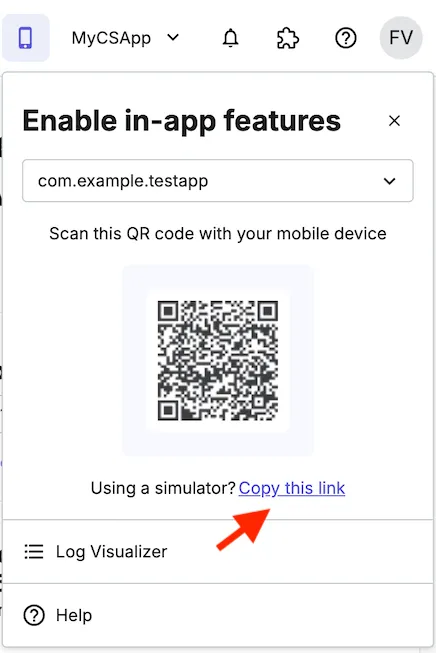
On an emulator/simulator
Section titled On an emulator/simulatorIn Contentsquare, select the Mobile icon in the menu top bar then select your application ID, and "Copy this ADB command".
In Contentsquare, select the Mobile icon in the menu top bar then select your Bundle ID, and select "Copy this link". Paste it in Safari on your simulator to trigger the in-app features.
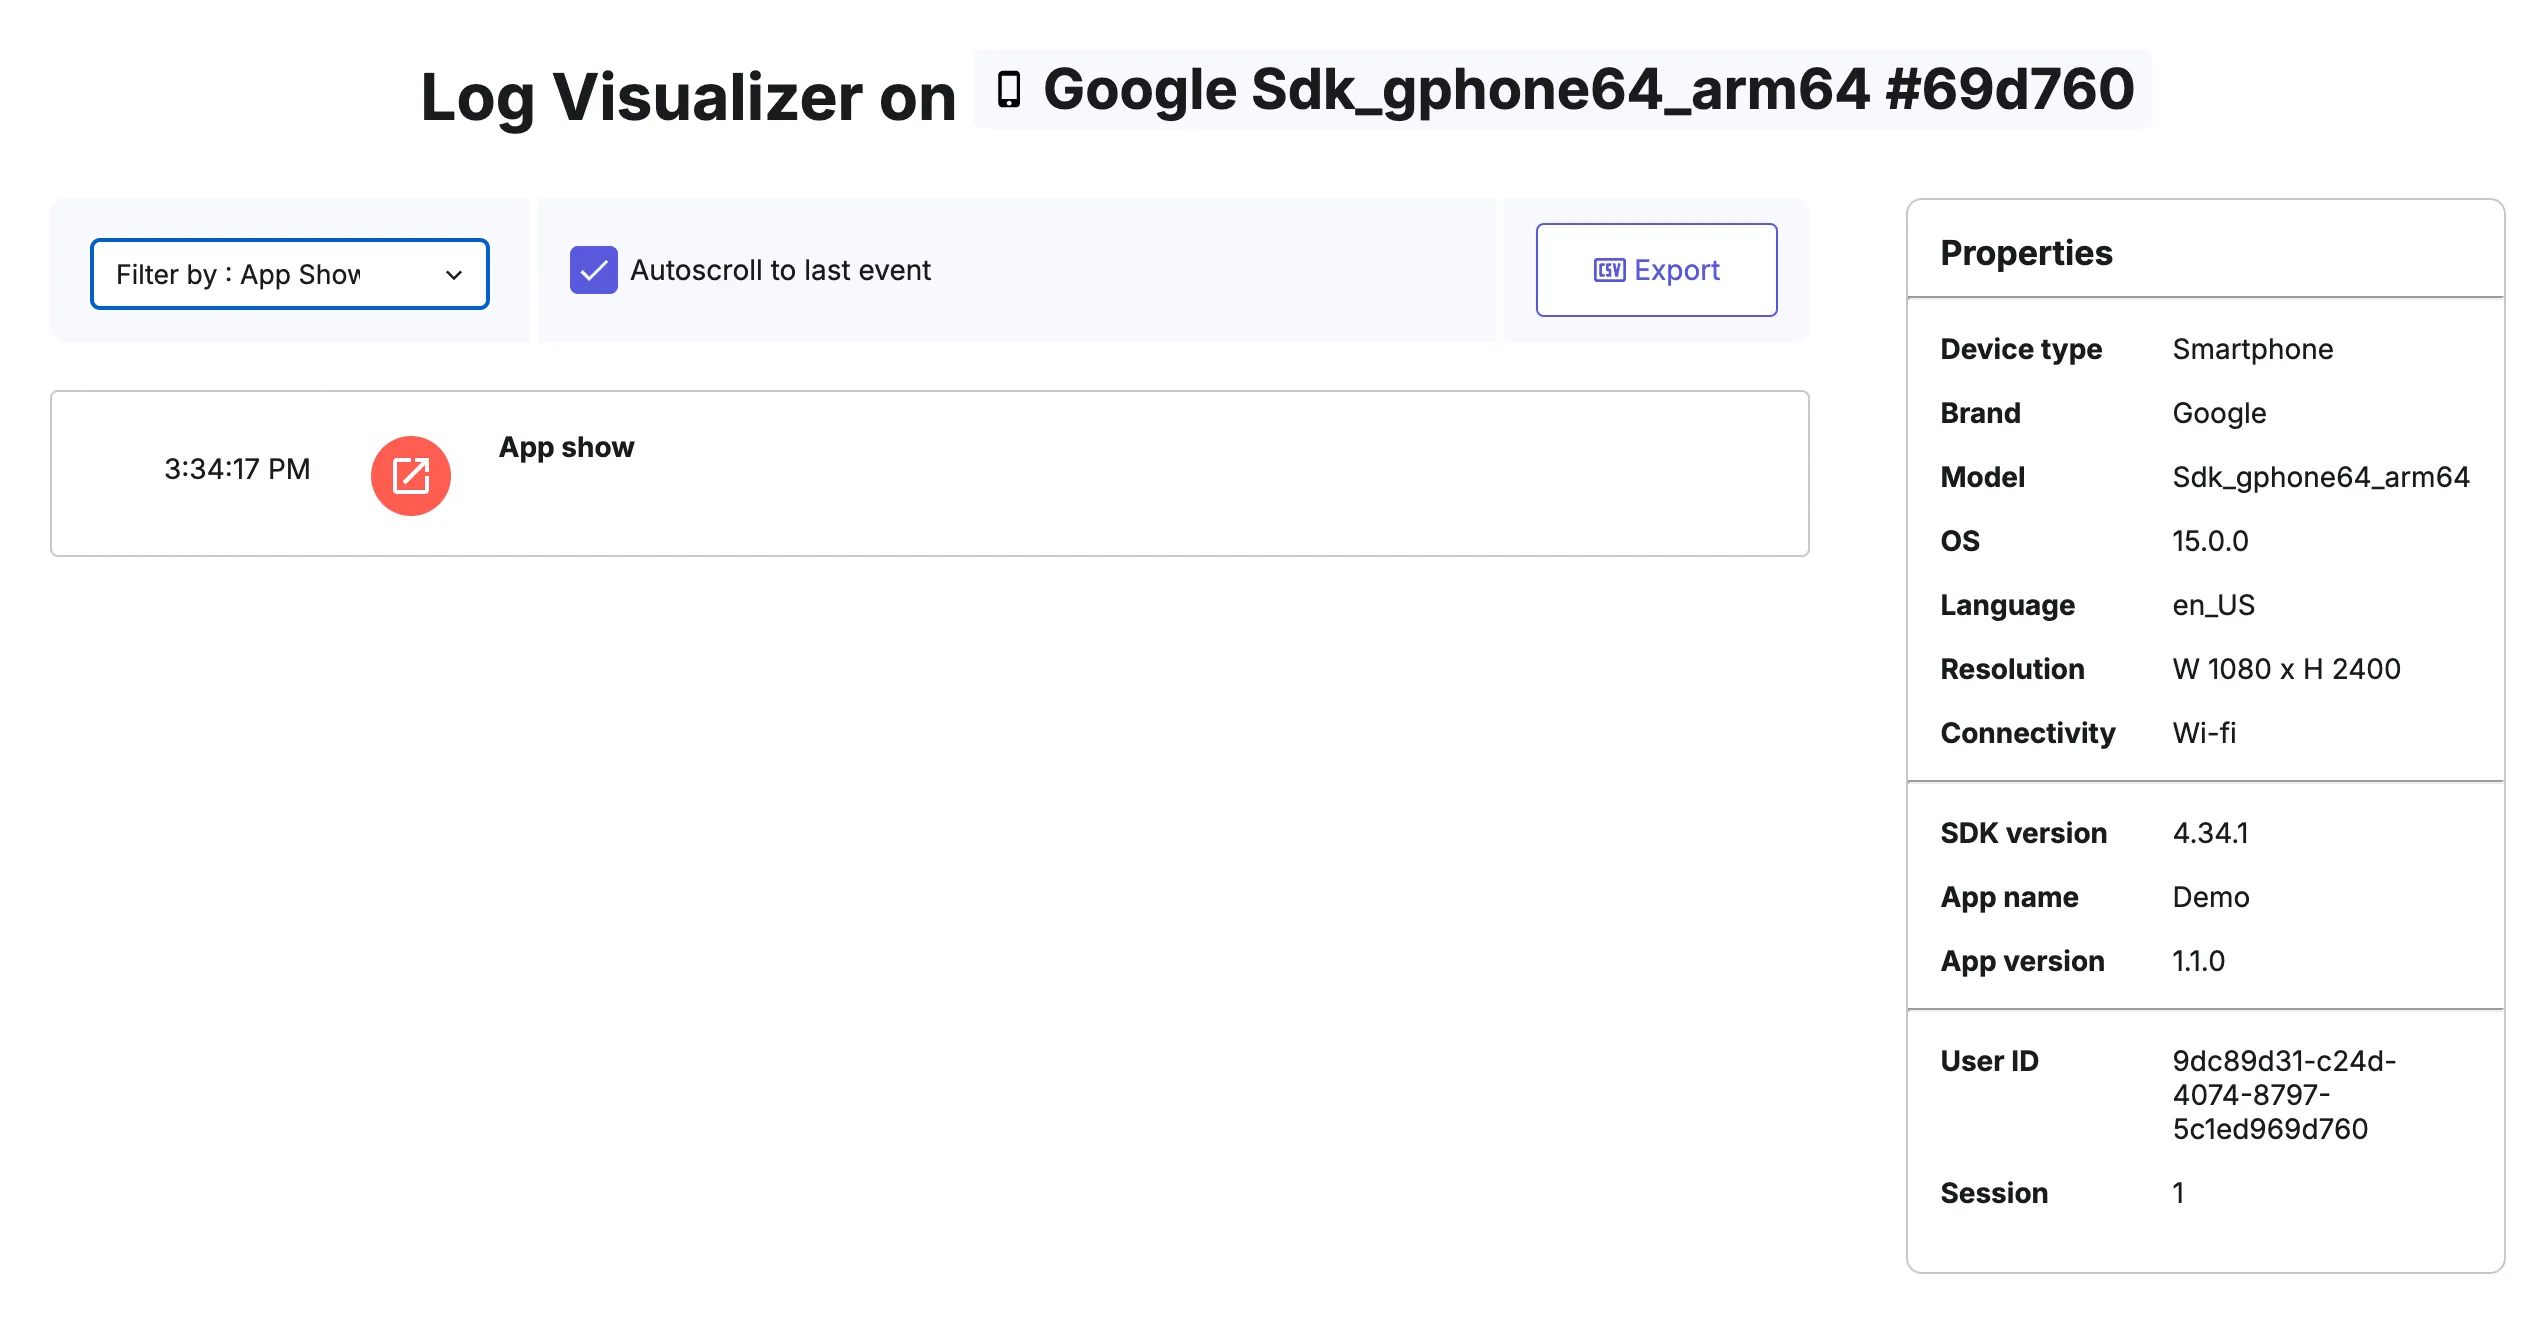
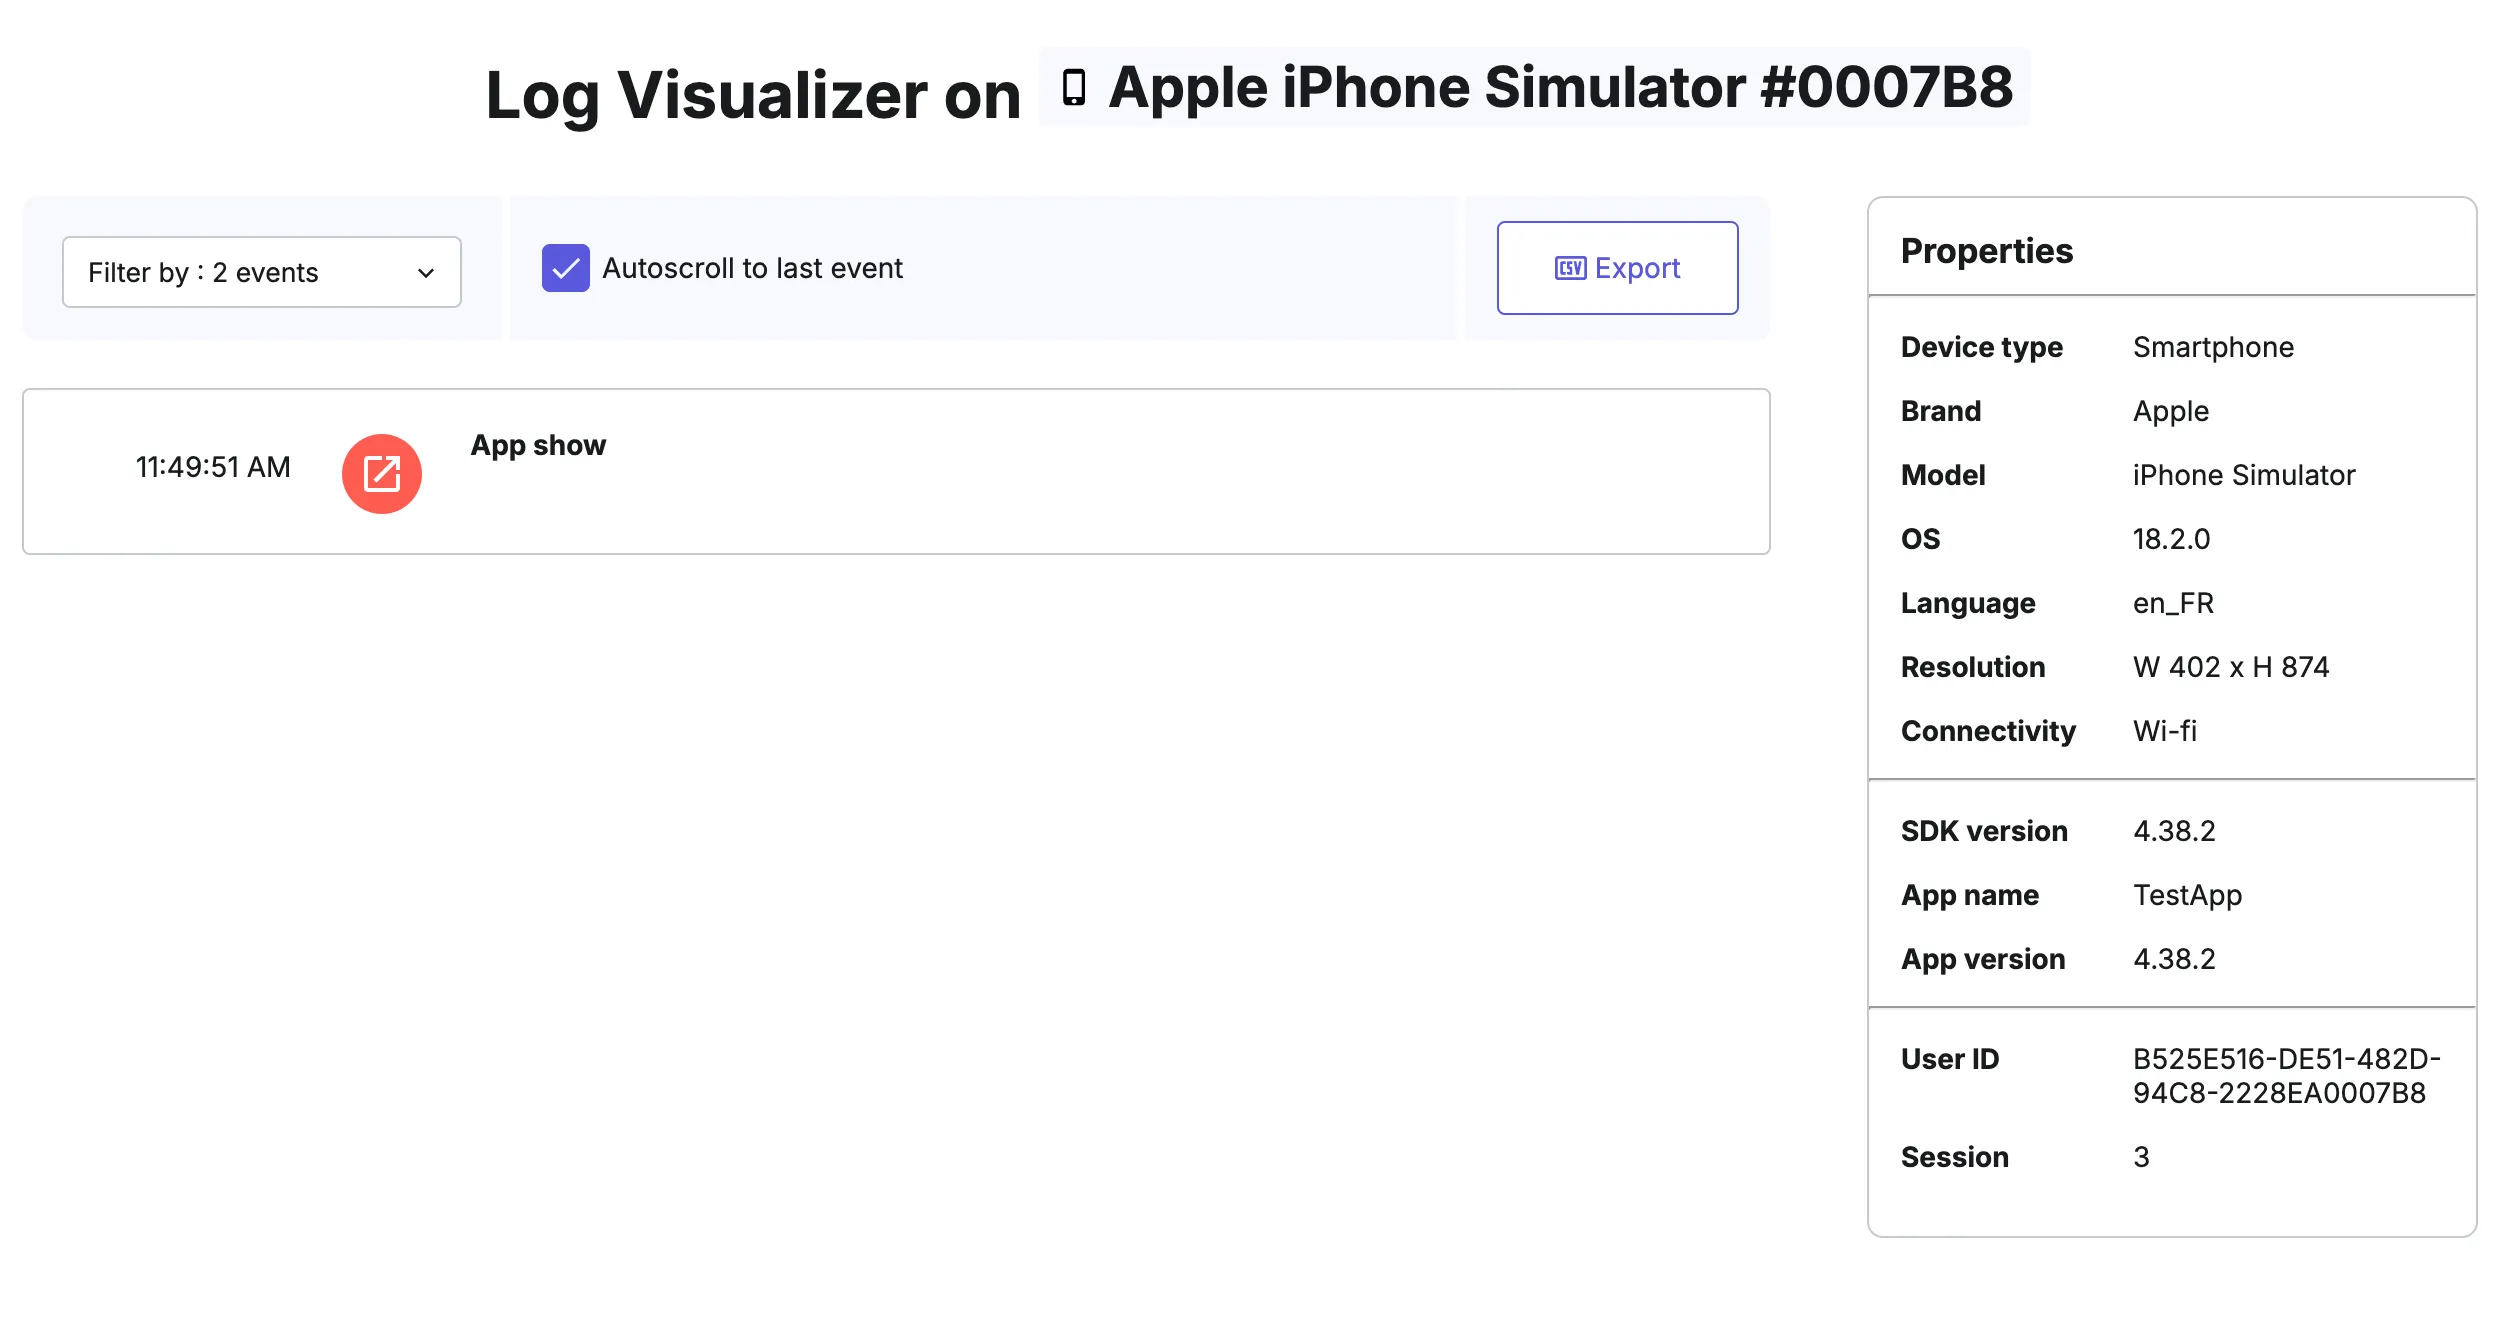
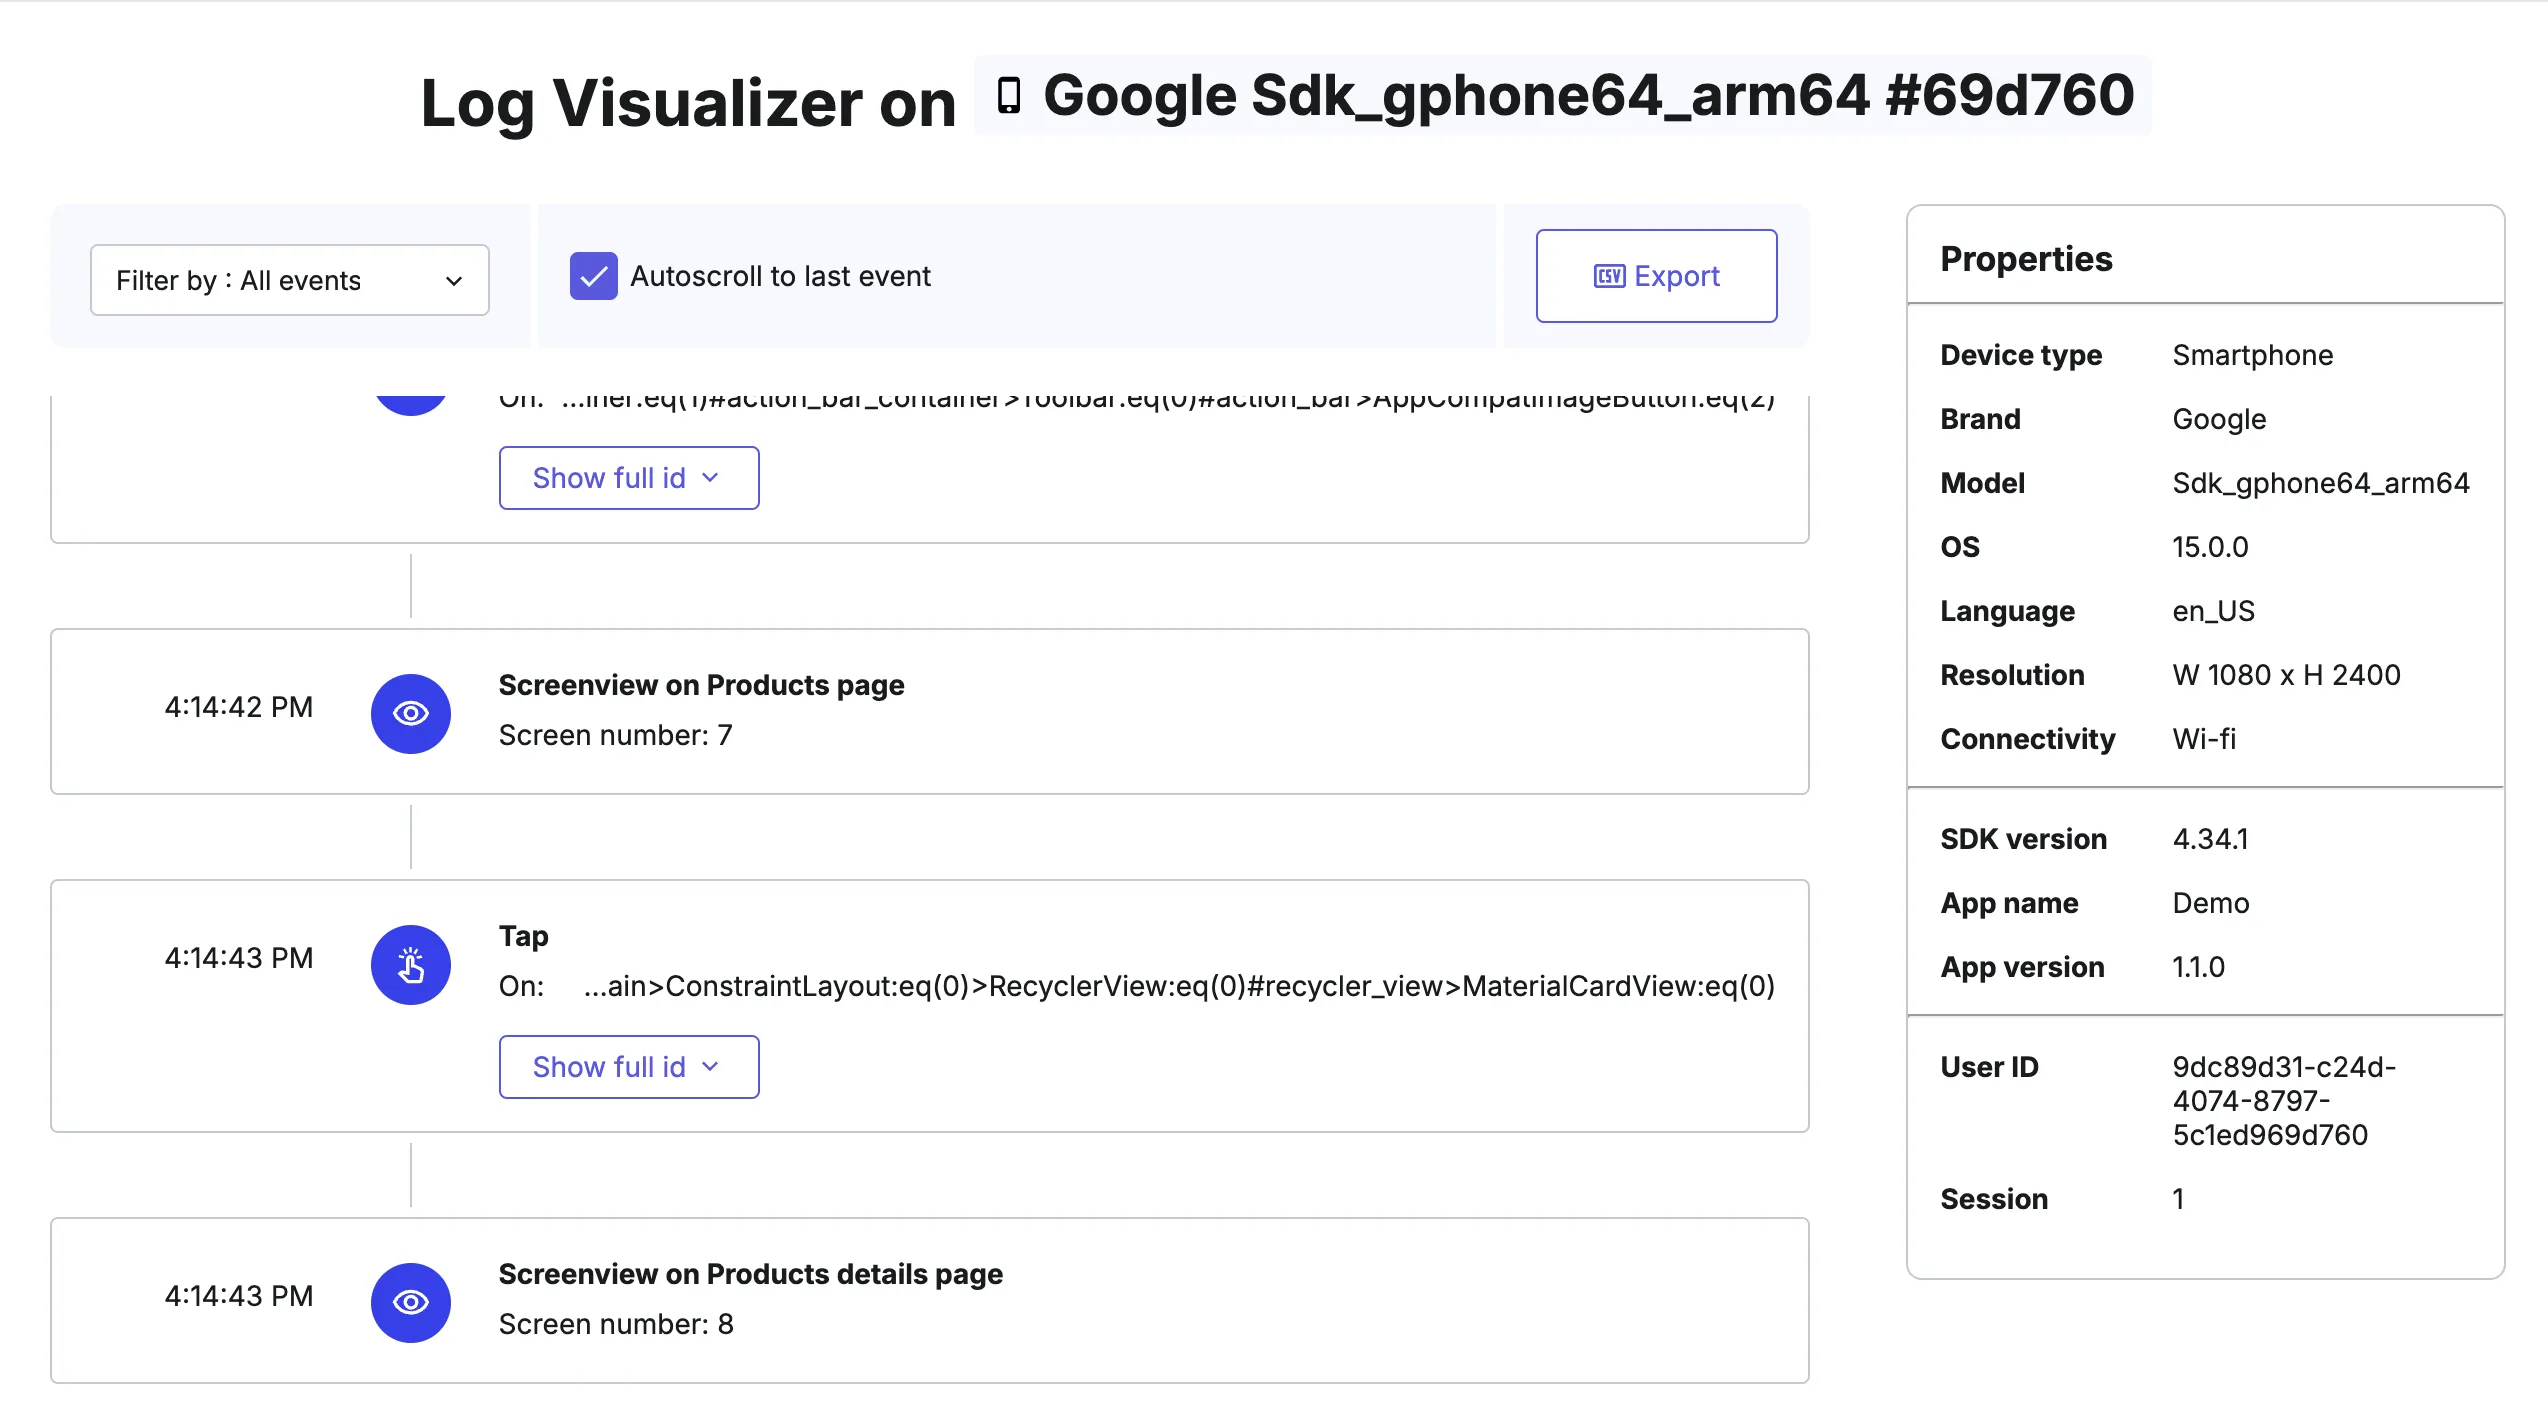
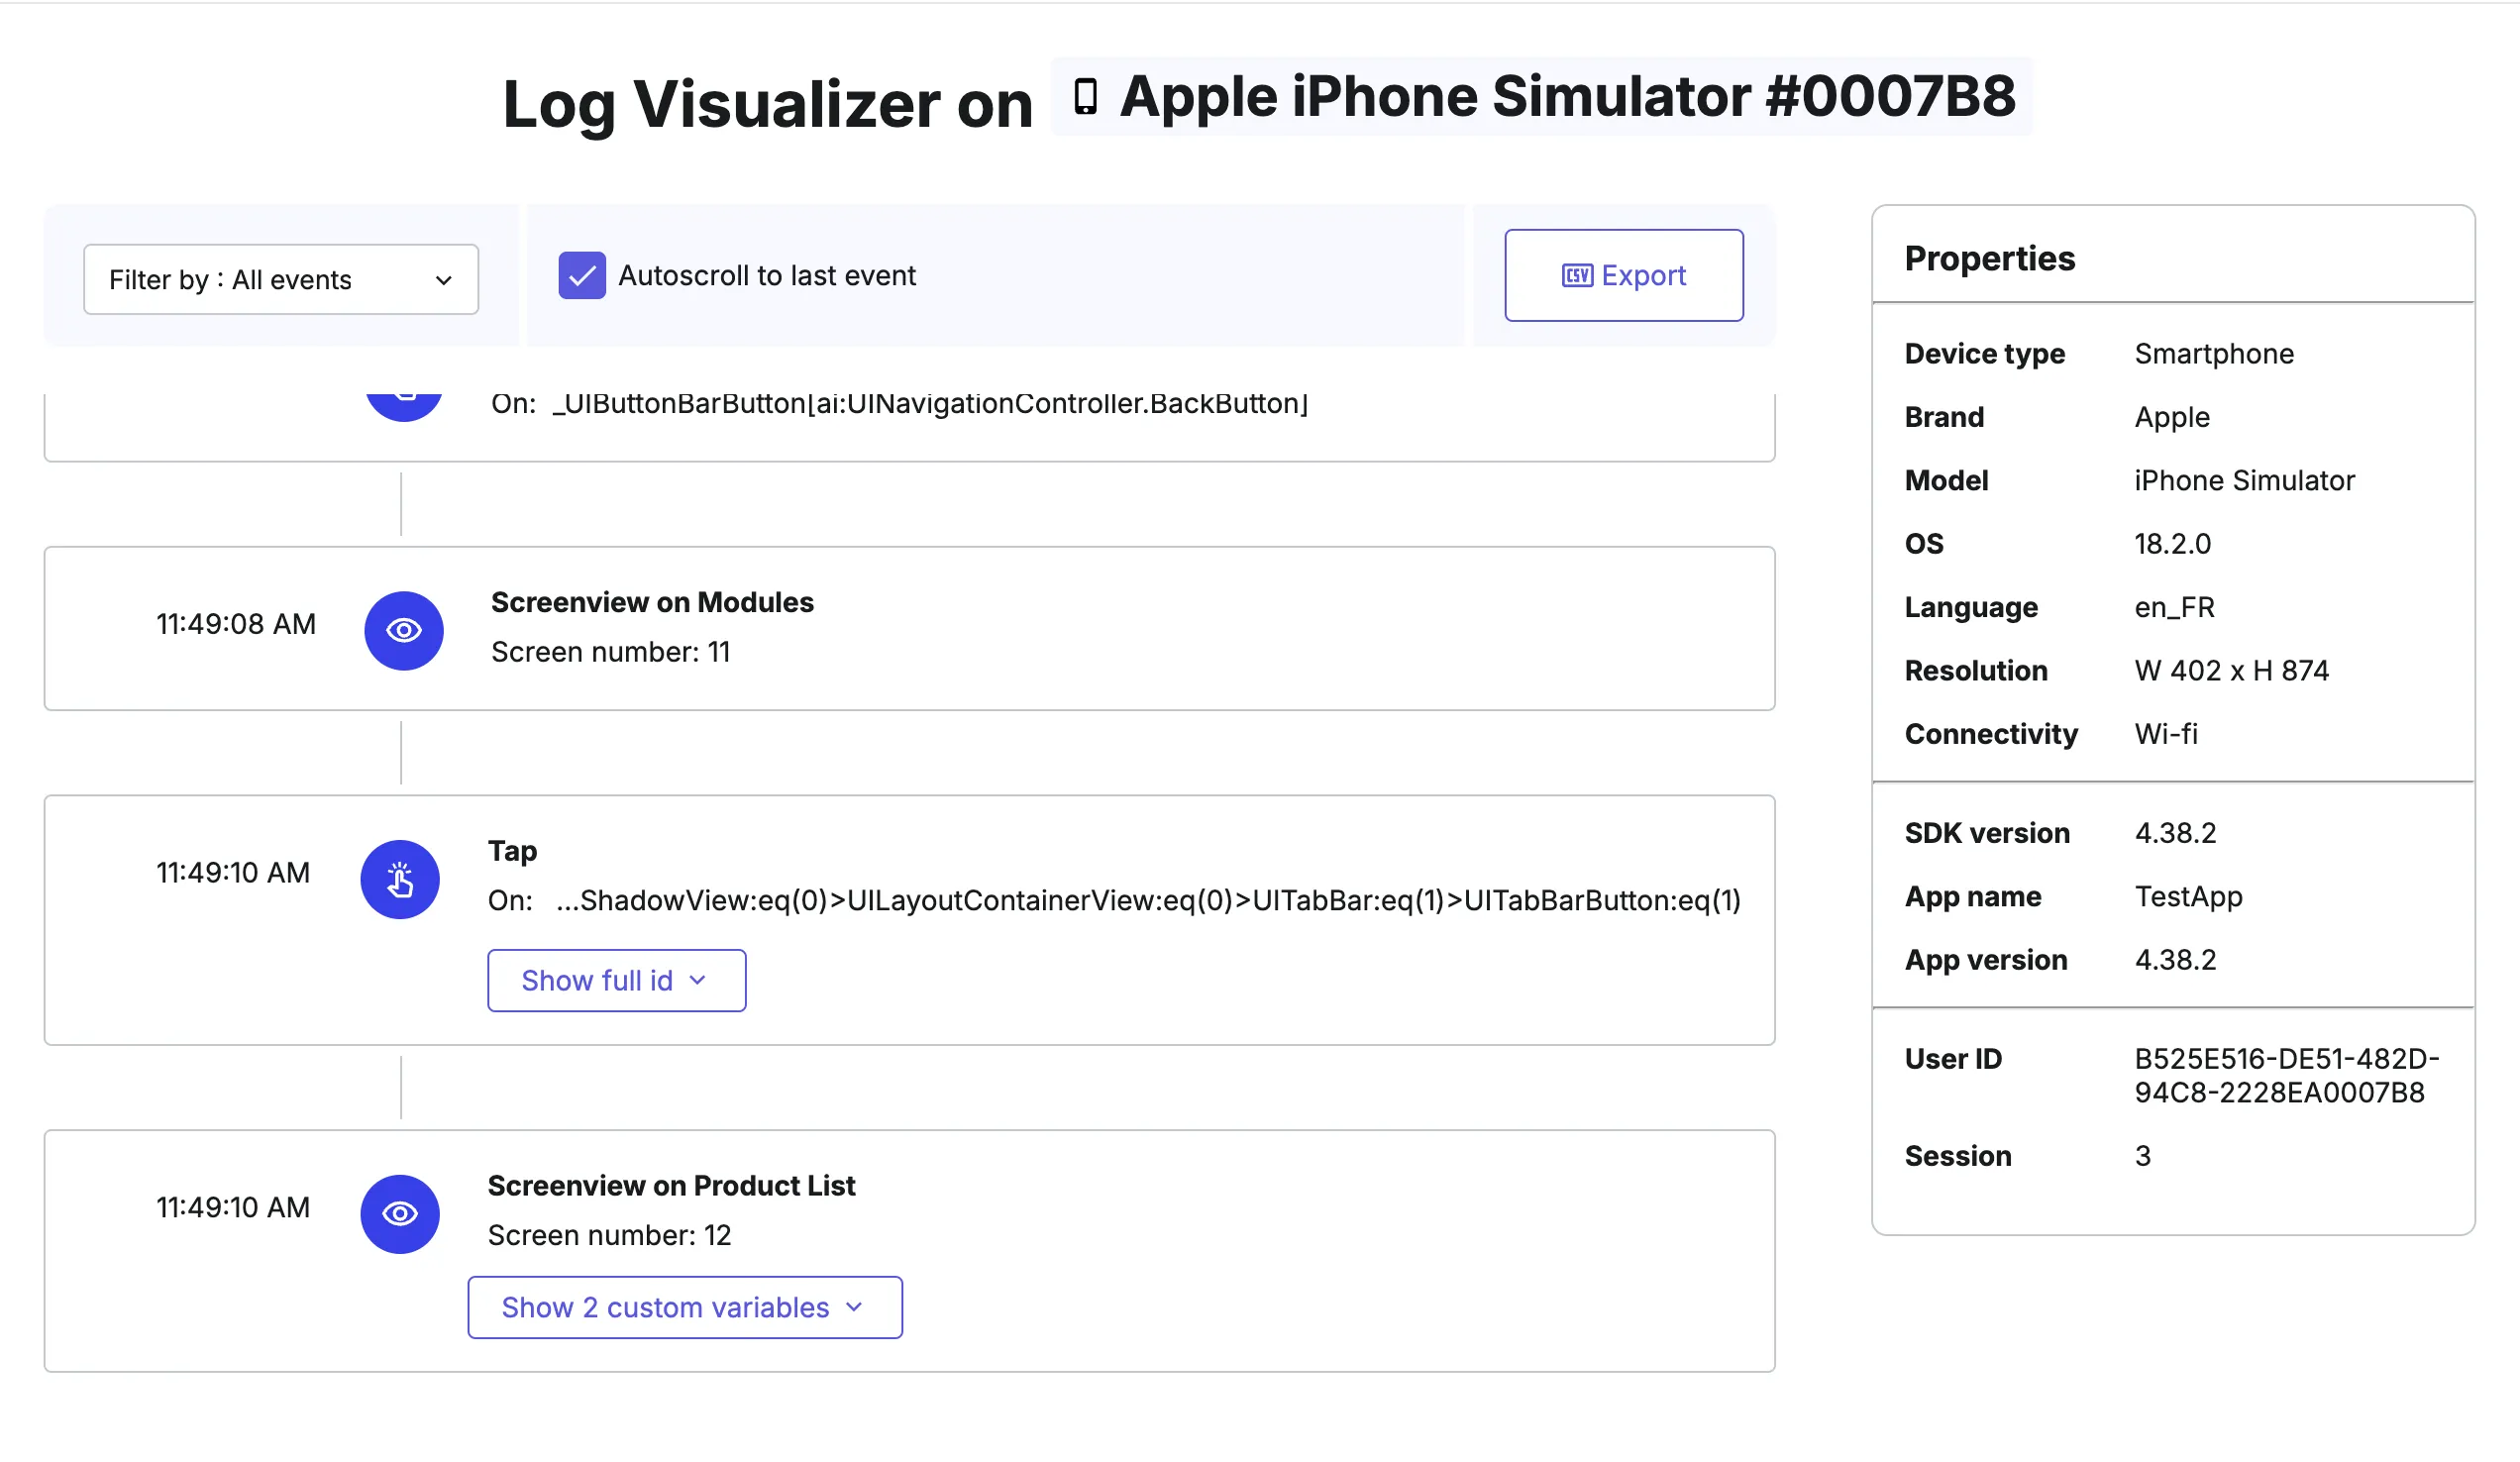
Contentsquare Log Visualizer
Section titled Contentsquare Log VisualizerLog Visualizer is a feature integrated into the Contentsquare SDK. As you navigate and interact with your app, it provides a live view of events detected by the SDK, visible directly on the Contentsquare platform ↗.
- Start your app.
- Select the Mobile icon in the menu top bar then select
Log Visualizer. - Select the device to inspect.
At this stage, you should see an 'App start' or 'App show' event being logged.
Android permissions
Section titled Android permissionsWhen using the Contentsquare Flutter SDK on Android, the underlying native SDK requires specific permissions to function correctly.
These permissions are automatically included from the Contentsquare SDK into your app's AndroidManifest.xml at build time.
For the full list and detailed explanations, you can refer to the Contentsquare Android SDK Required Permissions documentation.
Important
These permissions are mandatory and used exclusively for analytics purposes, in compliance with GDPR and CNIL (French regulation) requirements.
Track your first screens
Section titled Track your first screensContentsquare aggregates the user behavior and engagement at the screen level. Start your SDK implementation by tracking key screens like the home screen, product list, product details, or conversion funnel.
Sending screenview events
Section titled Sending screenview eventsScreen tracking is achieved by sending a screenview each time a screen is displayed on the user's device.
import 'package:contentsquare/contentsquare.dart';import 'package:flutter/material.dart';
class Home extends StatefulWidget {  @override  _HomeState createState() => _HomeState();}class _HomeState extends State<Home> {
  @override  void initState() {    super.initState();    Contentsquare().send('Home');  }
  @override  Widget build(BuildContext context) {    return Scaffold(      appBar: AppBar(        title: const Text('Home'),      ),      body: const Center(        child: Text('Welcome to Contentsquare!'),      ),    );  }}
Implementation recommendations
Section titled Implementation recommendationsFor more detailed information on how to track screens, refer to the complete screen tracking guide.
Test your setup
Section titled Test your setupTesting your SDK implementation is essential to make sure data is being accurately captured and reported.
To test your setup, simulate user interactions in your app and check that the events are logged correctly in our analytics platform.
You can also use debugging tools such as Android Studio, Xcode, or Log Visualizer to monitor data transmission and ensure everything is running smoothly.
Visualize events in Contentsquare
Section titled Visualize events in ContentsquareUse Log Visualizer to view incoming events within the Contentsquare pipeline. This allows you to monitor the stream in real time.
By simulating user activity, you see incoming screenview and gesture events.
Visualize data in Contentsquare
Section titled Visualize data in ContentsquareIn Journey Analysis
Section titled In Journey AnalysisOpen Journey Analysis ↗ in Contentsquare and visualize the user journeys main steps across your app, screen by screen.
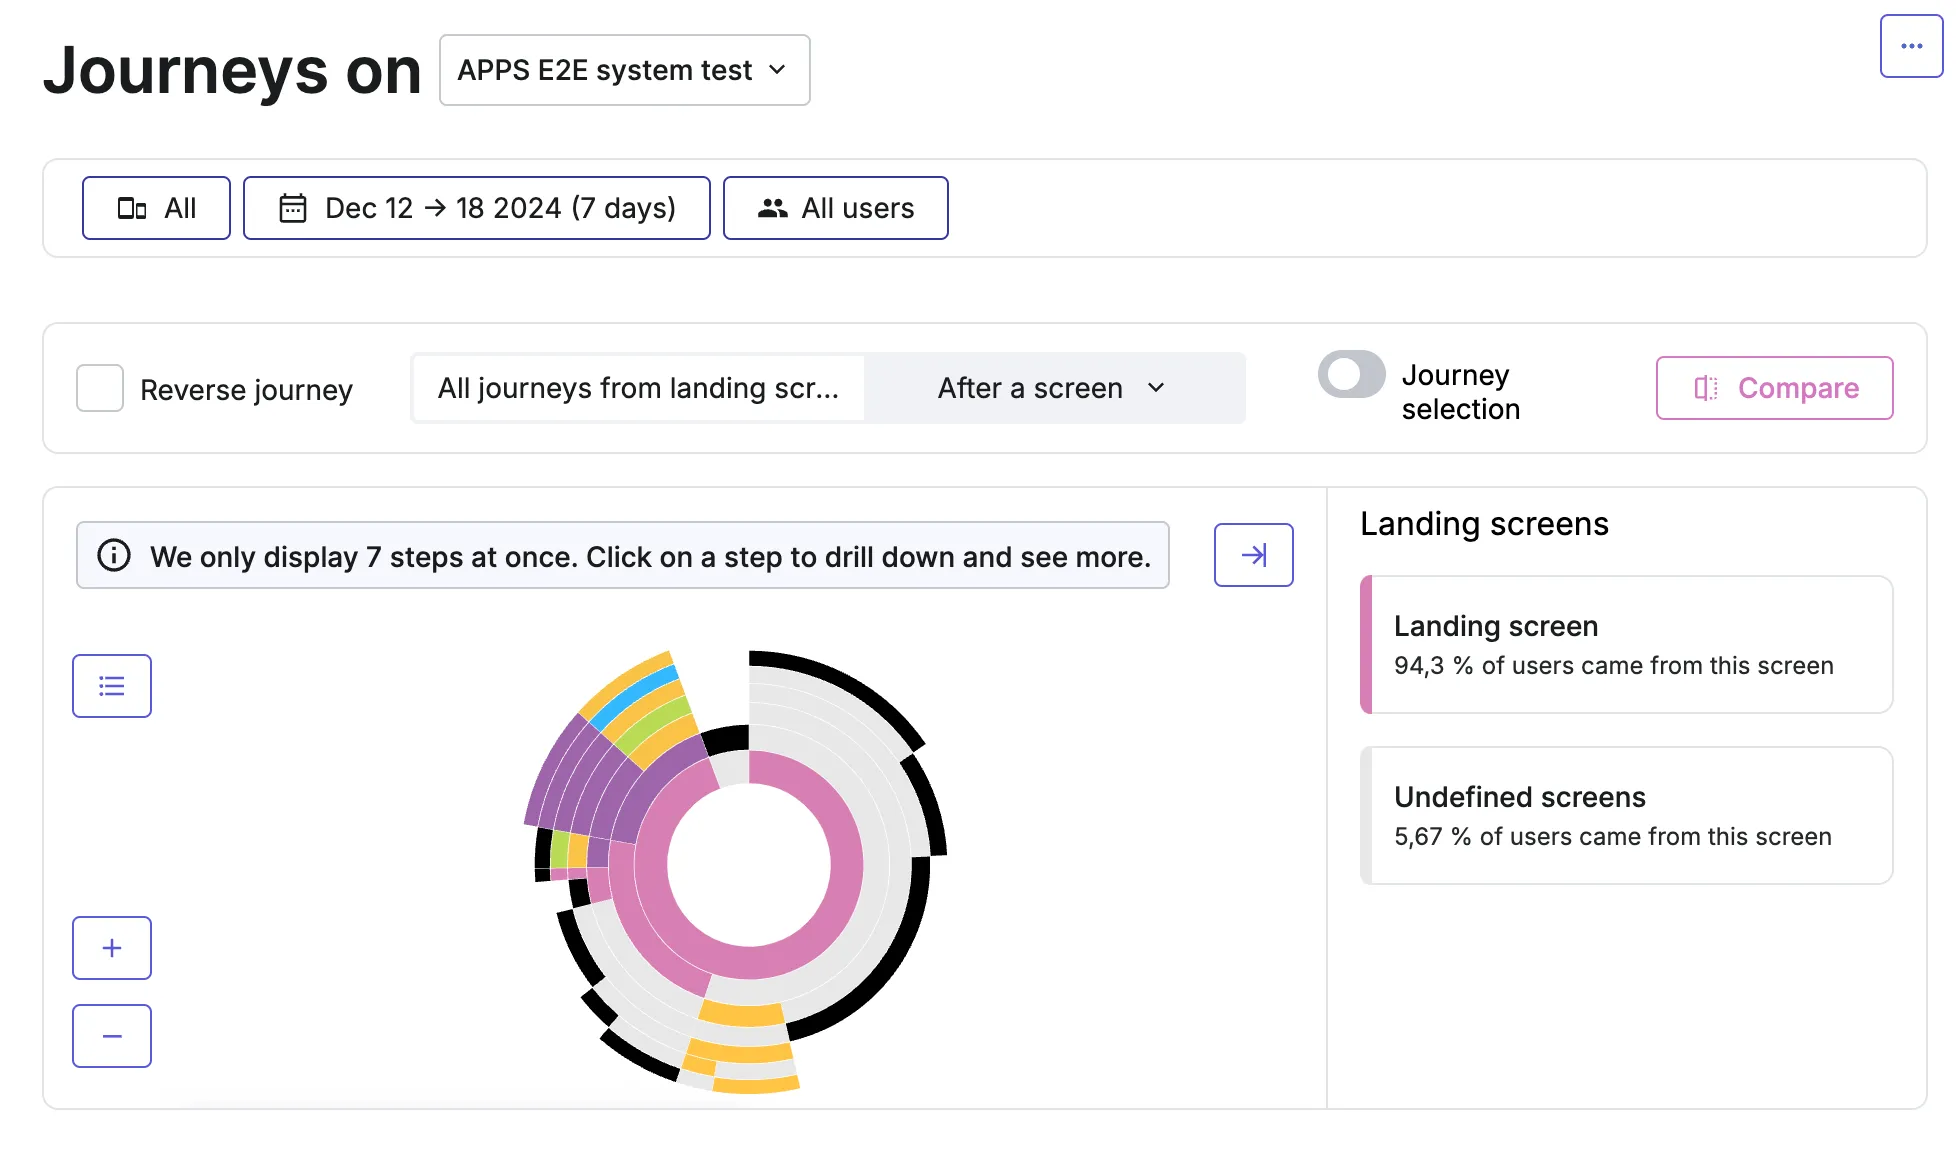
See how to use Journey Analysis on the Help Center ↗.
In Session Replay
Section titled In Session ReplayOpen Session Replay ↗ in Contentsquare and replay the full user session across your app.
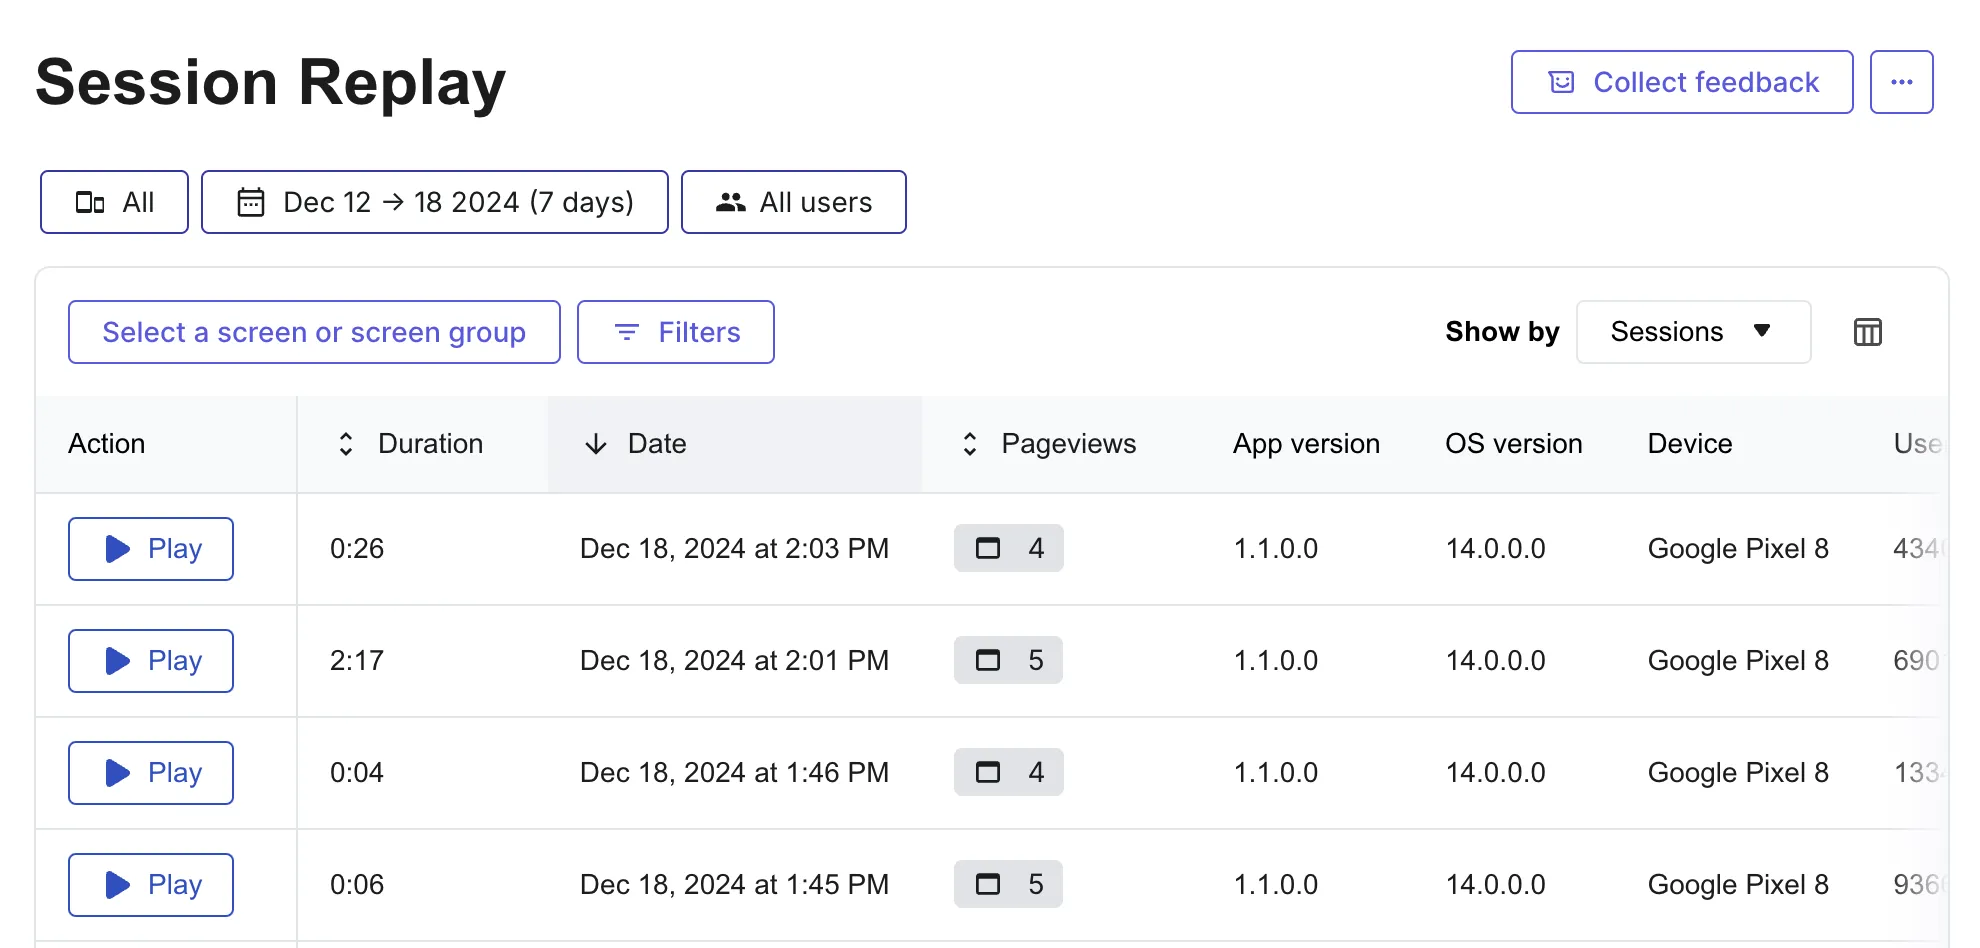
See how to use Session Replay on the Help Center ↗
Next Steps
Section titled Next StepsWhile screen tracking gives an overview of user navigation, capturing session, screen, or user metadata provides a deeper understanding of the context behind user behavior.
Our SDK offers a wide range of features to enhance your implementation, including Session Replay, Error Monitoring, extended tracking capabilities, and personal data masking.
Proceed with these how-to's to refine your implementation.