

Experience Analytics extension
Use this page to set up the Mobile Experience Analytics extension for Contentsquare Product Analytics.
This will supercharge the Product Analytics platform with:
- Powerful Session Replay
- Analysis capabilities of Mobile API Errors and Crashes
This guide assumes that you have already implemented the CSQ SDK for Product Analytics.
Enable the extension in the Product Analytics UI
Section titled Enable the extension in the Product Analytics UI- In Product Analytics, navigate to Account > Manage > Replays & Heatmaps.
- If this is your first time setting up Session Replay, select the checkbox to accept the terms and conditions.
- Click Add web or mobile app to launch the setup wizard. There is one configuration per app.
- Select Mobile as platform.
- Give your app a name and choose a storage location (US or EU).
- Set a sampling rate for how many sessions to record.
- Configure replay settings:
- App ID: enter the bundle ID of your app (for example,
com.companyname.appname). - Quality Settings: choose the recording fidelity for Wi-Fi and Cellular connections. The default for both is Medium; keep Cellular equal to or lower than Wi-Fi.
- User Consent: enable this if your app requires explicit opt-in before recording. See Privacy docs for the opt-in API.
- App ID: enter the bundle ID of your app (for example,
- Click Save and Continue to finish the wizard.
Enable error and crash collection
Section titled Enable error and crash collectionError and crash collection is managed separately from the setup wizard. Navigate to Account > Manage > Replays & Heatmaps, click Edit next to your app configuration, then scroll to the relevant section under General Settings:
- Error Capture: toggles for API Errors and Custom Errors.
- Crashes Capture: toggle for Crashes & Flutter Errors.
Click Save when finished.
Session Replay masking
Section titled Session Replay maskingThe Session Replay feature replays every interaction of your users with your app. To respect the user's right to privacy, the CSQ SDK:
- Masks everything by default
- Allows you to control which part of the user interface is collected via our Masking rules
Masking mechanisms
Section titled Masking mechanismsMasking depends on the type of element:
- Images: A blurred representation is sent in place of the original content.
- SVG images: A blurred representation is sent in place of the original content.
- CustomPaint: custom-made
CustomPaintelements are not collected. Instead, a blurred representation is sent in place of the original content. Framework specific decorativeCustomPaintthat do not contain sensitive data are still collected. - Text: Replaced by * (asterisk) characters, matching the original character count. Whitespace characters (spaces, tabs, line breaks) are preserved. For instance,
the lazy foxis collected as*** **** ***. All other visual properties (text color, background color, alignment, etc.) are collected. - TextFields: Same as Text
- TextField with
obscureText: Both the obscured text and the briefly revealed character are replaced by • (bullet). - Other types: no specific data is collected but visual properties are collected.
- Icons: Single characters belonging to the Private Use Area
U+E000..U+F8FFare collected.
If you believe a particular element might disclose personal data through any of these properties, you must mask it using one of the methods outlined below. A reliable method to assess how a view is rendered in a replay is to navigate to the desired view with the CS SDK active, then use the quick replay link.
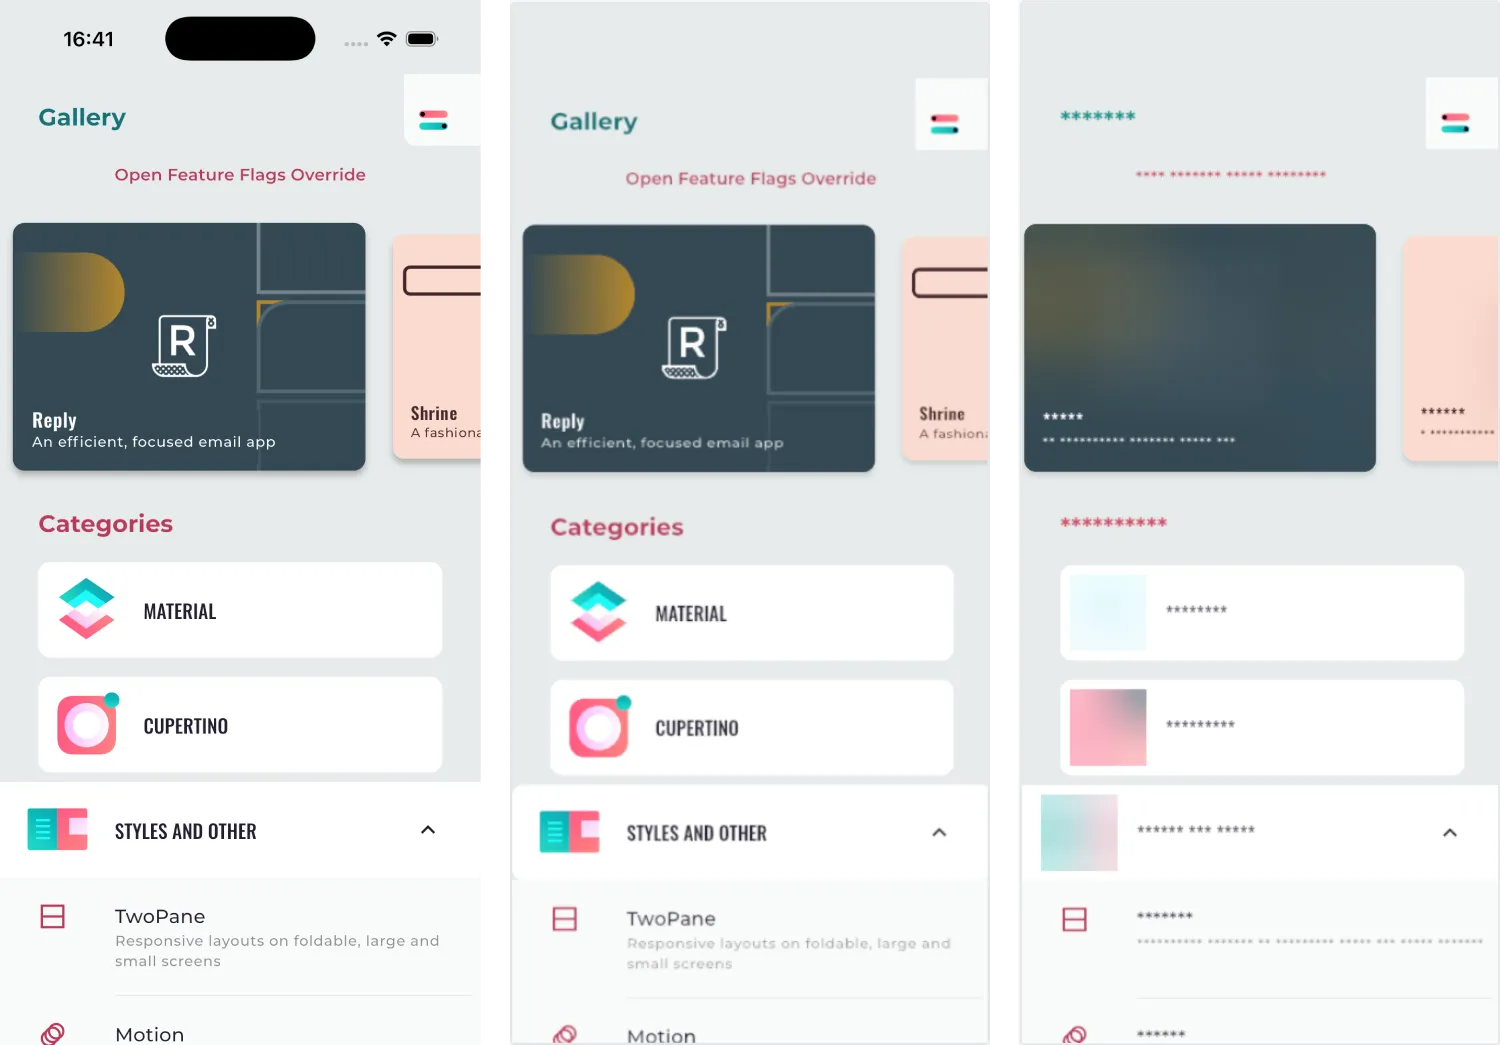
Masking example
Section titled Masking exampleHere's an illustration of a masked view:
Original -> Replay fully unmasked -> Replay fully masked
Masking rules
Section titled Masking rulesMasking rules can be applied in two ways:
- Through remote masking configuration in the CSQ Console (for admin users): These configurations are managed directly in the Console and take effect for all sessions as soon as the app is restarted or brought to the foreground. See How to customize masking rules from the Data Masking tab ↗ on the Help Center.
- Using public masking APIs in the SDK (for mobile application developers): These configurations require developer implementation and will be applied only after the mobile app has gone through its release cycle.
Masking rules set via the CSQ Console or the public APIs are applied according to different priorities, as described below. The SDK determines whether a view is masked by evaluating the rules in the order specified below. Once a rule is triggered, the state is set, and subsequent rules are not applied:
When using CSQMask and CSQMaskingConfig, it's essential to understand the priority of masking rules in the widget tree. The masking rules specified in a CSQMask widget will affect its descendants, and if nested scopes are used, the innermost (closest) scope takes precedence.
Once a rule is triggered, the state is set, and subsequent rules are not applied:
| Rule | Configured via |
|---|---|
| 1. The app or plugin version is fully masked | Data Masking tab in the CSQ Console ↗ |
| 2. Remote Text or Image masking is defined | Data Masking tab in the CSQ Console ↗ |
3. The CSQMaskingConfig object provided to the start() method sets the masking rules for the entire app. | API |
4. The CSQMaskingConfig object provided to a CSQMask widget sets the masking rules for its child and descendants. | API |
| 5. Remote Text or Image unmasking is defined | Data Masking tab in the CSQ Console ↗ |
6. Otherwise the widget remains masked except for CustomPaints and SvgImages | default |
Public Masking APIs
Section titled Public Masking APIsDefault masking
Section titled Default maskingBy default all images, text, and Text fields will be masked. SVGs and CustomPaints are not masked.
Masking/Un-masking in Flutter
Section titled Masking/Un-masking in FlutterCSQMask is a Flutter widget that applies specified masking rules to its descendant widgets. This can be used when you want to mask sensitive information during Session Replays, such as user data or private texts.
CSQMaskingConfig is a class that determines what type of content should be masked during Session Replays. You can customize the masking behavior by setting the masking options for texts, text fields, and images.
Handle masking
Section titled Handle maskingTo mask or unmask content, wrap the desired widgets with the CSQMask widget and provide a CSQMaskingConfig object to configure the masking rules.
Here's an example of how to use CSQMask:
import 'package:contentsquare/csq.dart';
CSQMask(  maskingConfig: CSQMaskingConfig.maskAll(),  child: const Text('Hello world'),);
In this example, CSQMaskingConfig.maskAll() is used to mask the Text widget.
You can also use nested CSQMask widgets to apply different masking rules to different parts of your widget tree. Here's an example:
import 'package:contentsquare/csq.dart';
CSQMask(  maskingConfig: CSQMaskingConfig.maskAll(),  child: Column(    children: [      const Text('This text will be masked'),      CSQMask(        maskingConfig: CSQMaskingConfig(maskTexts: false),        child: Text('This text will NOT be masked'),      ),    ],  ),);
In this example, the first Text widget will be masked, while the second one will not be masked due to the maskTexts: false option in the nested CSQMask.
How to use CSQMaskingConfig
Section titled How to use CSQMaskingConfigCSQMaskingConfig allows you to configure the masking behavior for different types of content:
maskTexts: If set totrue, any widget that creates aRenderParagraph(example:Text,RichText) will be masked.maskTextFields: If set totrue, any widget that creates aRenderEditable(example:TextFormField,TextField) will be masked.maskImages: If set totrue, any widget that creates an image (example:Image,BoxDecoration.image) will be masked.maskSvgImages: If set totrue, any widget that creates an SVG image throughflutter_svgwill be masked.maskCustomPaints: If set totrue, any custom-made widget that creates aCustomPaintwill be masked. Framework specific decorativeCustomPaintnot containing any sensitive data are not masked.maskCharts: If set totrue, any widget that creates a chart using thefl_chart↗ package will be masked.
You can create a custom CSQMaskingConfig object by using the constructor:
import 'package:contentsquare/csq.dart';
const CSQMaskingConfig({  bool? maskTexts,  bool? maskImages,  bool? maskTextFields,  bool? maskSvgImages,  bool? maskCharts,  bool? maskCustomPaints,})
For easier readability and convenience, you can use the following factory constructors:
CSQMaskingConfig.maskAll(): Returns aCSQMaskingConfigobject with all values set totrue, meaning everything will be masked.CSQMaskingConfig.unMaskAll(): Returns aCSQMaskingConfigobject with all values set tofalse, meaning nothing will be masked.
If any masking parameter is omitted in the CSQMaskingConfig object, its value is inherited from the nearest SessionMaskingScope widget in the widget tree.