WebView Tracking Tag Web
Introduction
Section titled IntroductionIn order for Contentsquare to be able to track WebViews in your app, a bit of setup is involved. It is necessary to inject our CS Tag in WebView Mode in your HTML page, which is the step detailed on this page. You will also have to link the CS Tag in WebView mode with our SDK by injecting your WebViews, following the documentation for your platform (📚 iOS, 📚 Android, 📚 Flutter, 📚 React Native).
CS Tag in WebView mode implementation
Section titled CS Tag in WebView mode implementationWe support implementing the CS Tag in WebView mode via Google Tag Manager or manually. Note that GTM is the preferred method of injection of the Contentsquare Tag.
Google Tag Manager
Section titled Google Tag Manager1. Backward Compatibility for WebView Detection
Section titled 1. Backward Compatibility for WebView Detection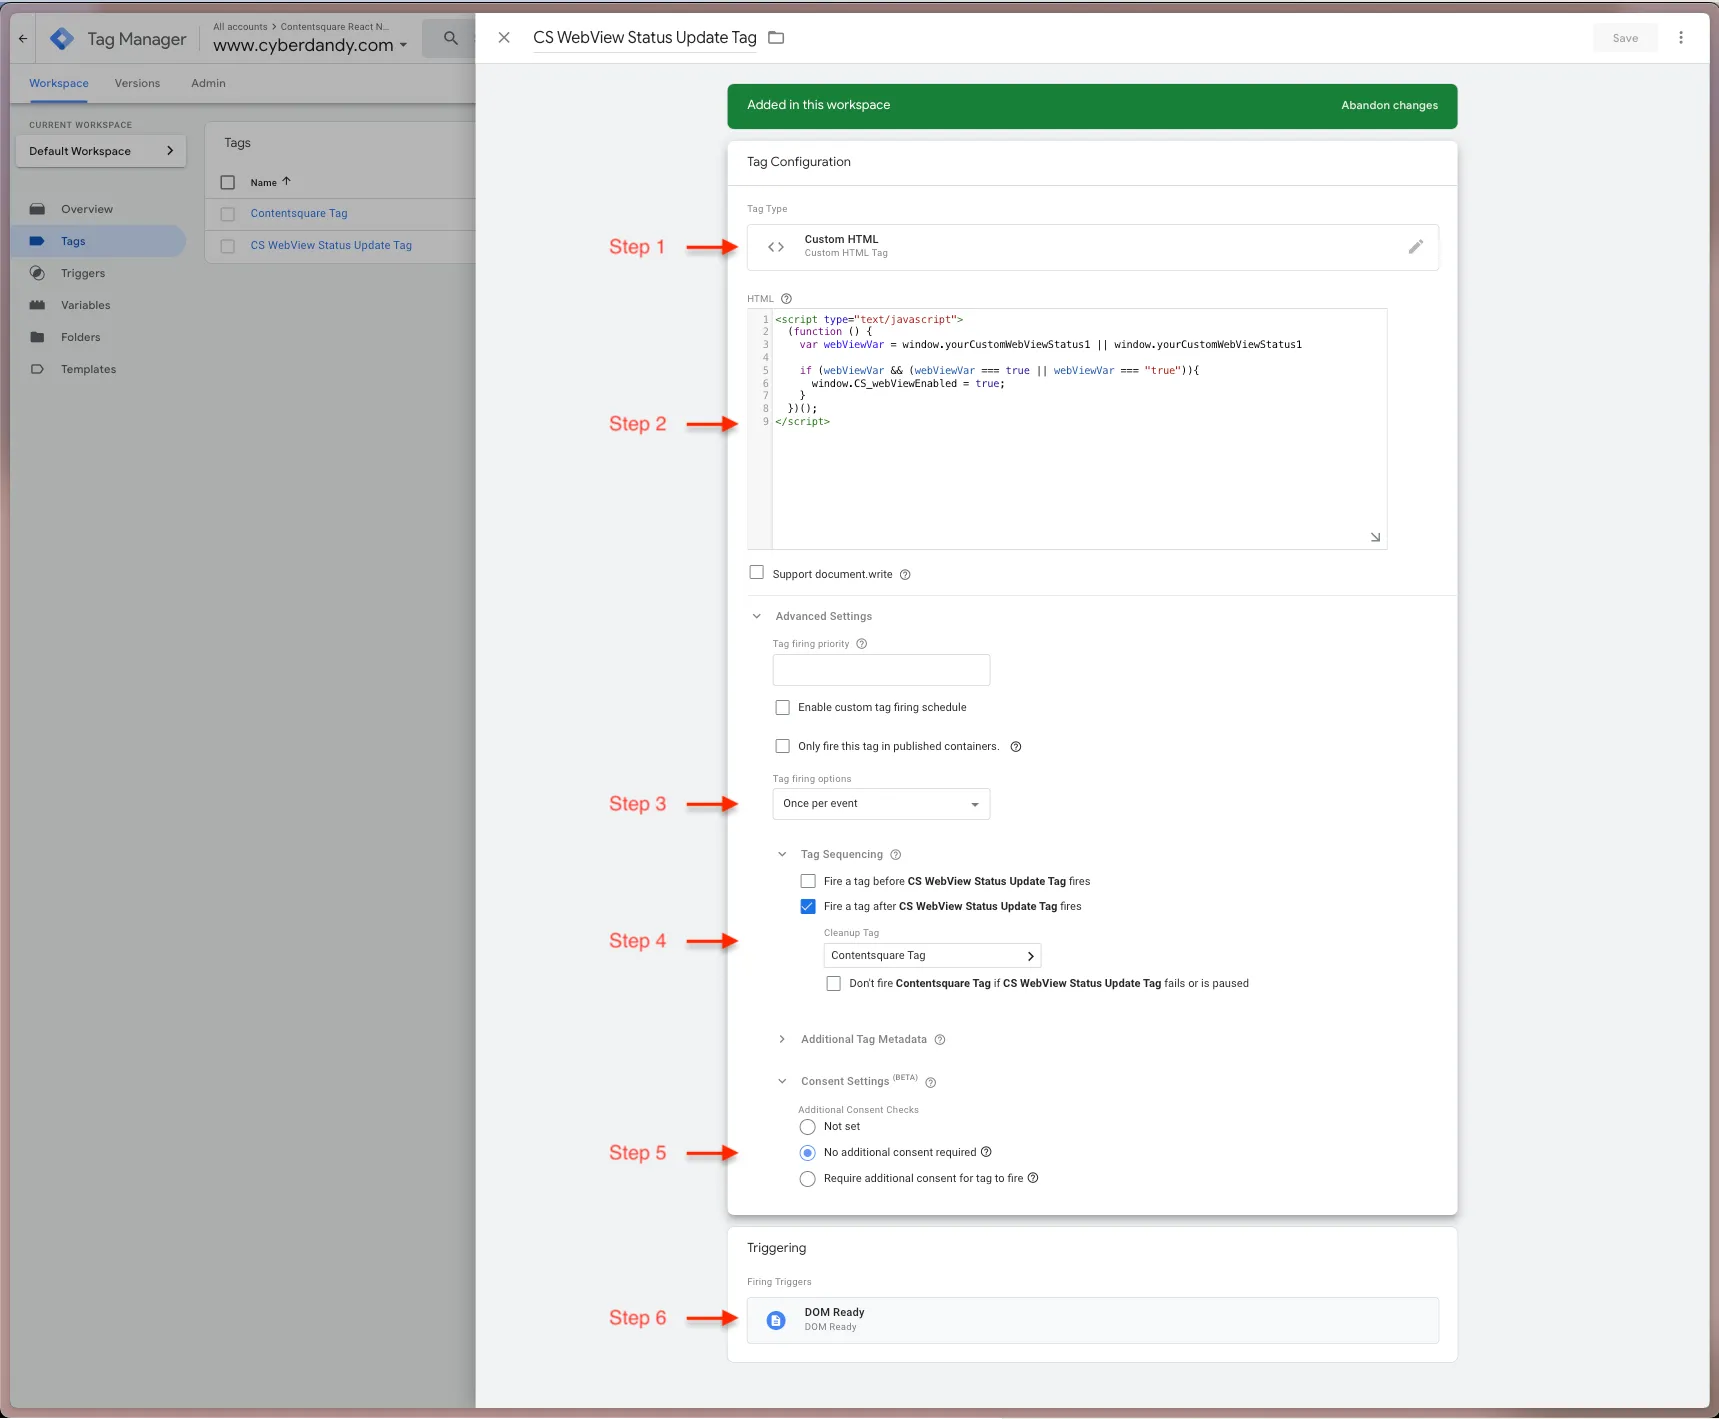
To maintain compatibility, follow these steps:
-
Create a new GTM Tag using the “Custom HTML” template.
-
Insert and modify the following script in the HTML section. This example assumes you’re using two different custom methods (
window.yourCustomWebViewStatus1andwindow.yourCustomWebViewStatus2) to detect if a page is loaded in a WebView.<script type="text/javascript">(function () {var webViewVar = window.yourCustomWebViewStatus1 || window.yourCustomWebViewStatus2if (webViewVar && (webViewVar === true || webViewVar === "true")){window.CS_webViewEnabled = true;}})();</script> -
Ensure the GTM Tag triggers once per event.
-
Sequence your GTM Tags, so that Contentsquare Tag, which you will create in the next step, is fired right after this GTM Tag (CS WebView Status Update Tag).
-
Make sure consent does not hinder the CS WebView Status Update Tag triggering, as consent is handled by the SDK in the context of a mobile app.
-
Set the GTM Tag to trigger when the DOM is fully loaded.
2. Implement or Update the Contentsquare Tag
Section titled 2. Implement or Update the Contentsquare Tag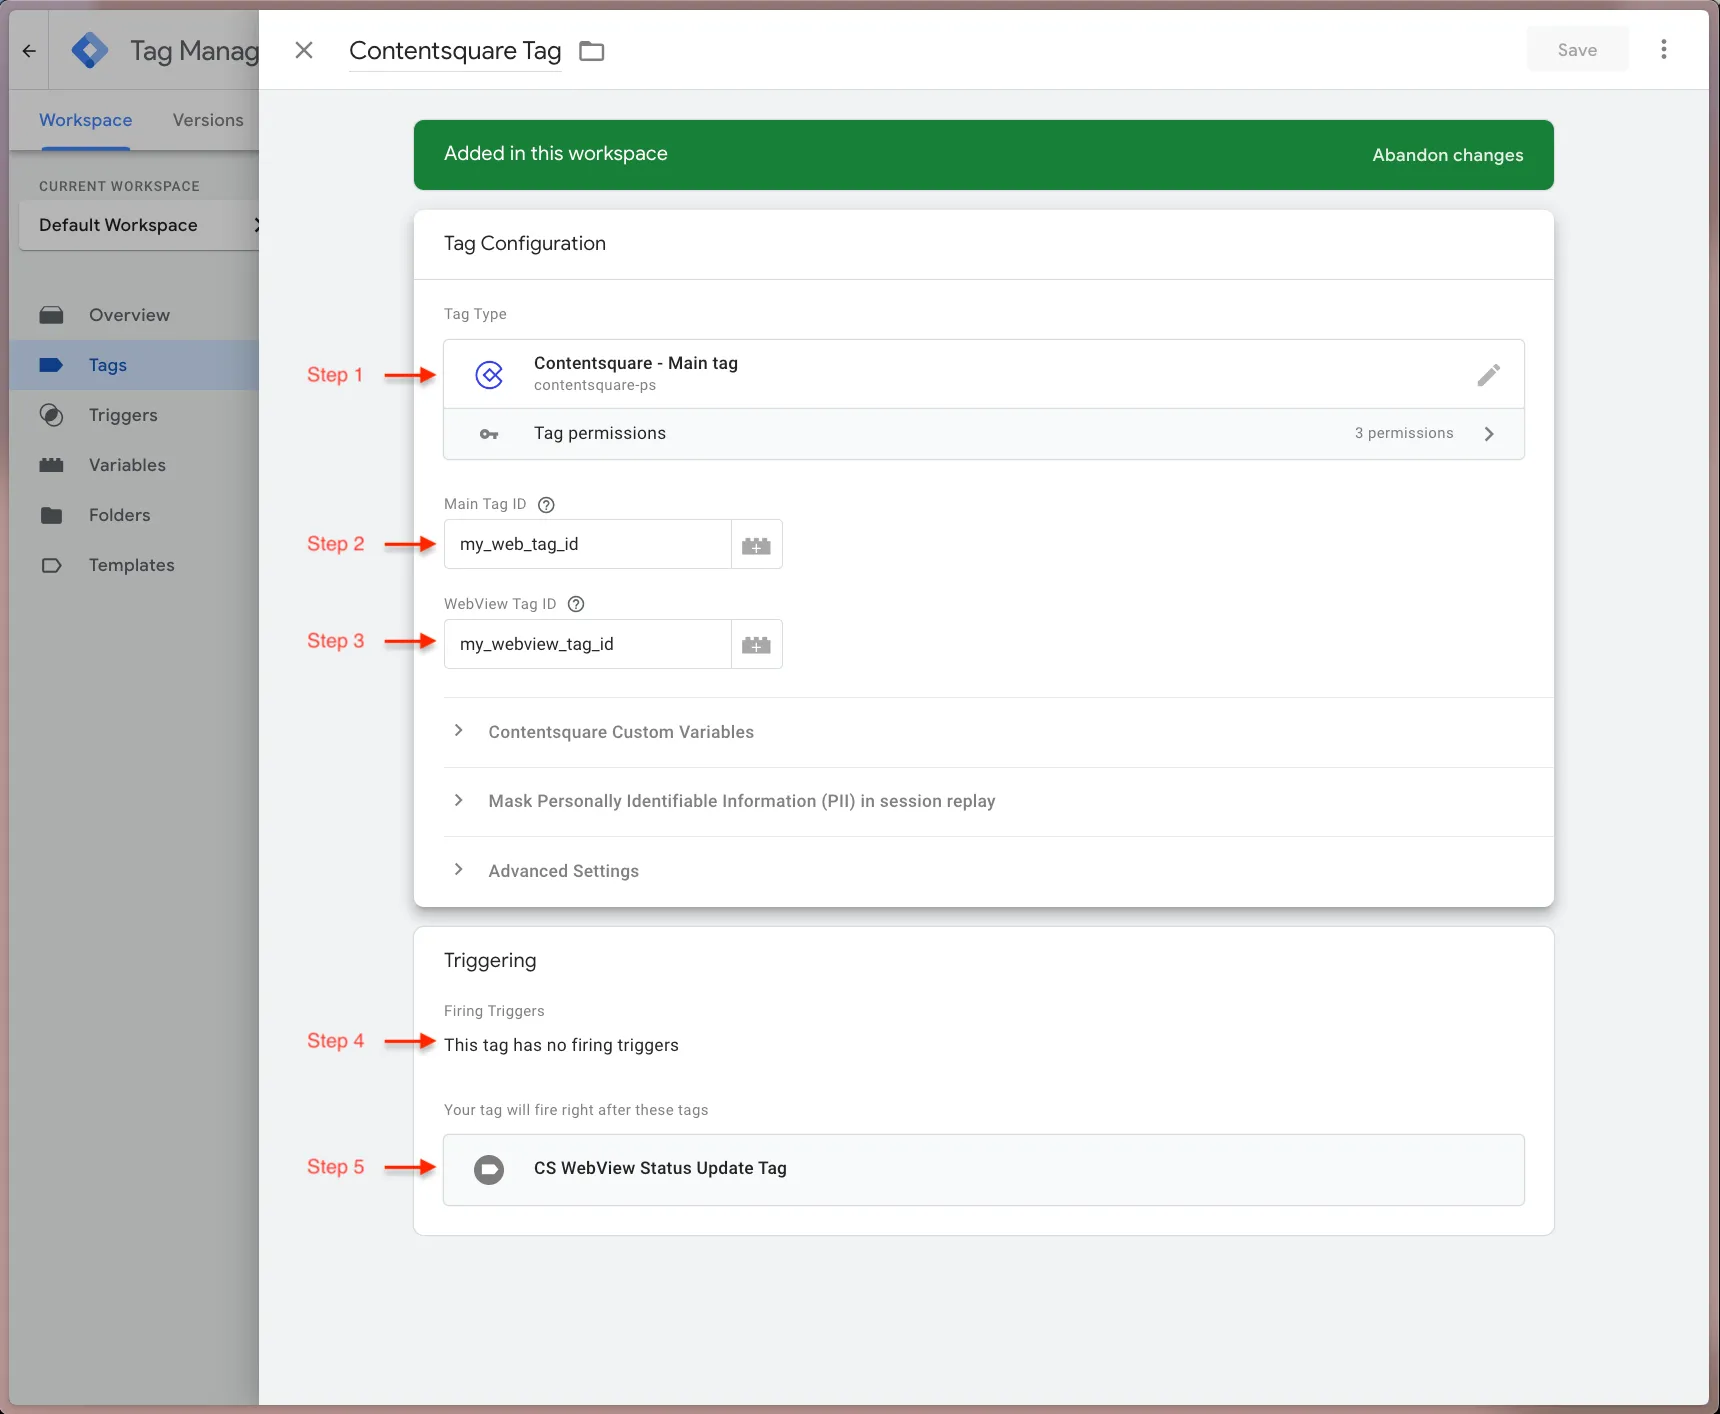
If your page can load in both browsers and WebViews, you may already have implemented our GTM Tag (Contentsquare - Main Tag). Follow these steps to either implement or verify your setup. In case you skipped the previous step, make sure to check the note about the trigger, further below.
-
Use the GTM Tag type
Contentsquare - Main Tag. -
Confirm that your Web Tag ID is correctly added. This should have been provided by your Contentsquare contact during your web implementation.
-
Similarly, confirm that your WebView Tag ID is properly configured. This is also provided by your Contentsquare contact.
-
Remove any custom triggers you may have added, except for those required by this implementation (see next point).
-
Ensure CS WebView Status Update Tag triggers the subsequent GTM Tag only after it finishes executing.
Manual
Section titled ManualDepending if your page is also loaded in browsers, you will have a different snippet to add at the top for your page.
Here’s what’s going on with the following snippet:
- Detect if the page is loaded in a WebView.
- If so,
- Set
isWebViewtotrueto start the CS Tag in WebView mode. - Load the CS Tag in WebView mode with the WebView Tag ID provided by your CS contact.
- Set
- Else, load the CS Tag with the Web Tag ID.
<script type="text/javascript">    (function () {        window._uxa = window._uxa || [];
        var tag_id = MY_WEB_TAG_ID;
        if (window.isWebView) {            window._uxa.push(['setOption', 'isWebView', true]);            tag_id = MY_WEBVIEW_TAG_ID;        }
var mt = document.createElement("script"); mt.type = "text/javascript"; mt.async = true; mt.src = "https://t.contentsquare.net/uxa/${tag_id}.js"; document.getElementsByTagName("head")[0].appendChild(mt); })();</script>For pages that are only loaded in WebViews, we can simplify the implementation by not checking if we are in a WebView. Make sure to load the CS Tag in WebView mode with the WebView Tag ID provided by your CS contact.
<script type="text/javascript"> (function () { window._uxa = window._uxa || []; window._uxa.push(["setOption", "isWebView", true]); var mt = document.createElement("script"); mt.type = "text/javascript"; mt.async = true; mt.src = "https://t.contentsquare.net/uxa/MY_WEBVIEW_TAG_ID.js"; document.getElementsByTagName("head")[0].appendChild(mt); })();</script>What’s next?
Section titled What’s next?Once you have completed all the steps required to add the CS Tag in WebView mode, you are ready to use our API to continue implementing Contentsquare in your WebViews.