Use Google Tag Manager
If you are using Firebase to track events such as screenviews or transactions, you can trigger these events for Contentsquare with minimal effort, thanks to Google Tag Manager.
Prerequisites
Section titled PrerequisitesIf you are following this Google Tag Manager integration process, you should already have followed the Google Tag Manager + Firebase setup as described in Google’s Tag Manager + Firebase: Getting Started ↗
You also need to integrate the Contentsquare SDK see section: Add Contentsquare to your app.
Screenview events
Section titled Screenview eventsThis section covers how to trigger a Contentsquare screenview event for every Firebase screenview event. Firebase allows you to log screenviews automatically or manually ↗ for an exhaustive coverage of your app screens.
Variables
Section titled VariablesContentsquare screenview events require a name parameter.
Firebase has 2 ways to track screens:
1. Variable for automatically tracked screens
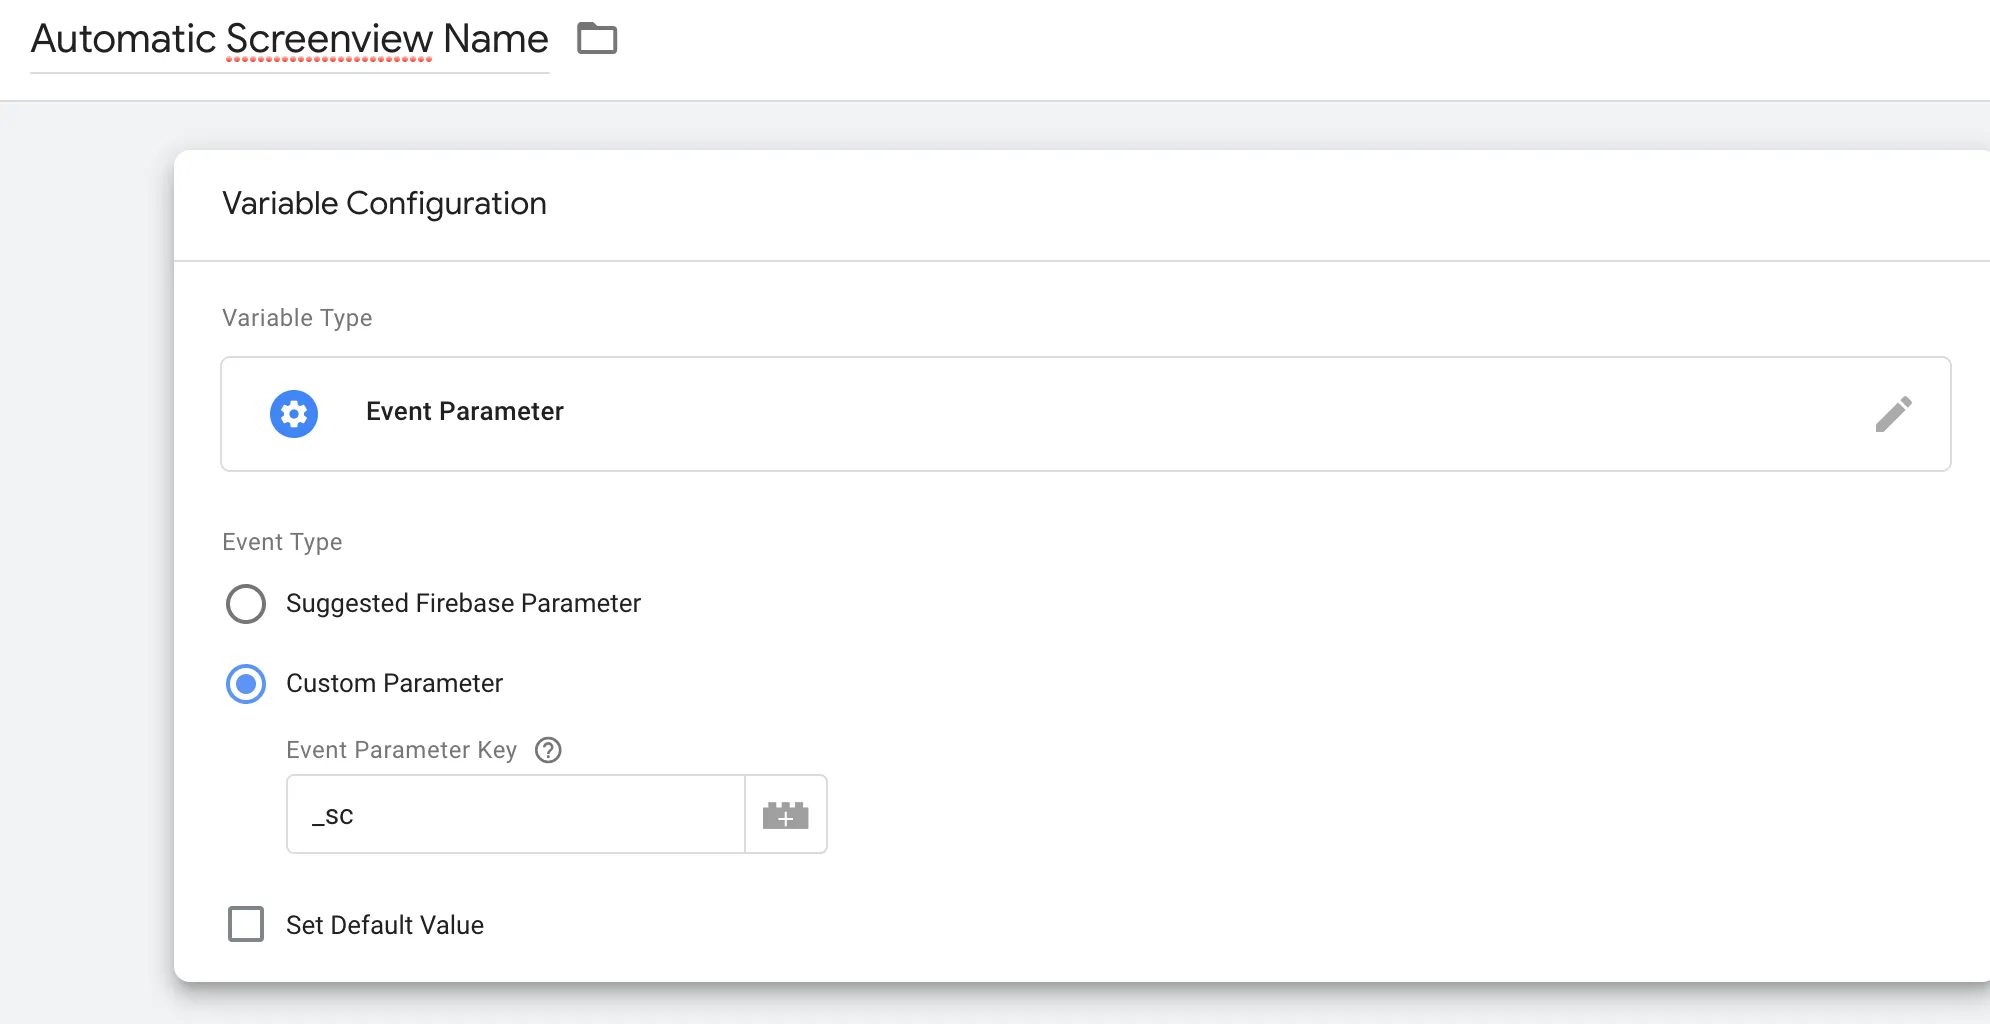
Section titled 1. Variable for automatically tracked screensFirebase’s screen_view events have an _sc parameter (for screen class) which we can use as parameter for screens that are automatically tracked.
We will create a variable called Auto Screenview with:
- The Variable Type set to Event Parameter
- The Event Type set to Custom Parameter
- The Event Parameter Key set manually to
_sc
2. Variable for manually tracked screens
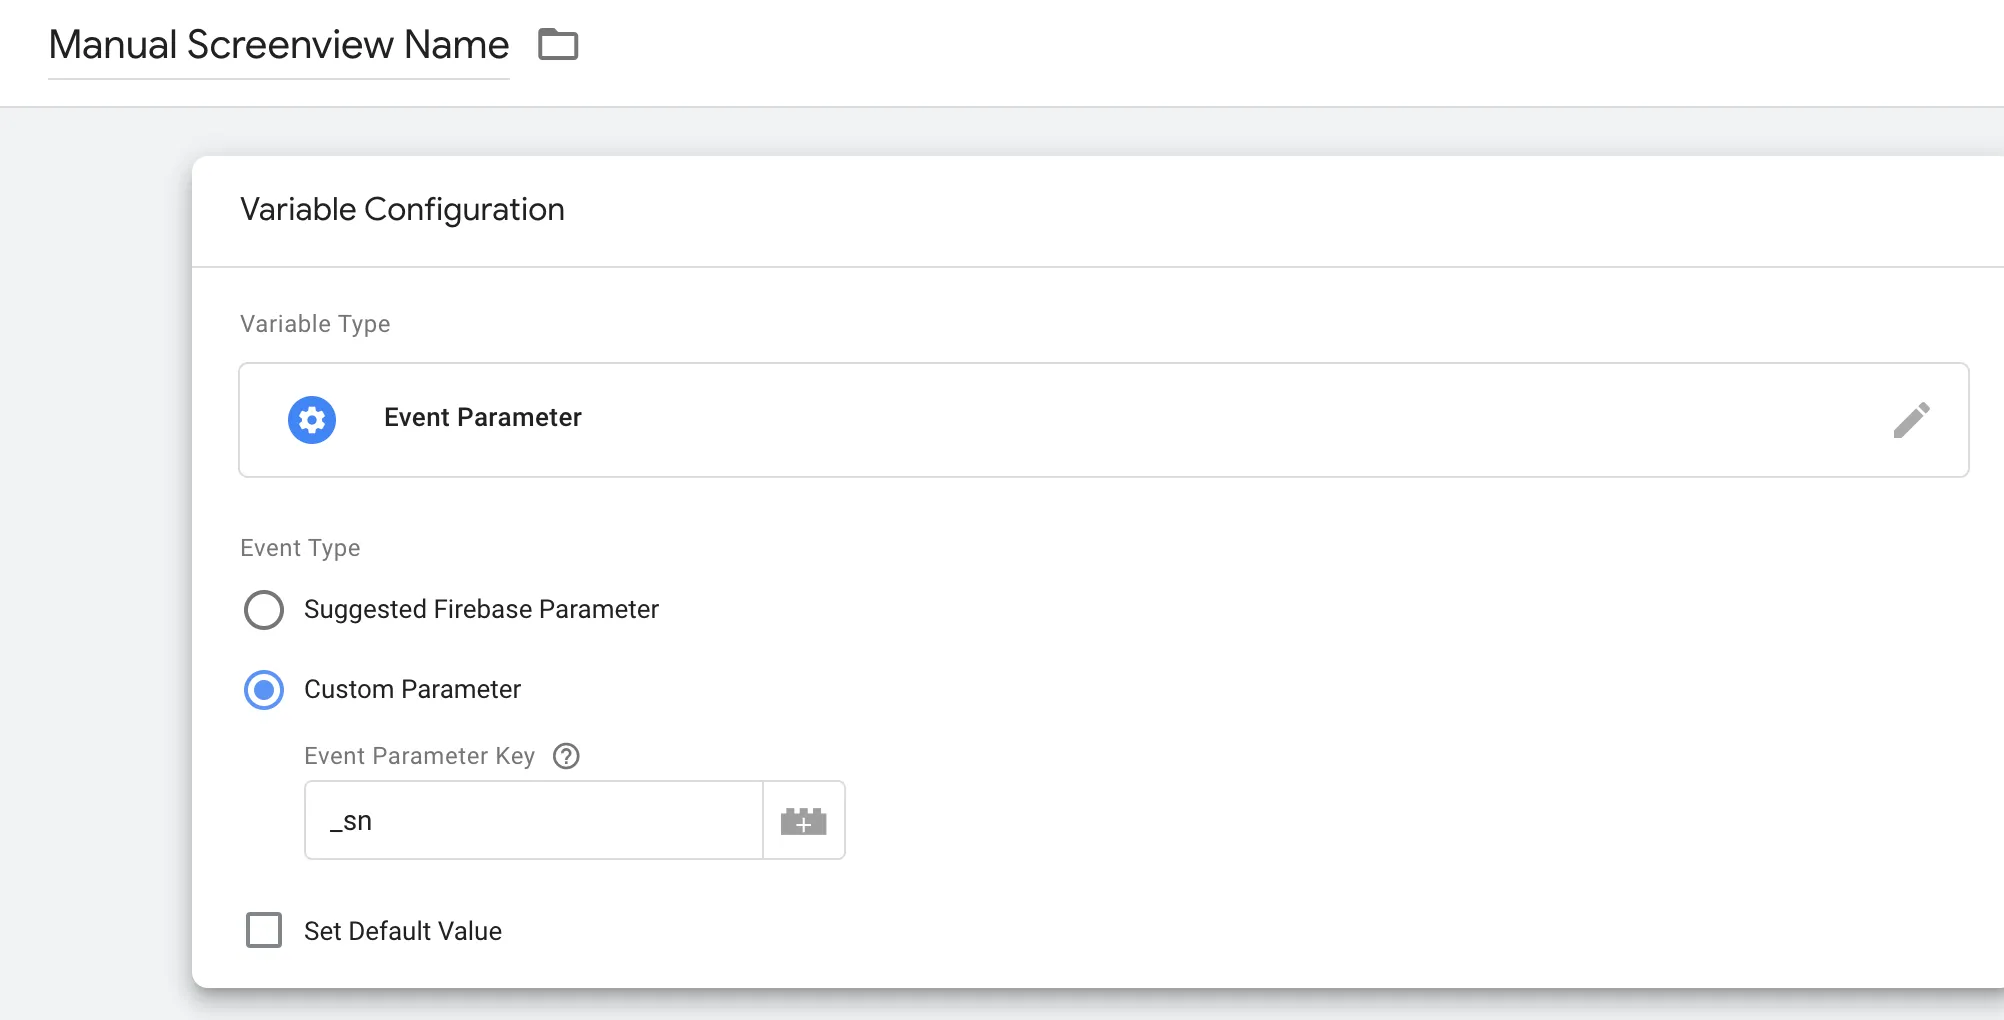
Section titled 2. Variable for manually tracked screensFirebase’s screen_view events have a _sn parameter (for screen name) which we can use as parameter for screens that are manually tracked.
We will create a variable called Manual Screenview with:
- The Variable Type set to Event Parameter
- The Event Type set to Custom Parameter
- The Event Parameter Key set manually to
_sn
We can also create variables for our own custom parameters, for example, we can send a screen_view event like this:
firebaseAnalytics.logEvent(FirebaseAnalytics.Event.SCREEN_VIEW) { param(FirebaseAnalytics.Param.SCREEN_NAME, "MyScreenName") param("is_user_logged_in", "true")}and create a variable called Is User Logged In with:
- The Variable Type set to Event Parameter
- The Event Type set to Custom Parameter
- The Event Parameter Key set manually to
is_user_logged_in
Check out Configure variables in Tag Manager ↗ for more information.
Screenview trigger
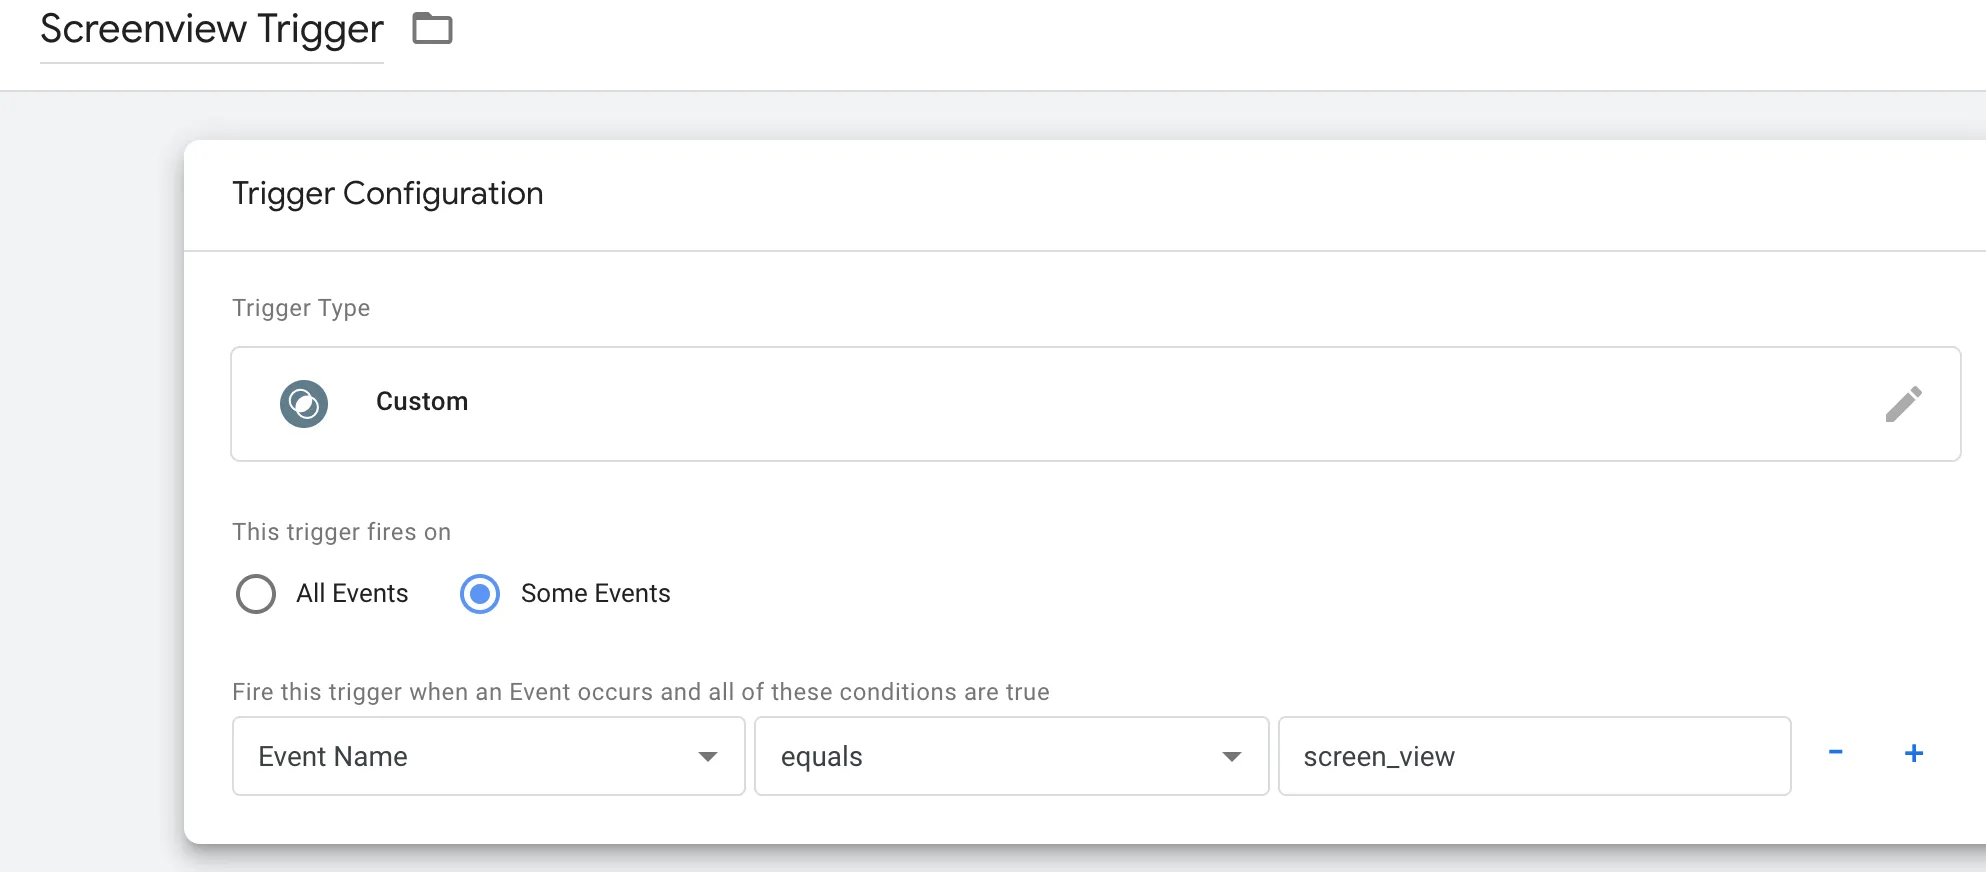
Section titled Screenview triggerWe will need to tell Google Tag Manager when to send a Contentsquare screenview, and for that we need to create a Trigger. Firebase sends screenviews as events of name screen_view, so we need to create a trigger for that event.
- Name your trigger
Screenview Trigger - Trigger Type should be set to Custom
- Trigger should fire on Some Events
- For the Event, the Event Name should be equal to
screen_view
Create the custom function Tag
Section titled Create the custom function TagIn Google Tag Manager, a Tag is what configures what happens when some trigger is activated. It will be automatically linked to a custom class which we will create in a later step.
The Tag Type should be a Function Call. You will also need to fill in the Class Path field with a class name of your liking, typically related to what the tag is about (here we chose com.myapp.ContentsquareScreenviewTag), which you will re-use later.

Adding the trigger and the variables to the Tag
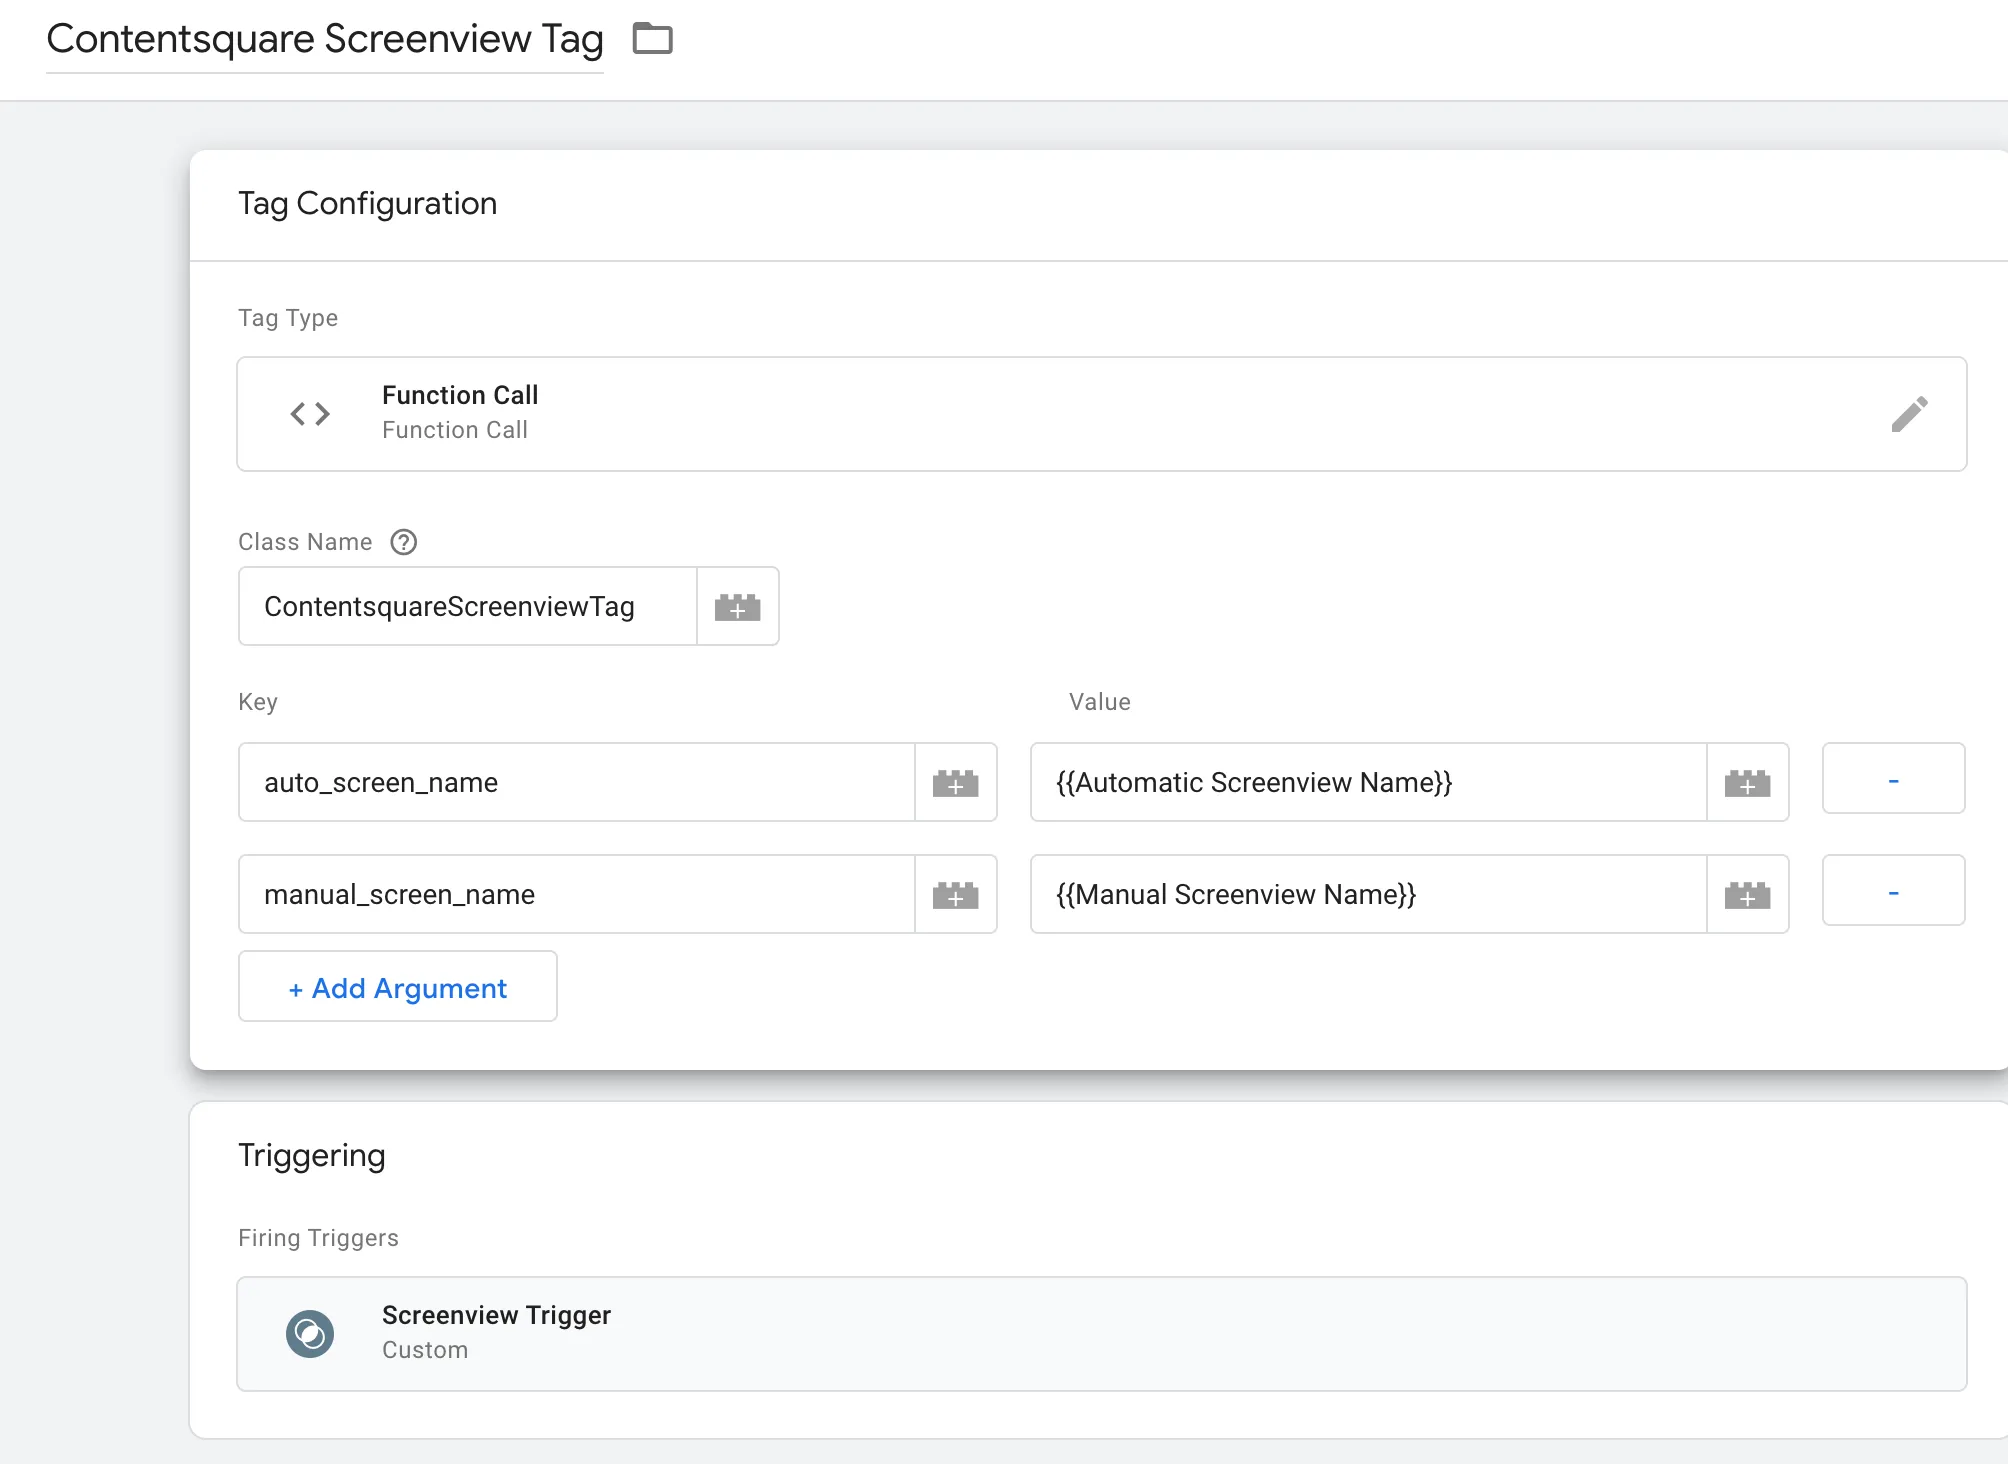
Section titled Adding the trigger and the variables to the TagEdit the ContentsquareScreenviewTag Tag:
- Add an argument with the key
auto_screen_nameand the variable{{Automatic Screenview Name}}as the value - Add an argument with the key
manual_screen_nameand the variables{{Manual Screenview Name | Is User Logged In}}or{{Manual Screenview Name}}as the value - Add Contentsquare Screenview Trigger as the Tag’s trigger
It should look like this now:
Create the custom function Tag class
Section titled Create the custom function Tag classIn your app code, create a class of the same name as the Class Path you configured in the GTM interface, for example ContentsquareScreenviewTag. This is how GTM connects the configuration and the actual class to trigger. This class is used to call the Contentsquare screenview tracking function as follows:
@Keepclass ContentsquareScreenviewTag : com.google.android.gms.tagmanager.CustomTagProvider { override fun execute(map: MutableMap<String, Any>?) { val autoScreenName = map?.get("auto_screen_name") as String? val manualScreenName = map?.get("manual_screen_name") as String? if (autoScreenName != null) { Contentsquare.send(autoScreenName) Log.w("GTM", "-------> $autoScreenName") } if (manualScreenName != null) { Contentsquare.send(manualScreenName) Log.w("GTM", "-------> $manualScreenName") } }}Now, every time Firebase sends a screenview event, Contentsquare will send one as well.
Transaction events
Section titled Transaction eventsA Contentsquare transaction event can also be triggered for every Firebase purchase event (See Firebase documentation ↗).
To do so, you will need to follow the setup described below.
Variables
Section titled VariablesWe have to create at least two variables in order to be able to build a transaction event: Value and Currency. Optionally, it is also possible to pass a transaction identifier, meaning you would need to create an additional variable in order to be able to use it.
Value (mandatory)
Section titled Value (mandatory)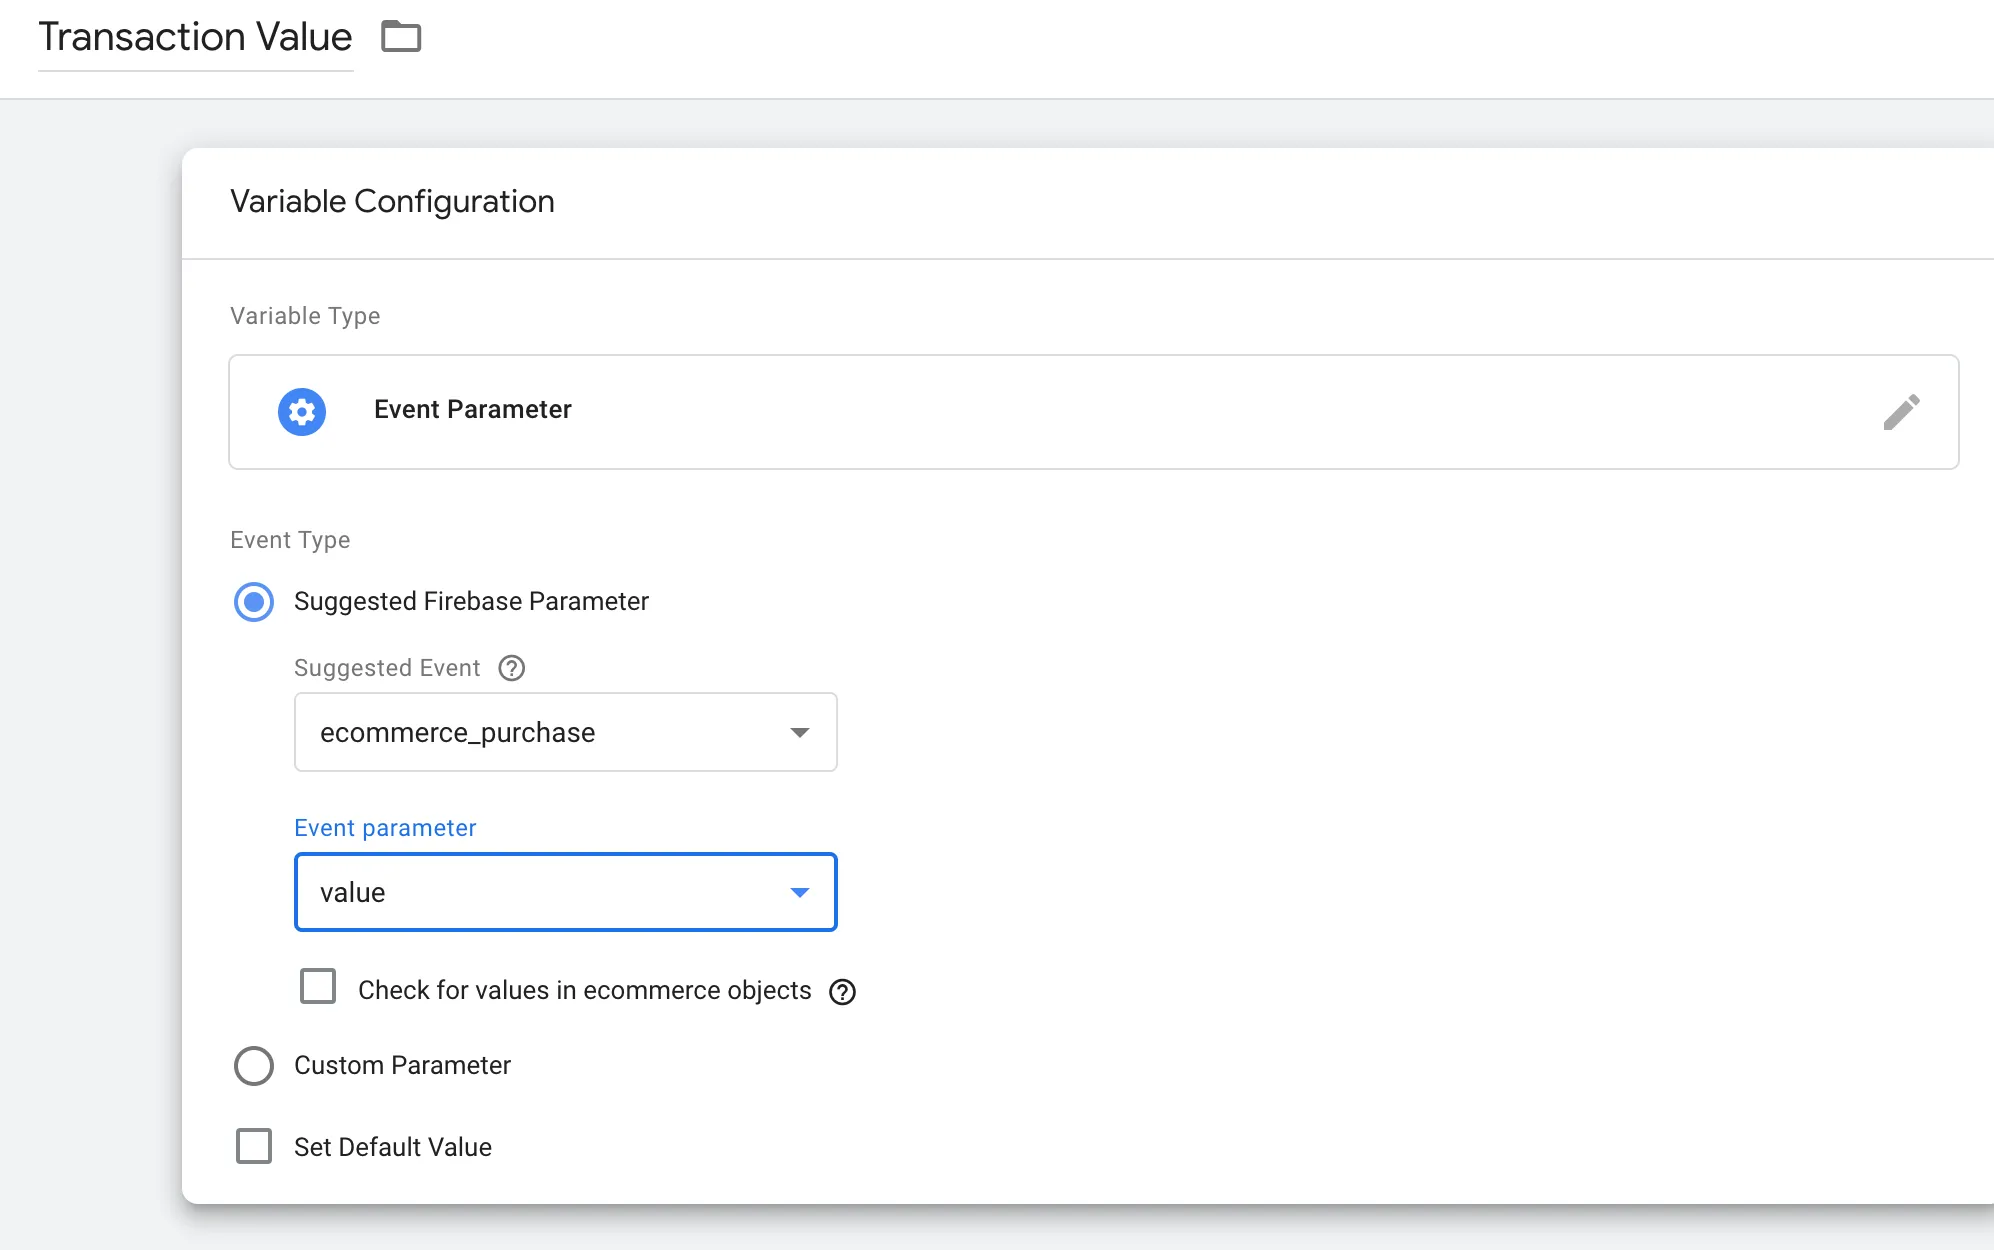
Currency (mandatory)
Section titled Currency (mandatory)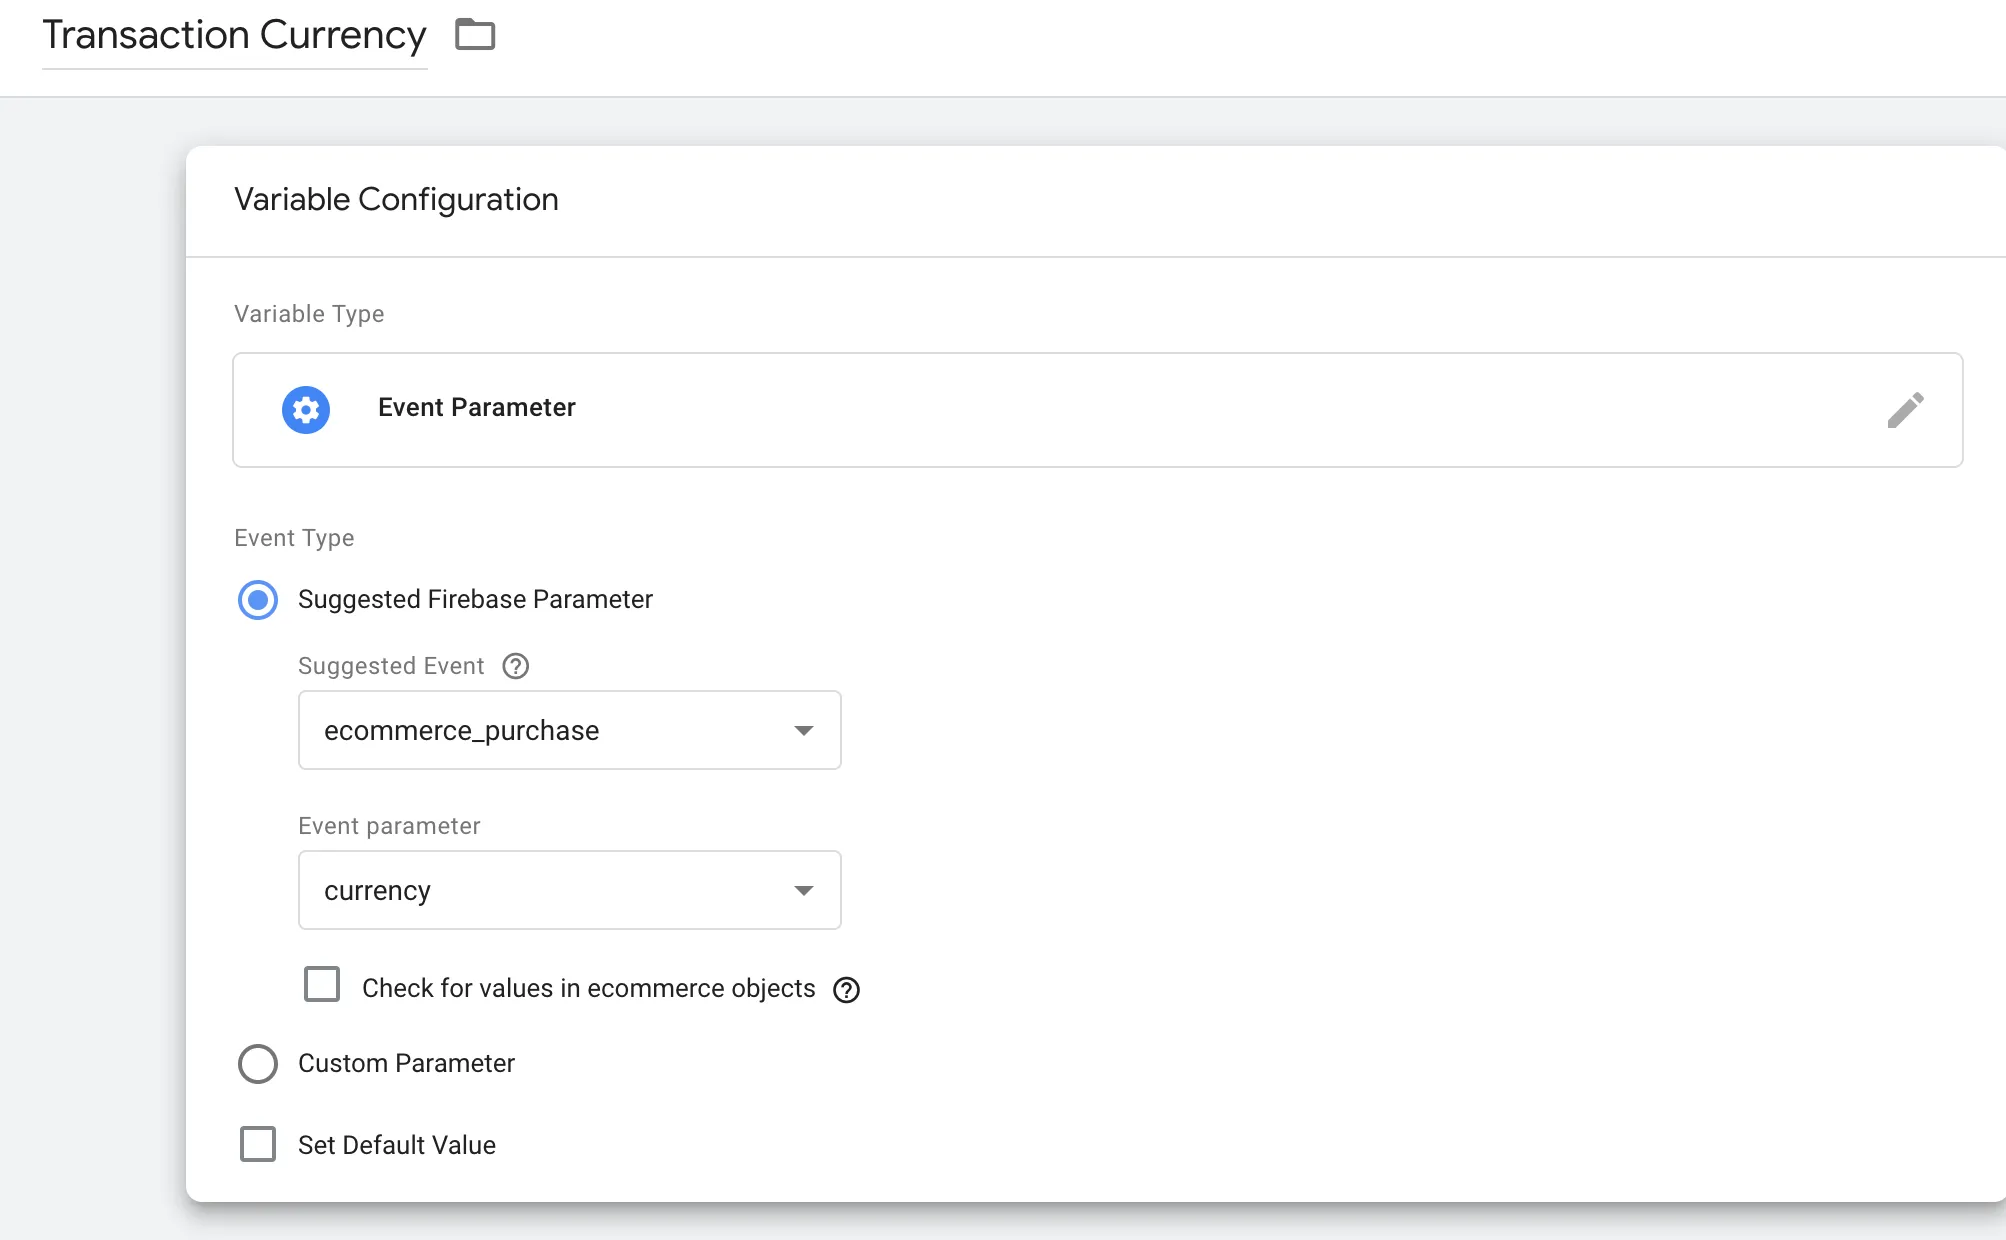
Transaction ID (optional)
Section titled Transaction ID (optional)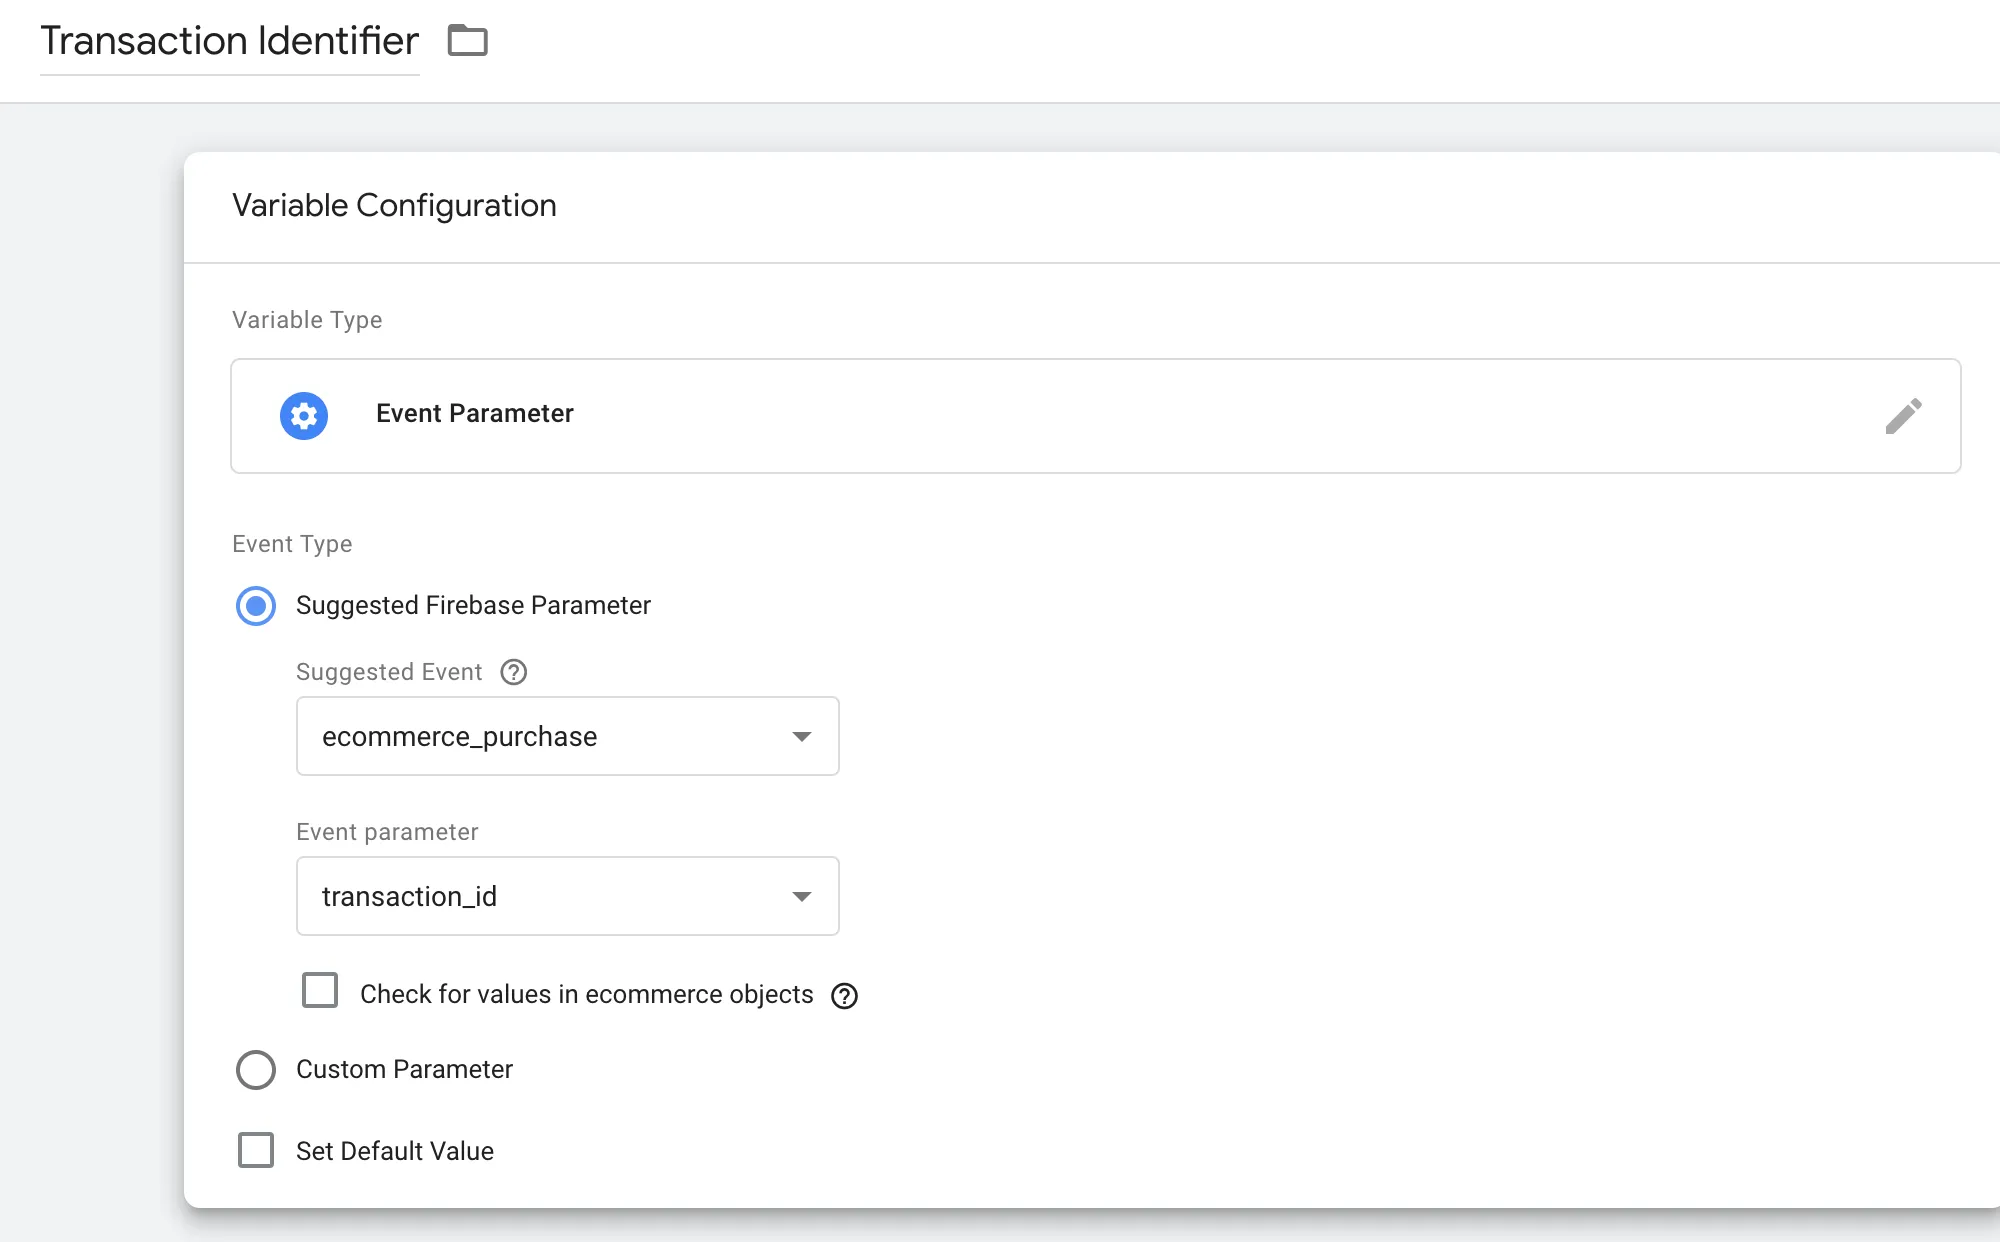
Trigger
Section titled TriggerCreate the following custom trigger.
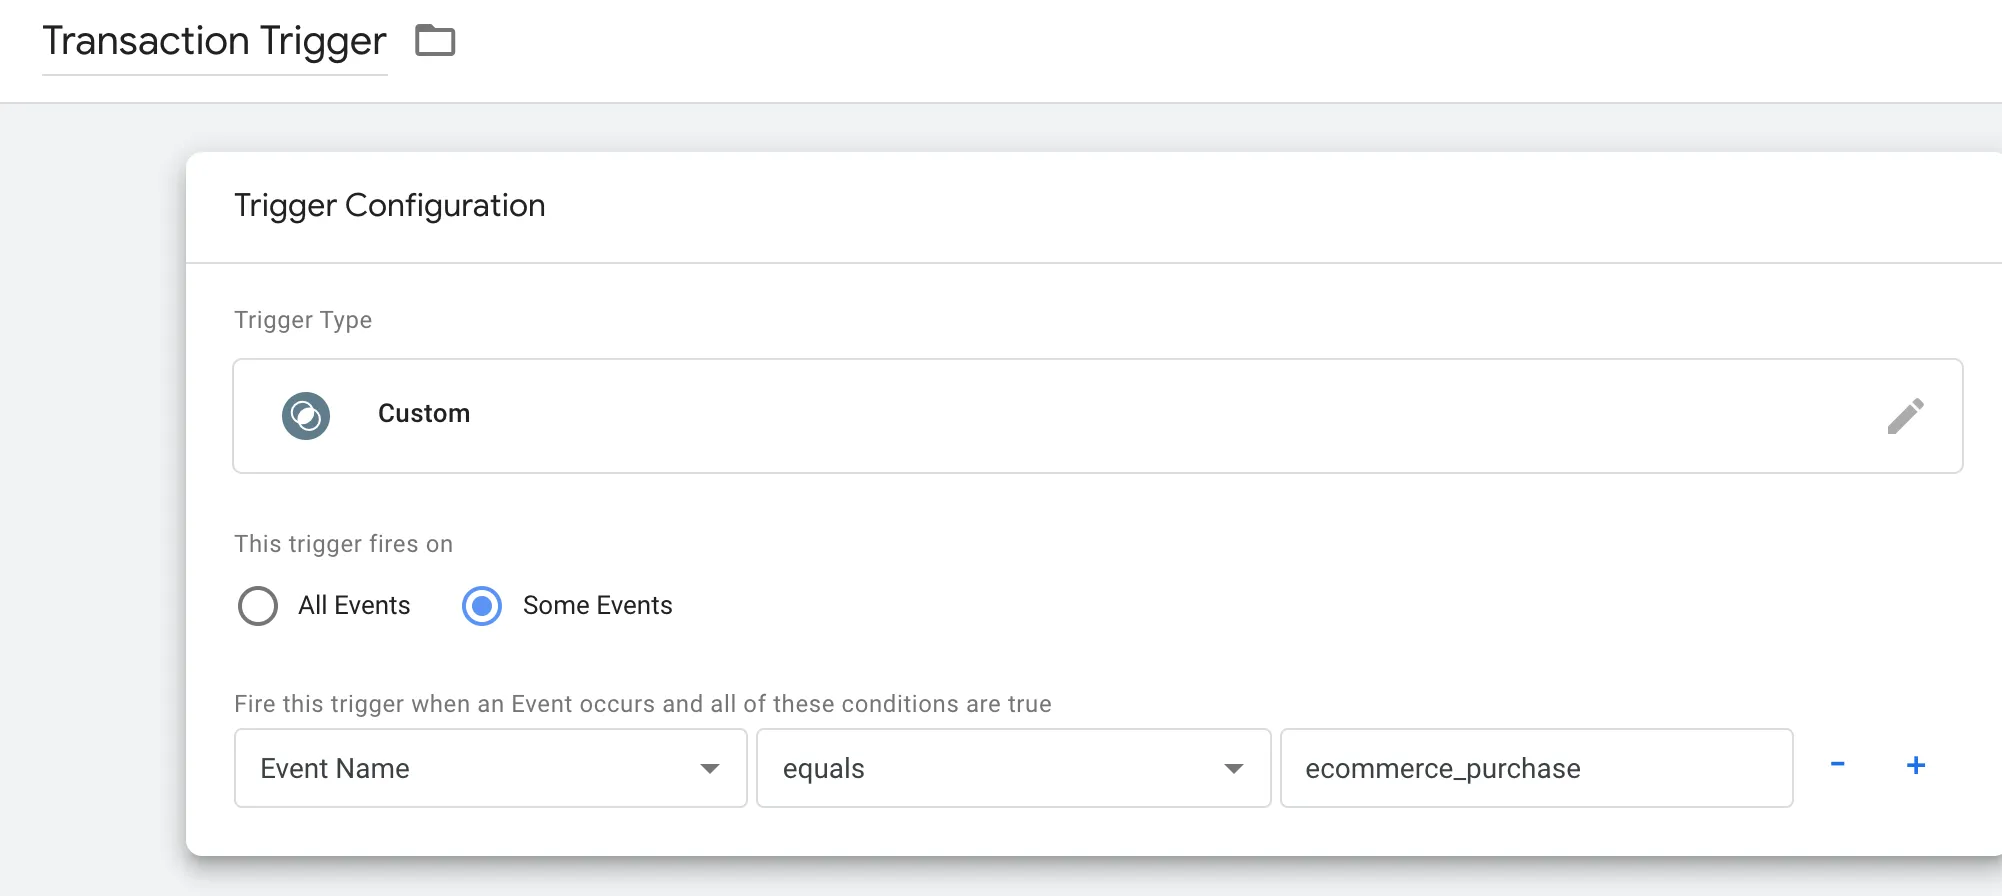
Create a Function call Tag called ContentsquareTransactionTag.
You will also need to fill in the Class Path field with a class path of your liking, typically related to what the tag is about (here we chose com.myapp.ContentsquareTransactionTag), which you will re-use later.
Pass the two to three variables created earlier as arguments (skip the id line if you do not want to use it) and set its trigger to the one you just created.
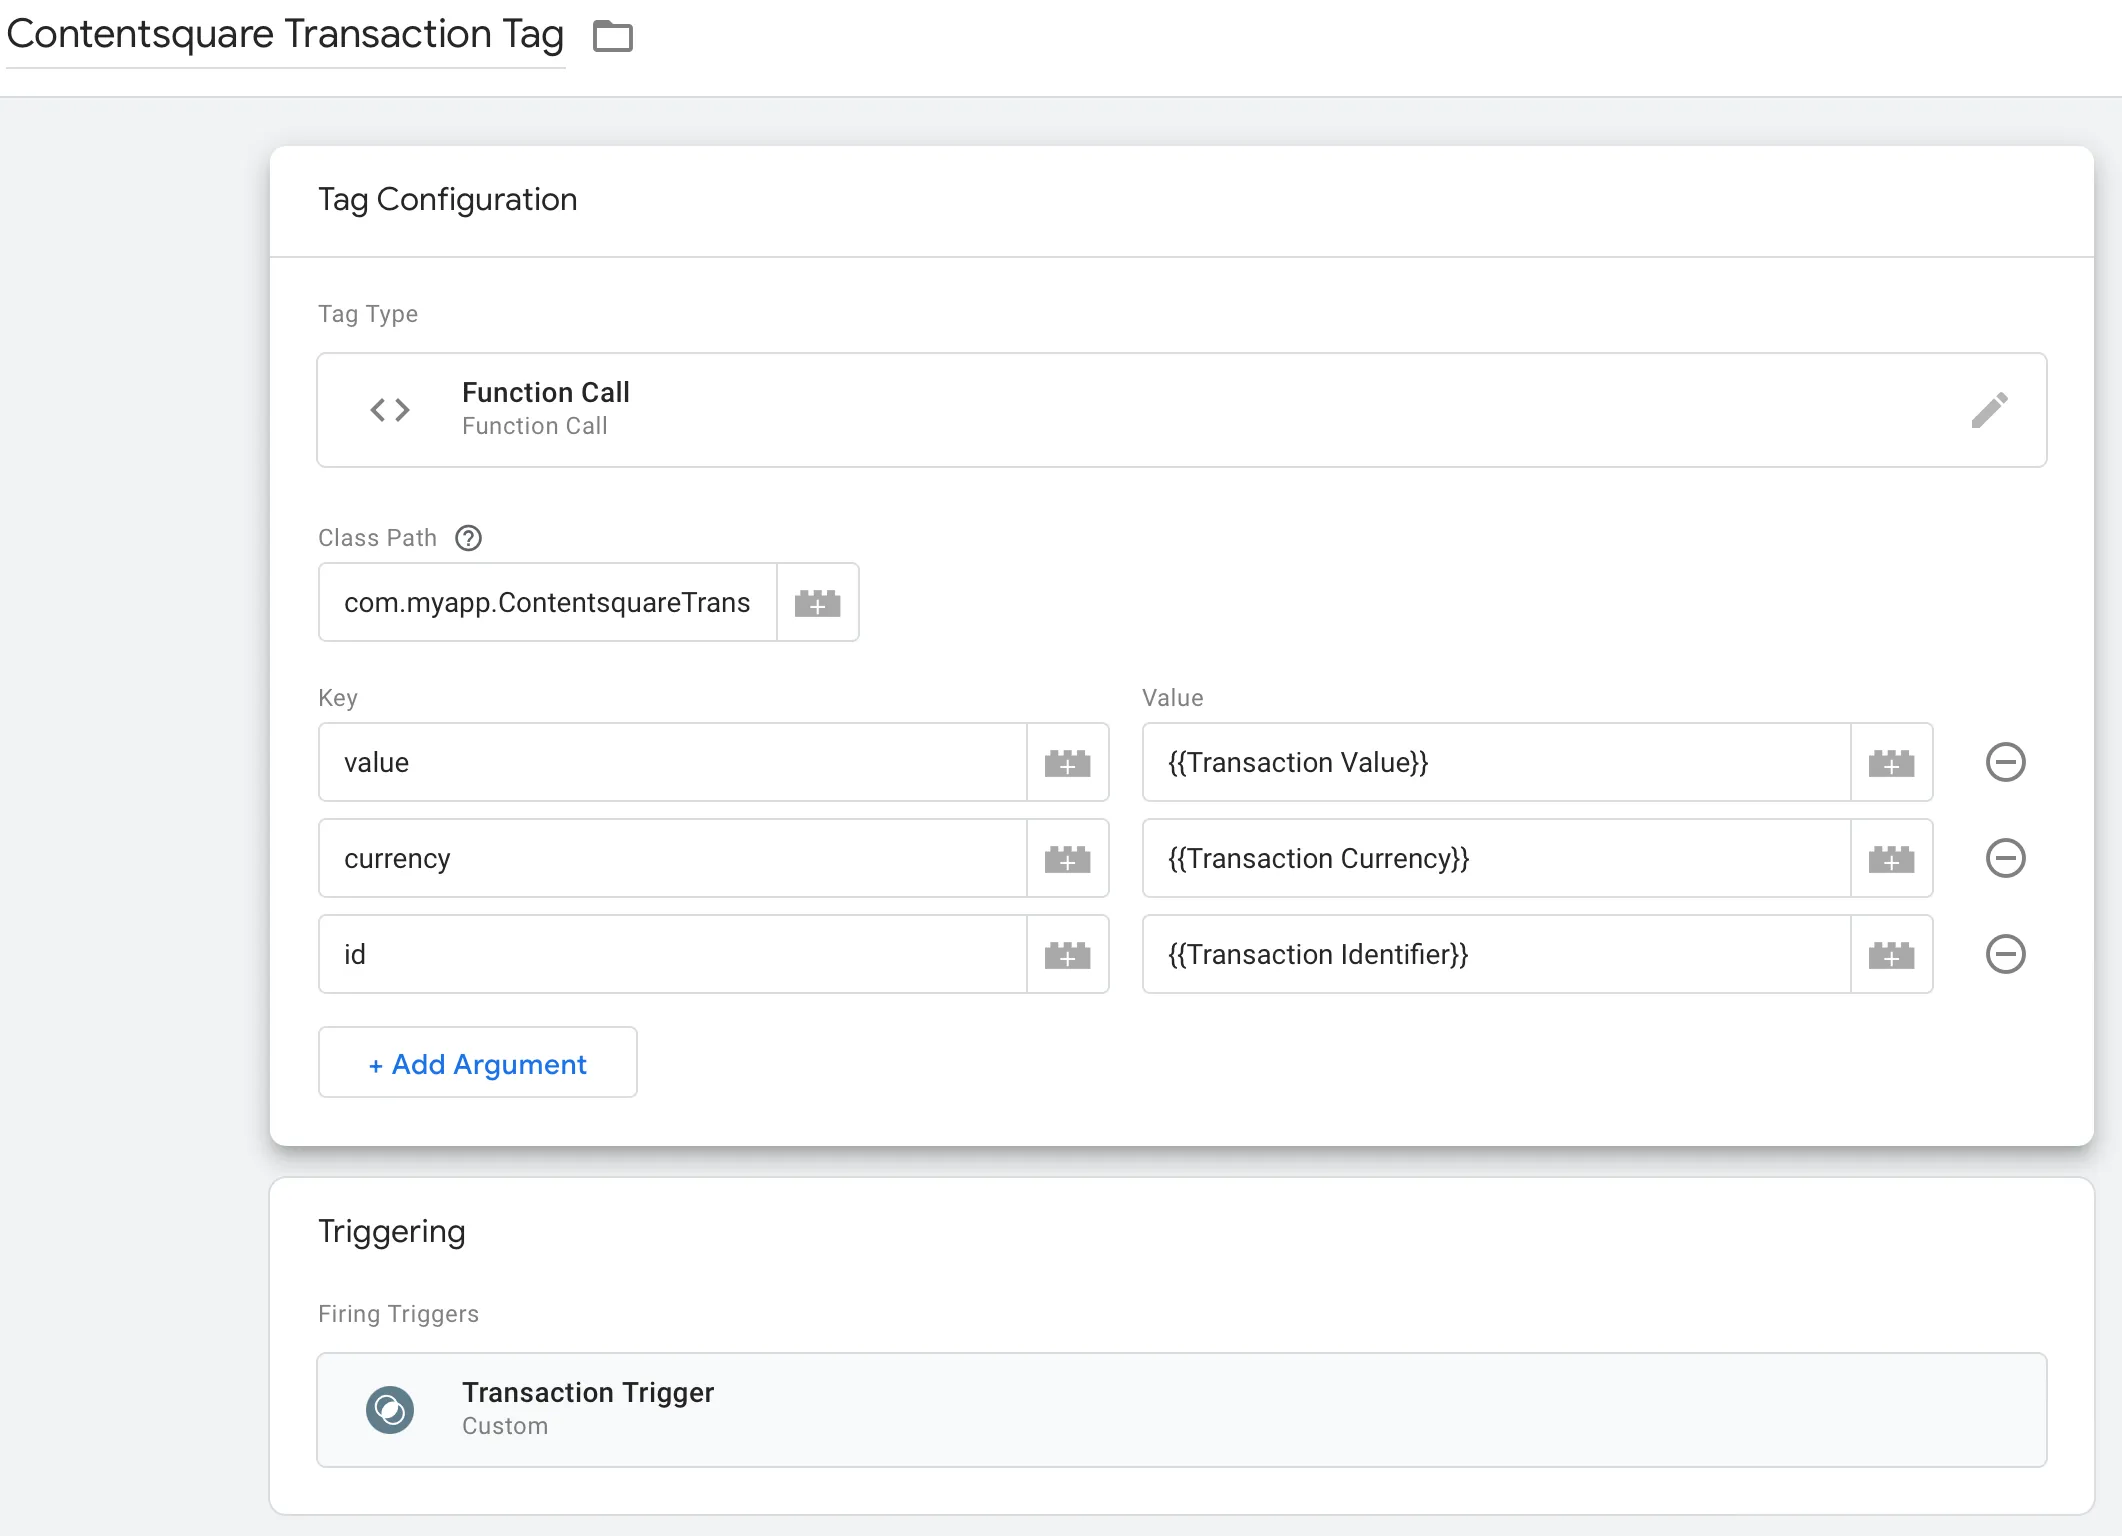
Implementing the function call
Section titled Implementing the function callWe need to create a ContentsquareTransactionTag class, and have it adhere to the CustomTagProvider interface to link it to the Google Tag Manager custom Tag of the same name.
Take good note that in order to be able to create and send a Contentsquare Transaction successfully, when you create a Firebase purchase event you will have to at least pass values for VALUE and CURRENCY, and can optionally pass a value for TRANSACTION_ID see Firebase reference docs ↗
@Keepclass ContentsquareTransactionTag : com.google.android.gms.tagmanager.CustomTagProvider { override fun execute(map: MutableMap<String, Any>?) { val value = map?.get("value") as String? val currency = map?.get("currency") as String? if (value != null && currency != null) { val transactionBuilder = Transaction.builder(value.toFloat(), currency) val id = map?.get("id") as String? if (id != null) { transactionBuilder.id(id) } Contentsquare.send(transactionBuilder.build()) } }}Now, every time Firebase sends an ecommerce_purchase event, Contentsquare will send one as well.
Dynamic variable events
Section titled Dynamic variable eventsWe can send values from any Firebase event as a Contentsquare dynamic variable:
firebaseAnalytics.logEvent("addToCart") { param("product_count", 12) param("product_name", "ProductA")}Variables
Section titled VariablesThe addToCart event has parameters product_count, product_name, we will create variables called Product Count and Product Name with:
- The Variable Type set to Event Parameter
- The Event Type set to Custom Parameter
- The Event Parameter Key set manually to
product_count/product_name
Check out Configure variables in Tag Manager ↗ for more information.
Triggers
Section titled TriggersWe need to create a Trigger to tell Google Tag Manager when to send a Contentsquare dynamic variable, so we will create one for the event addToCart.
- Name your trigger
AddToCartTrigger - Trigger Type should be set to Custom
- Trigger should fire on Some Events
- For the Event, the Event Name should be equal to
addToCart
Create the custom function Tag
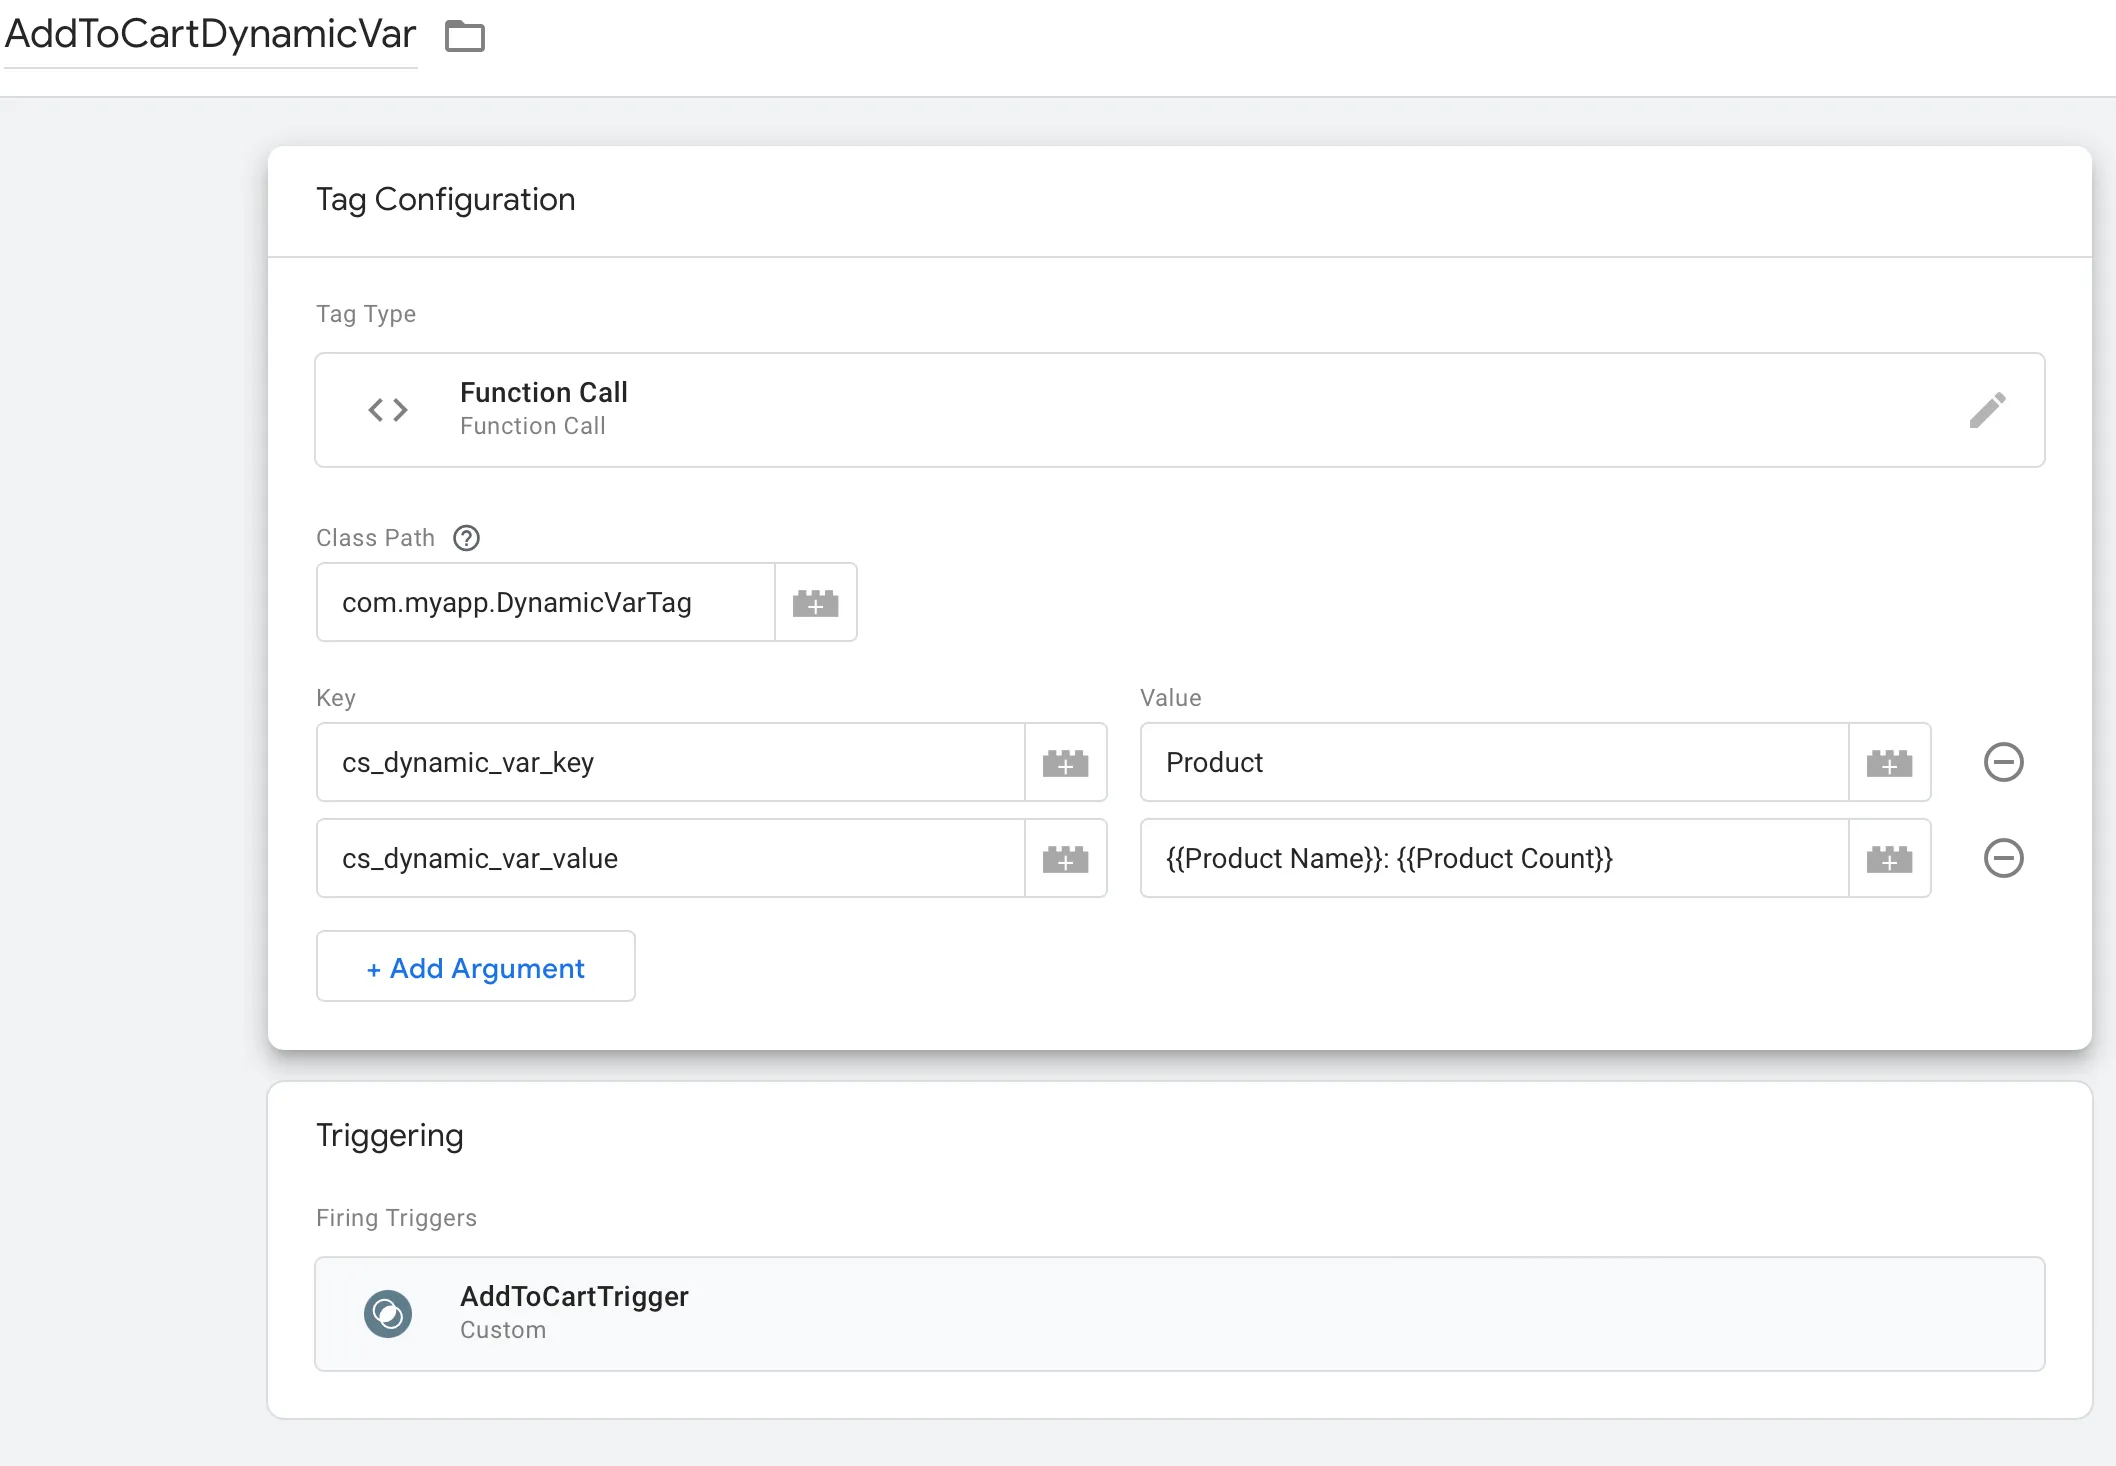
Section titled Create the custom function TagWe need to create a function tag AddToCartDynamicVar
- The Tag Type set to Function Call
- The Class Name set to DynamicVarTag (we’ll create this class later)
- Add two arguments
- Key:
cs_dynamic_var_key, Value:Product - Key:
cs_dynamic_var_value, Value:{{Product Name}}: {{Product Count}}
- Key:
- The Triggering set to AddToCartTrigger
It should look like this now:
Create the custom function Tag class
Section titled Create the custom function Tag classIn your app code, create a class of the same name as the Class Name you configured in the GTM interface, for example DynamicVarTag. This is how GTM connects the configuration and the actual class to trigger. This class is used to call the Contentsquare dynamic variable function as follows:
@Keepclass DynamicVarTag : com.google.android.gms.tagmanager.CustomTagProvider { override fun execute(parameters: MutableMap<String, Any>) { val dynamicVarKey = parameters["cs_dynamic_var_key"] as? String ?: return when (val dynamicVarValue = parameters["cs_dynamic_var_value"]) { is String -> Contentsquare.send(dynamicVarKey, dynamicVarValue) is Long -> Contentsquare.send(dynamicVarKey, dynamicVarValue) } }}Now, every time Firebase sends an addToCart event, Contentsquare will send a dynamic variable key: "Product", value: "ProductA: 12".