---
title: In-app features - undefined
description: Enable testing and debugging capabilities within your React Native app using in-app features for enhanced development workflow
lastUpdated: 11 December 2025
source_url:
html: https://docs.contentsquare.com/en/csq-sdk-react-native/experience-analytics/in-app-features/
md: https://docs.contentsquare.com/en/csq-sdk-react-native/experience-analytics/in-app-features/index.md
---
Implemented Contentsquare with our Classic SDK? Switch back to [Classic SDK](https://docs.contentsquare.com/en/react-native/) docs.
Alongside its tracking capabilities, the SDK embeds some features aimed at Contentsquare users such as Snapshot Capture and SDK Logs.
In order to allow Contentsquare users to enable in-app features in your React Native app, the implementation depends on the native platform.
## Android
To enable in-app features within your app, you have to **first make sure your app is launched in the background**. To do so, start it and press the Android home button. Then, follow the appropriate method described as follows.
### On a device: scan the QR code
If you have access to the Contentsquare platform, you can open the in-app features modal from the menu and scan the QR code with your phone.
Note
On Android, some devices have a built-in QR code reader feature in the default camera app. If that is not the case for you, use [QR & Barcode Reader by TeaCapps ↗](https://play.google.com/store/apps/details?id=com.teacapps.barcodescanner\&hl=en\&gl=US).
### On an emulator: use the ADB command
If you are using an emulator, you can use the ADB command to enable in-app features.
If you have access to the Contentsquare platform, you can open the in-app features modal from the menu and select “Copy this ADB command”.

It will look like this:
```shell
adb shell am start -W -a android.intent.action.VIEW -d "cs-{{packageName}}://contentsquare.com?activationKey={{uniqueActivationKey}}\&userId={{userId}}"
```
If you don’t have access to the Contentsquare platform, you can ask the Contentsquare team to share the link with you.
Note
On Android, the in-app features are handled automatically by the native SDK. No React Native code implementation is required.
## iOS
This implementation phase is required on the **iOS side only** You will have to do a few changes on the **native side of your app**:
### 1. Add the custom URL scheme to `Info.plist`
In order for your application to open when you scan the QR code or enter the URL we provide in a web browser, you have to add the custom URL scheme to your app’s `Info.plist` file.
You can do this using one of the following methods:
#### Xcode
1. Open your project settings
2. Select the app target
3. Select the `Info` settings
4. Scroll to `URL Types`
5. Set the URL scheme to `cs-$(PRODUCT_BUNDLE_IDENTIFIER)`
#### Text editor
1. Open the `Info.plist` of your project
2. Add the following snippet:
```xml
CFBundleURLTypes
CFBundleURLSchemes
cs-$(PRODUCT_BUNDLE_IDENTIFIER)
```
### 2. Call the SDK when your app is opened with the custom URL
Then, you will need to link your app with our SDK. When your application is started via a deeplink, a specific delegate function is called in your AppDelegate file. In order for us to be able to handle it, you will need to call a function of our API that will handle it.
Call either the React Native or the iOS native API:
#### Call the React Native API
Follow this [guide ↗](https://reactnative.dev/docs/linking) to call the React Native API.
```typescript
import { Linking } from 'react-native';
import { CSQ } from '@contentsquare/react-native-bridge';
// Listen for deeplinks while the app is running
Linking.addEventListener('url', (event: { url: string }) => {
CSQ.handleUrl(event.url);
});
// Handle deeplink when app is launched via a deeplink
const initialUrl = await Linking.getInitialURL();
if (initialUrl) {
CSQ.handleUrl(initialUrl);
}
```
## Enable in-app features
Once the implementation is done, in-app features can be enabled in different ways:
### Scan the QR code
If you have access to the Contentsquare platform, you can open the in-app features modal from the menu and scan the QR code displayed with your iPhone.
### Use the custom link for simulator
If you have access to the Contentsquare platform, you can open the in-app features modal from the menu and select “Copy link” (to copy the deeplink) and paste it in Safari on your Simulator to trigger the in-app features.
Note
If you don’t have access to the Contentsquare platform, you can ask the Contentsquare team to share the link with you.
### Using the Terminal
In a Terminal console, open an URL in your current simulator with the following command (replacing `CUSTOM_LINK` with yours):
```shell
xcrun simctl openurl booted "CUSTOM_LINK"
```
## Debugging and Logging
Contentsquare provides Logging capabilities that allow you to see the raw event data logged by your app in the macOS Console App, Xcode or in the Contentsquare platform. Use this for validation purposes during the instrumentation phase of development and can help you discover errors and mistakes in your analytics implementation and confirm that all events are being logged correctly.
### Viewing local logs
By default, almost all logs are disabled. There is only one log that is always visible to notify that the SDK has started:
1. Start your application, and check logs for this output:
```text
[INFO] CSQ 6.0.0 is attempting to start Digital eXperience Analytics.
```
In order to enable all logs, activate [in-app features](#enable-in-app-features). Logging is directly linked to in-app features state: it starts when in-app features are enabled and stops when you disable in-app features.
### Viewing logs in the Contentsquare platform
To view logs directly on the platform, you can use Log visualizer. Log visualizer is a helper tool to see SDK logs without logging tools. It requires having platform access for your project and enabling in-app features. See the [SDK Log Visualizer Help Center Article ↗](https://support.contentsquare.com/hc/en-us/articles/37271699876625) for more information.
### Snapshot Capture
In order to unlock the full data-visualization capabilities of Contentsquare, the SDK provides a way to capture snapshots of your app screens. These snapshots can only be taken by Contentsquare’s users on their device. They are not captured from your end-users device. It means your Personal Data is safe, as long as you use a test user account.
Warning
For snapshot capture to work, the session has to be tracked (included in tracked users and not opted-out) and a first screenview event has to be sent before.
Note
Snapshots require a screenview event to be triggered before they can be captured.
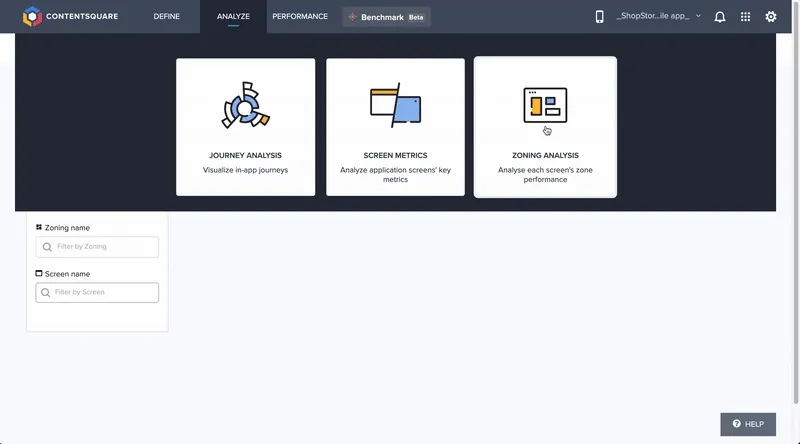
Snapshots are used in the **Zoning Analysis** module to look at zone-level metrics (Tap rate, Swipe rate…):